If you don’t have a PlayStation 2 (PS2) video game console and you want to play PlayStation 2 Games on your personal computer, PCSX2 is the best way to play your favourite PS2 games on PC/Windows and PCSX2 is also available for MacOS and Linux operating systems.
What is PCSX2 ?
PCSX2 is a PS2 emulator that is absolutely free and completely open-source. It uses MIPS CPU Interpreters, Recompilers, and a Virtual Machine to manage hardware states and PlayStation 2 (PS2) system memory in order to simulate the PlayStation 2’s hardware.
PCSX2 System Requirements
What should be the minimum PCSX2 requirements for PC to emulate all PlayStation 2 video games? here is the answer:
PCSX2 Minimum System Requirements:
Operating System: Windows/Linux/MacOS.
Storage: 100MB (PCSX2 Emulator Software Files Size).
RAM: 512MB RAM.
CPU: Any That Supports SSE2 (Pentium 4 and Up, Athlon64 and Up).
GPU: Any That Supports Pixel Shader model 2.0, Except the Nvidia FX series.
PCSX2 Recommended System Requirements:
Operating System: Windows/Linux/MacOS Latest.
Storage: 100mb (PCSX2 Emulator Software Files Size).
RAM: 1GB or More.
CPU: Intel Core 2 Duo @3.2 GHz or better OR i3/i5/i7 @2.8 GHz or better OR AMD Phenom II @3.2 GHz or better.
GPU: 8800gt or better (For Direct3D11 Support).
Where to download PCSX2 ?
You can download PCSX2 from the website “PCSX2.net“. However, keep in mind that “PCSX2.net” is the only official and safest place to download the PCSX2 emulator, and do not download from somewhere else.
You can also download the latest version 1.7.3 of PCSX2 from their Github automated builds page, if you want to download it without a doubt but this is a nightly build, so things might not work right away.
How To Download PCSX2 ?
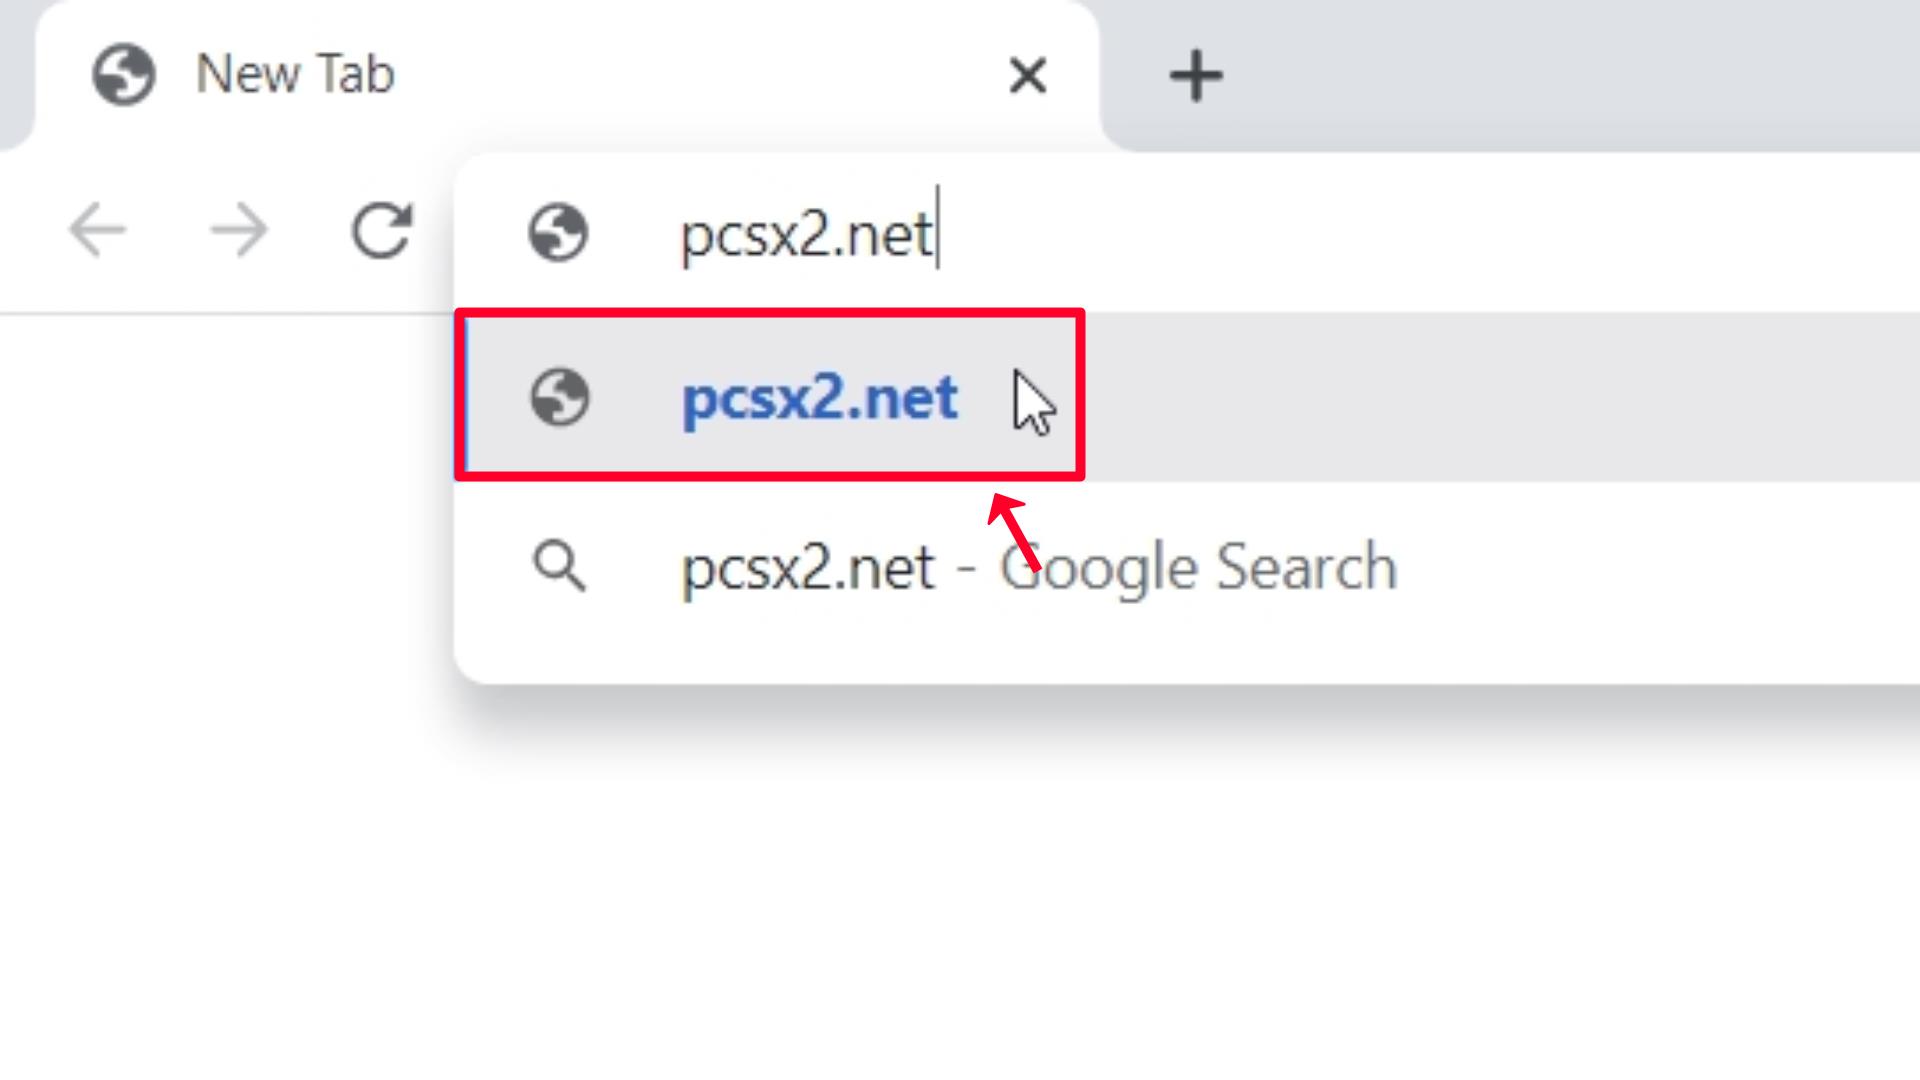
Step 1 – Open any Web browser on your PC and go to PCSX2.net.

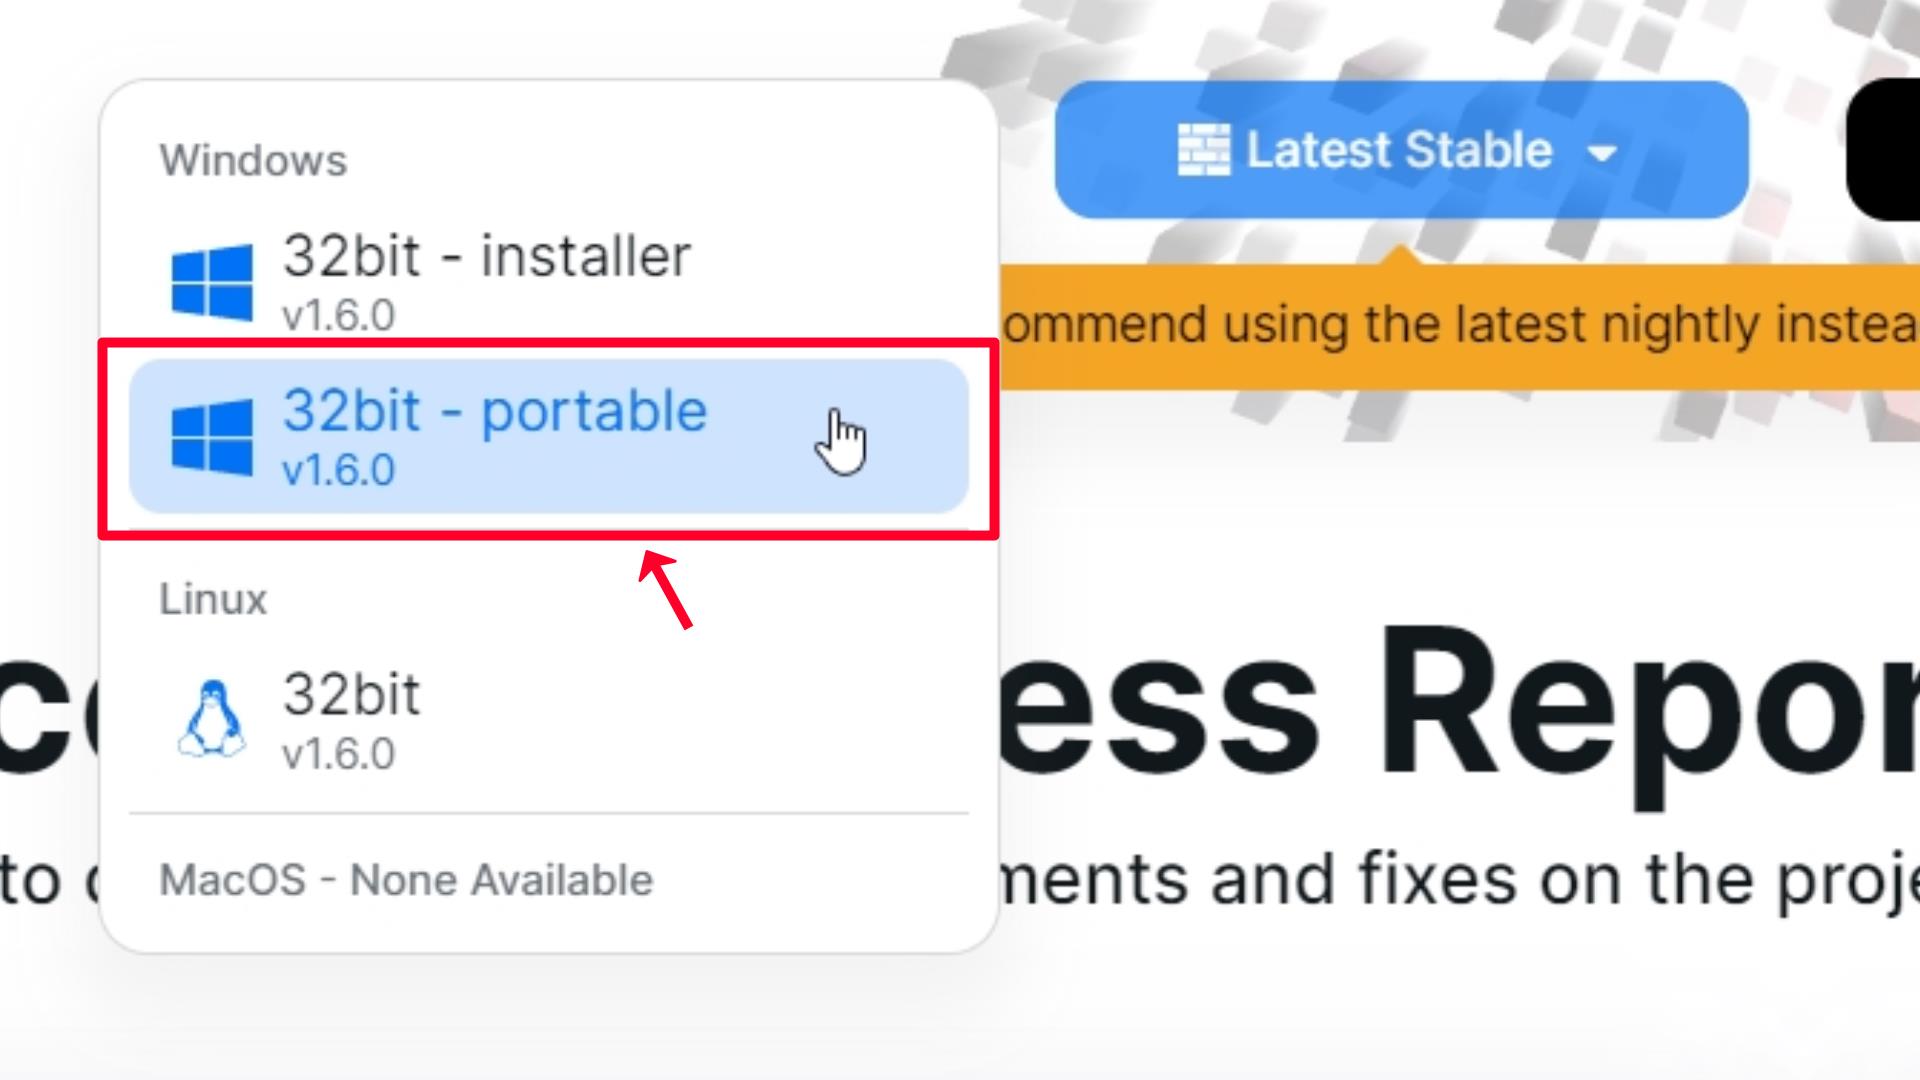
Step 2 – Download PCSX2 32bit – portable from the Latest Stable option.
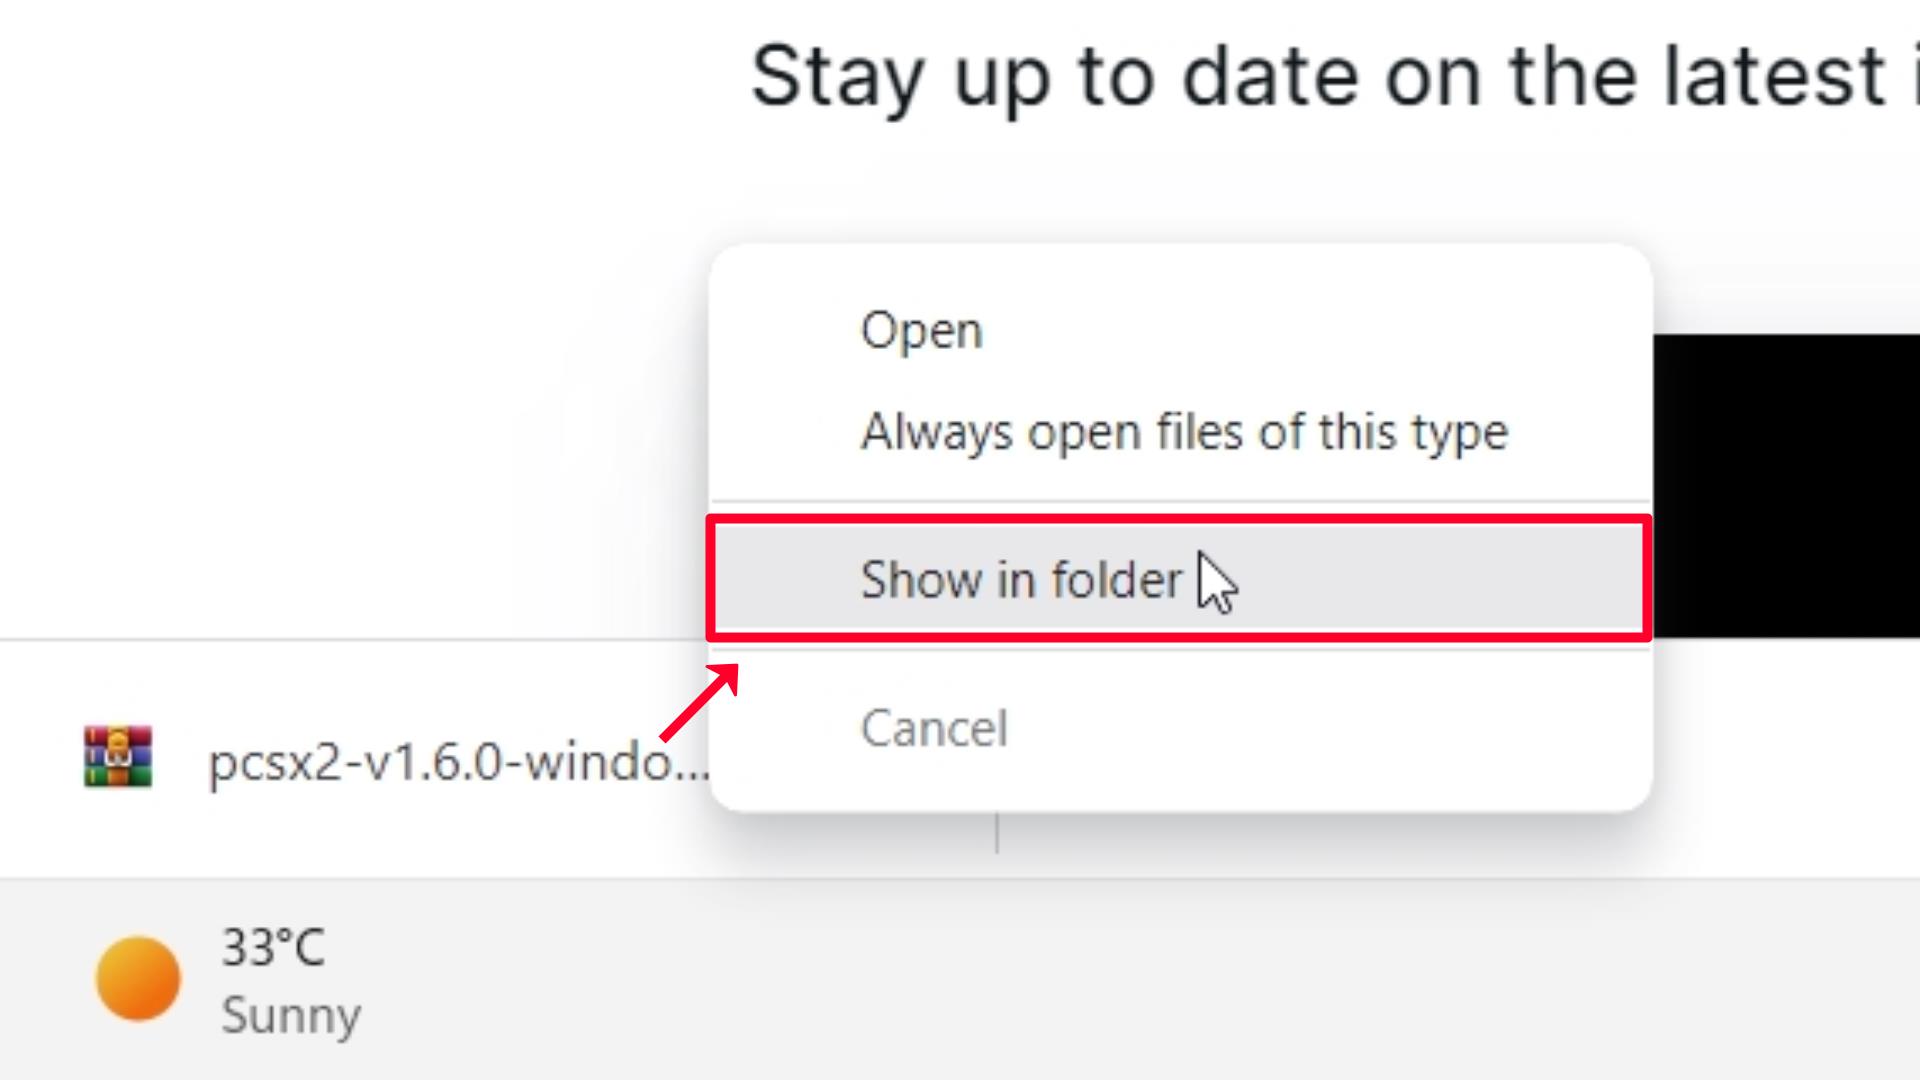
Step 3 – Open the pcsx2-v1.6.0-windows-32bit-portable.7z file location by clicking on the Show in folder option.
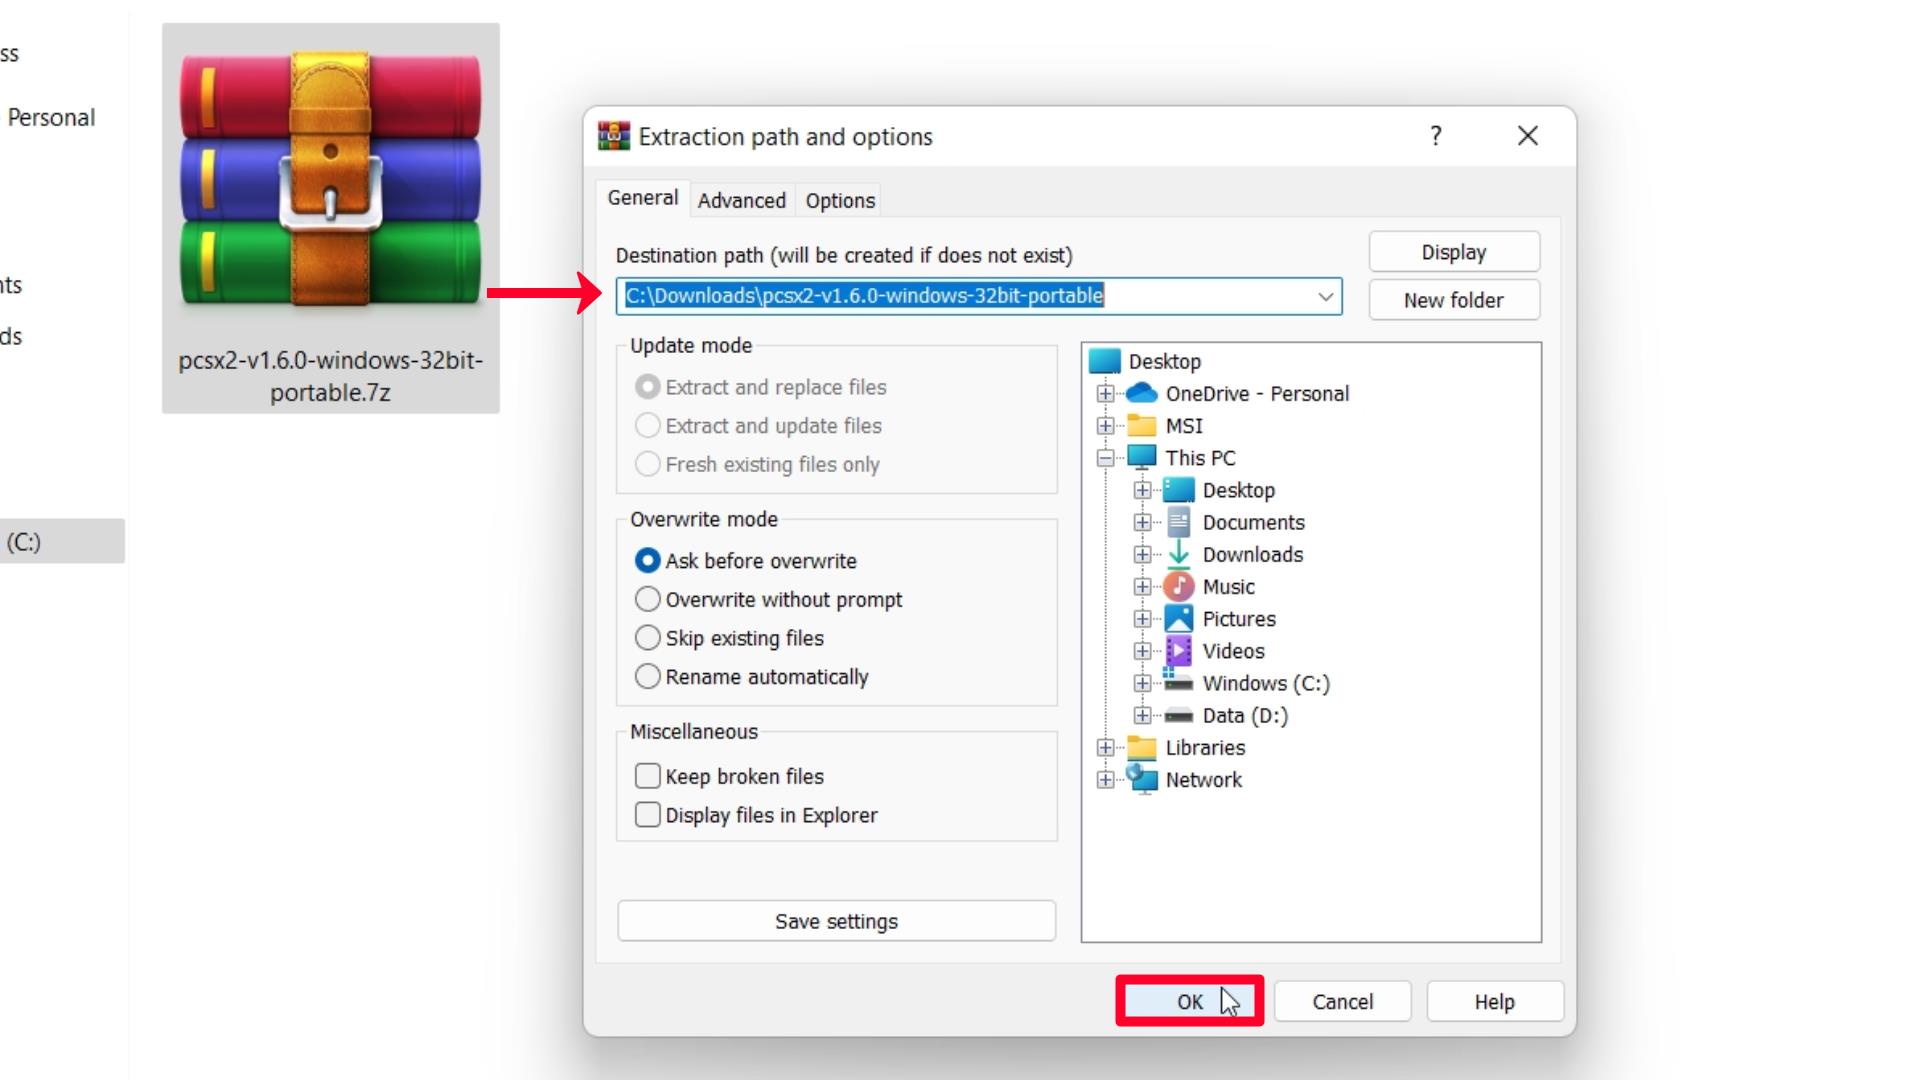
Step 4 – Extract pcsx2-v1.6.0-windows-32bit-portable.7z file using WinRAR or any 7z Archive extracting software.
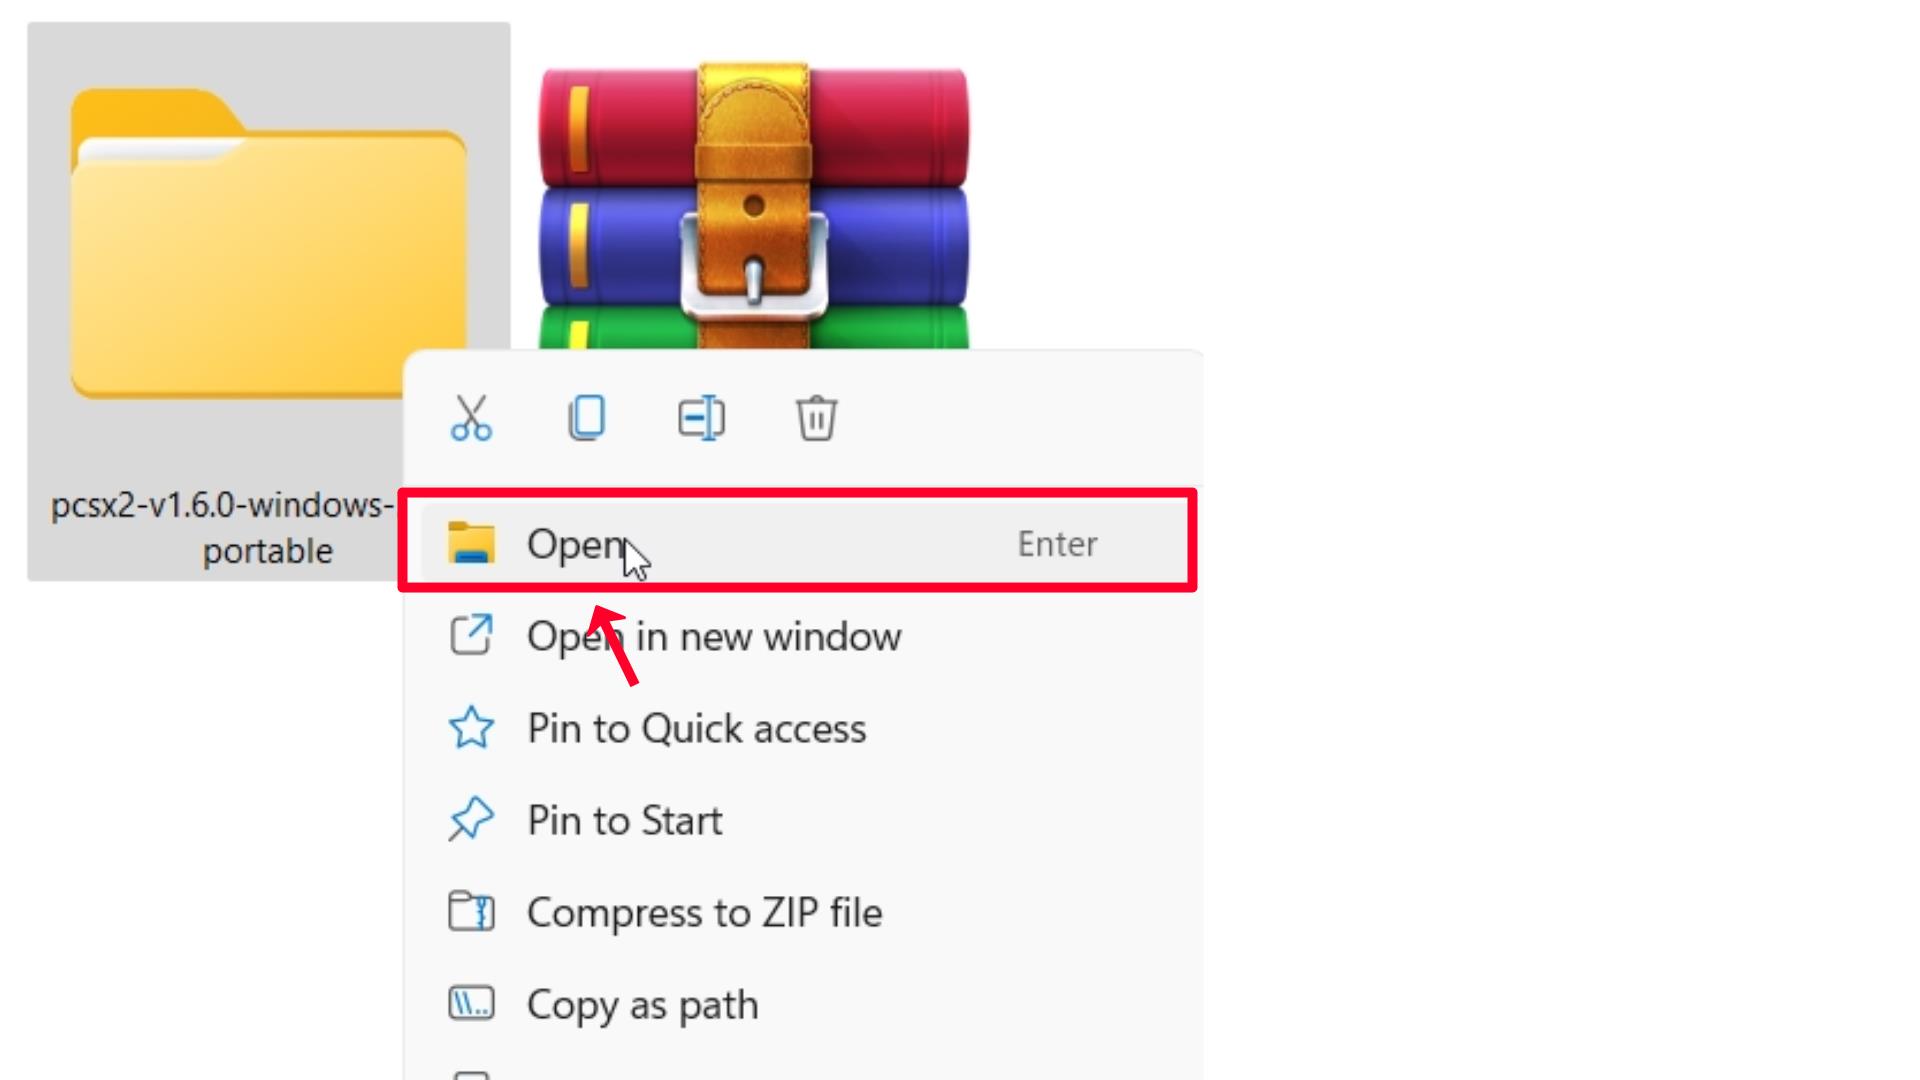
Step 5 – Open extracted folder.
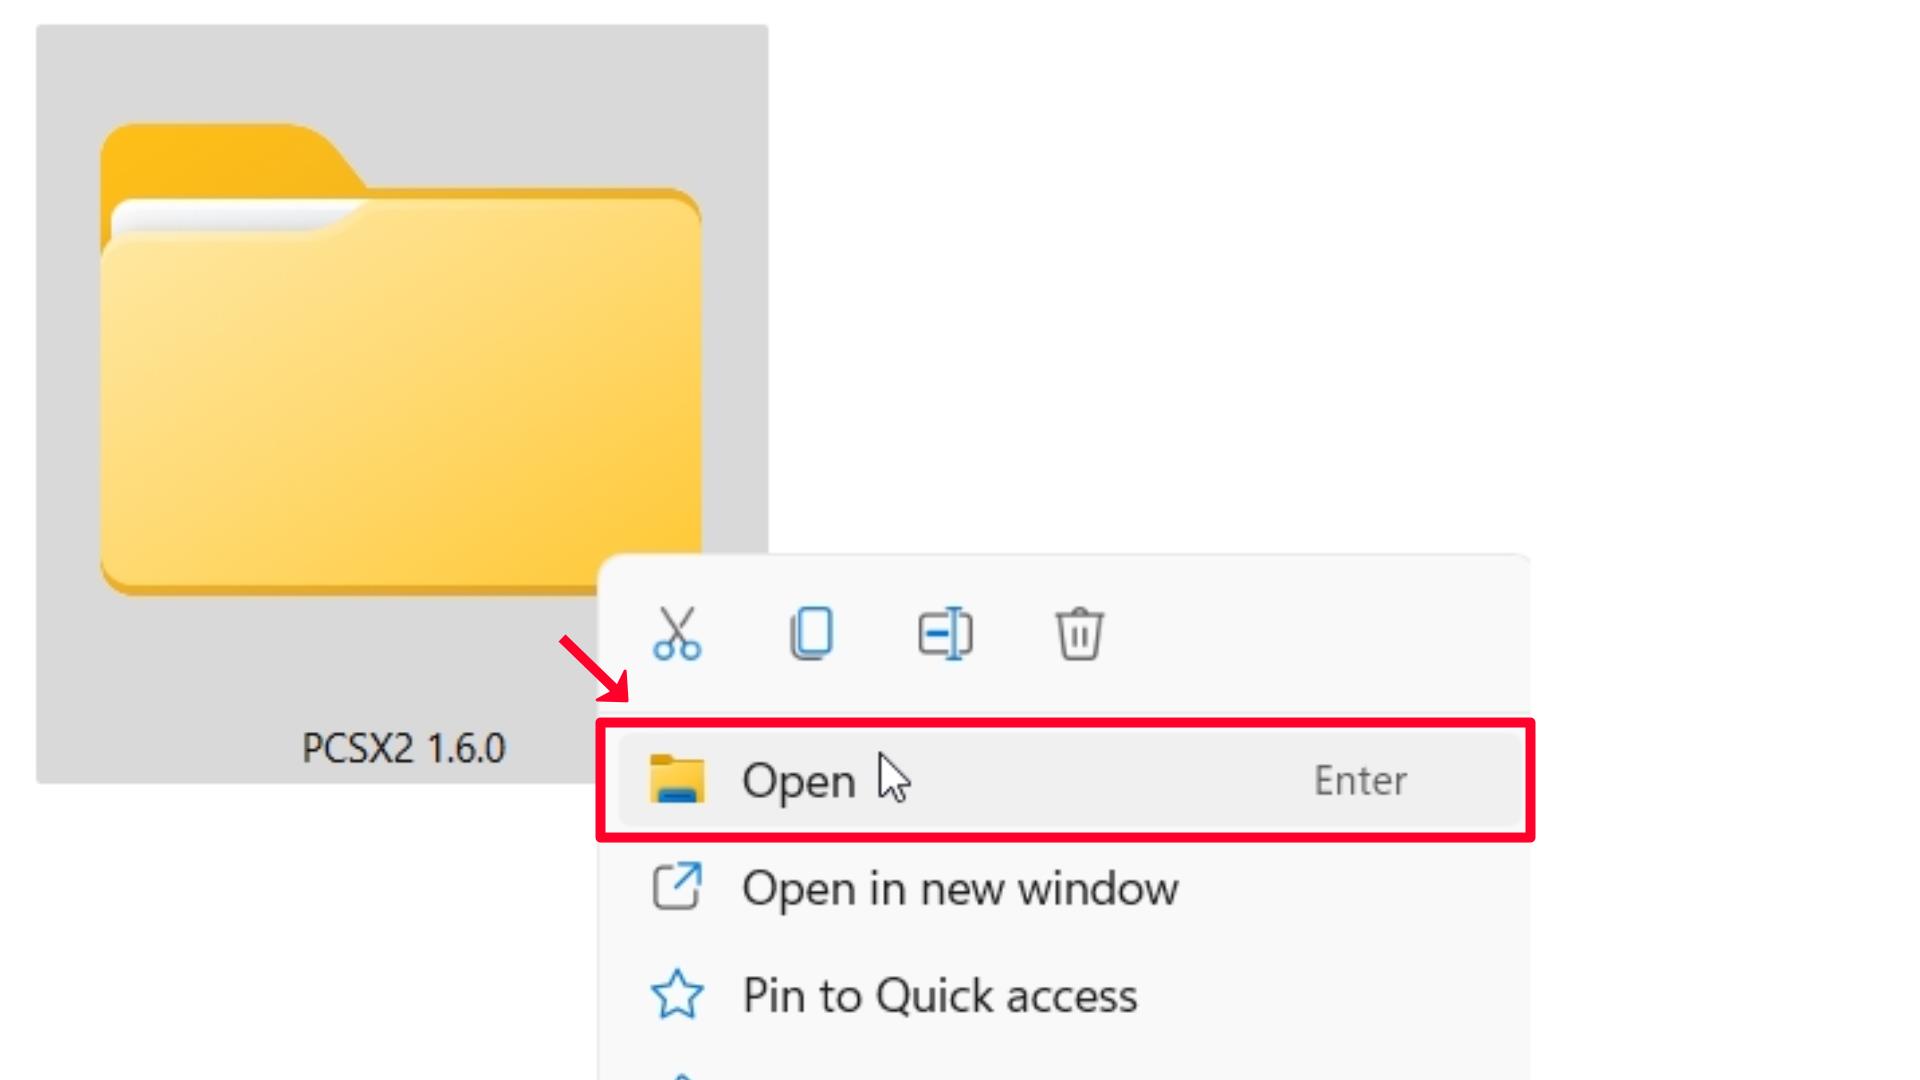
Step 6 – Open the PCSX2 1.6.0 folder.
How To Install PCSX2 ?
If you are setting up PCSX2 for the first time, here are the few steps you need to follow:
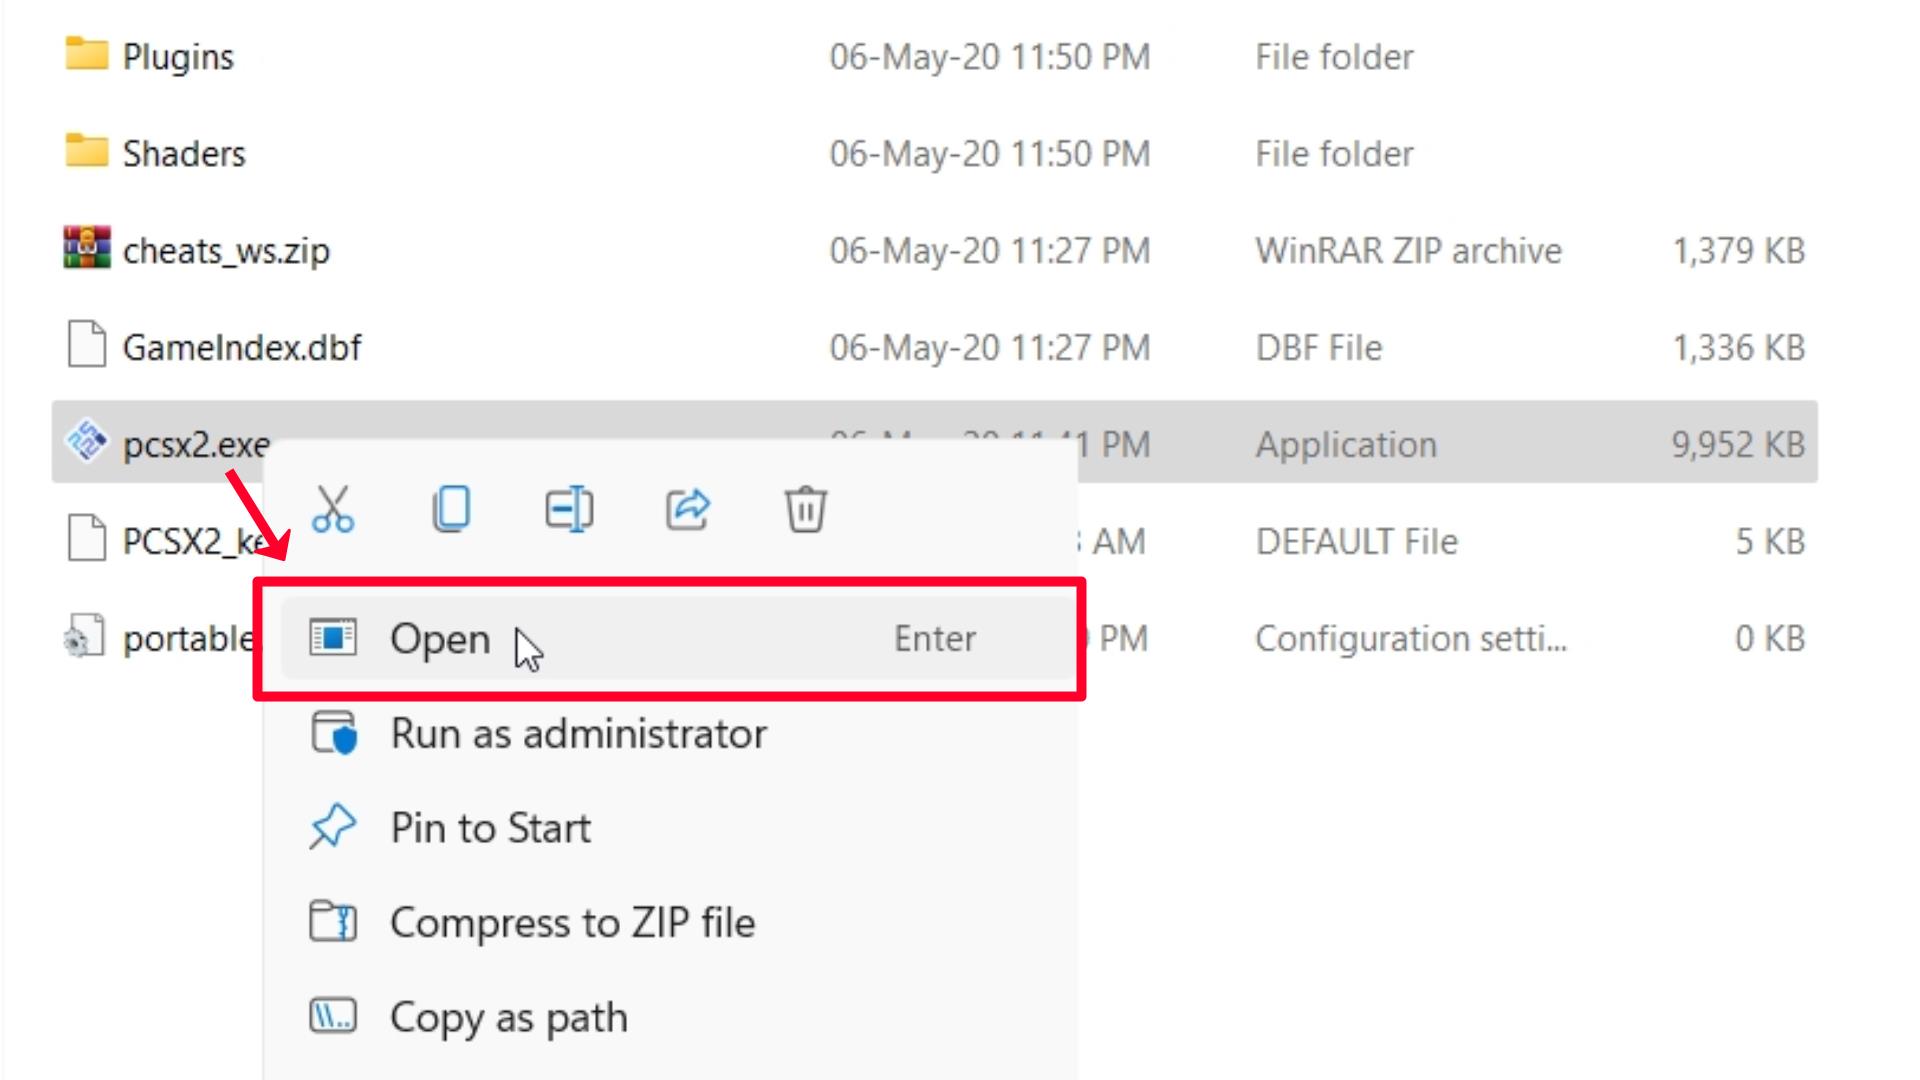
Step 1 – Open pcsx2.exe file.
PCSX2 First Time Configuration
Step 2 – Select your Language.
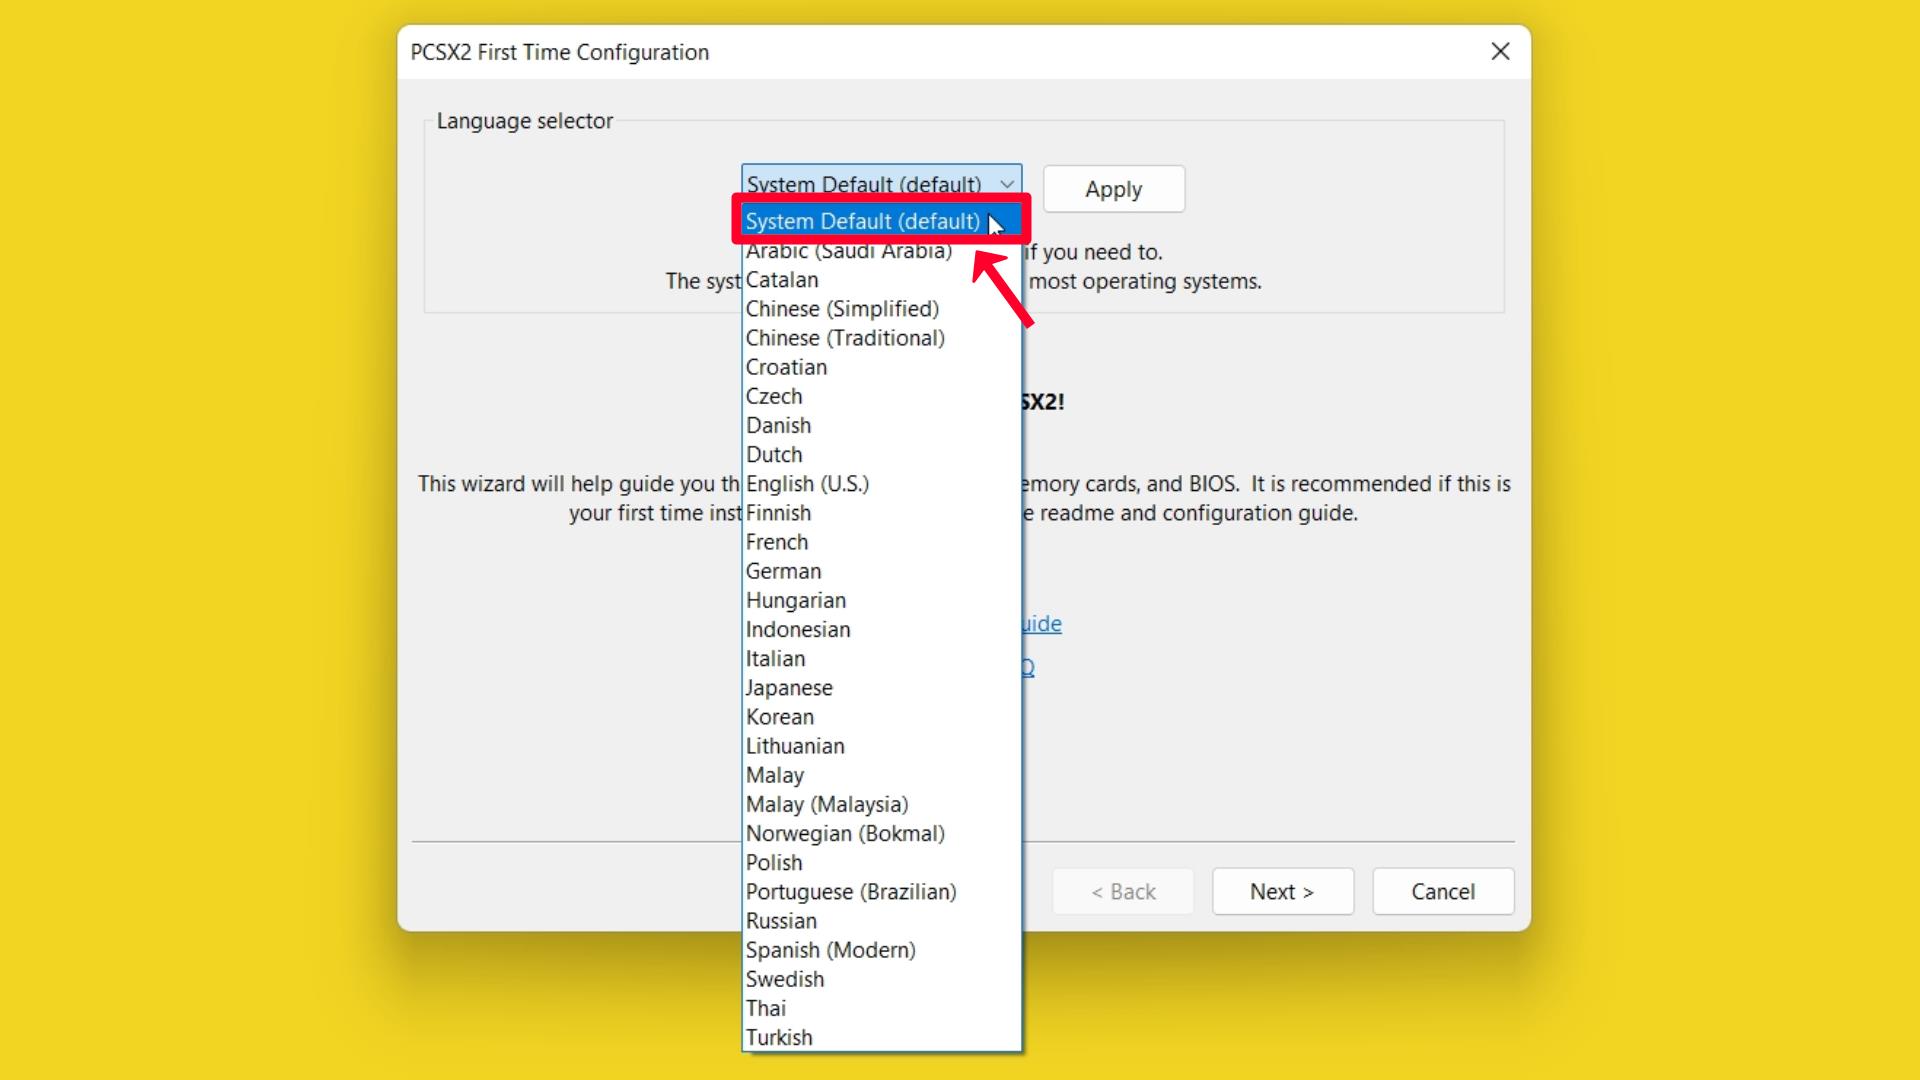
- Language Selector → System Default (Recommended).
Step 3 – Click on the Apply button.
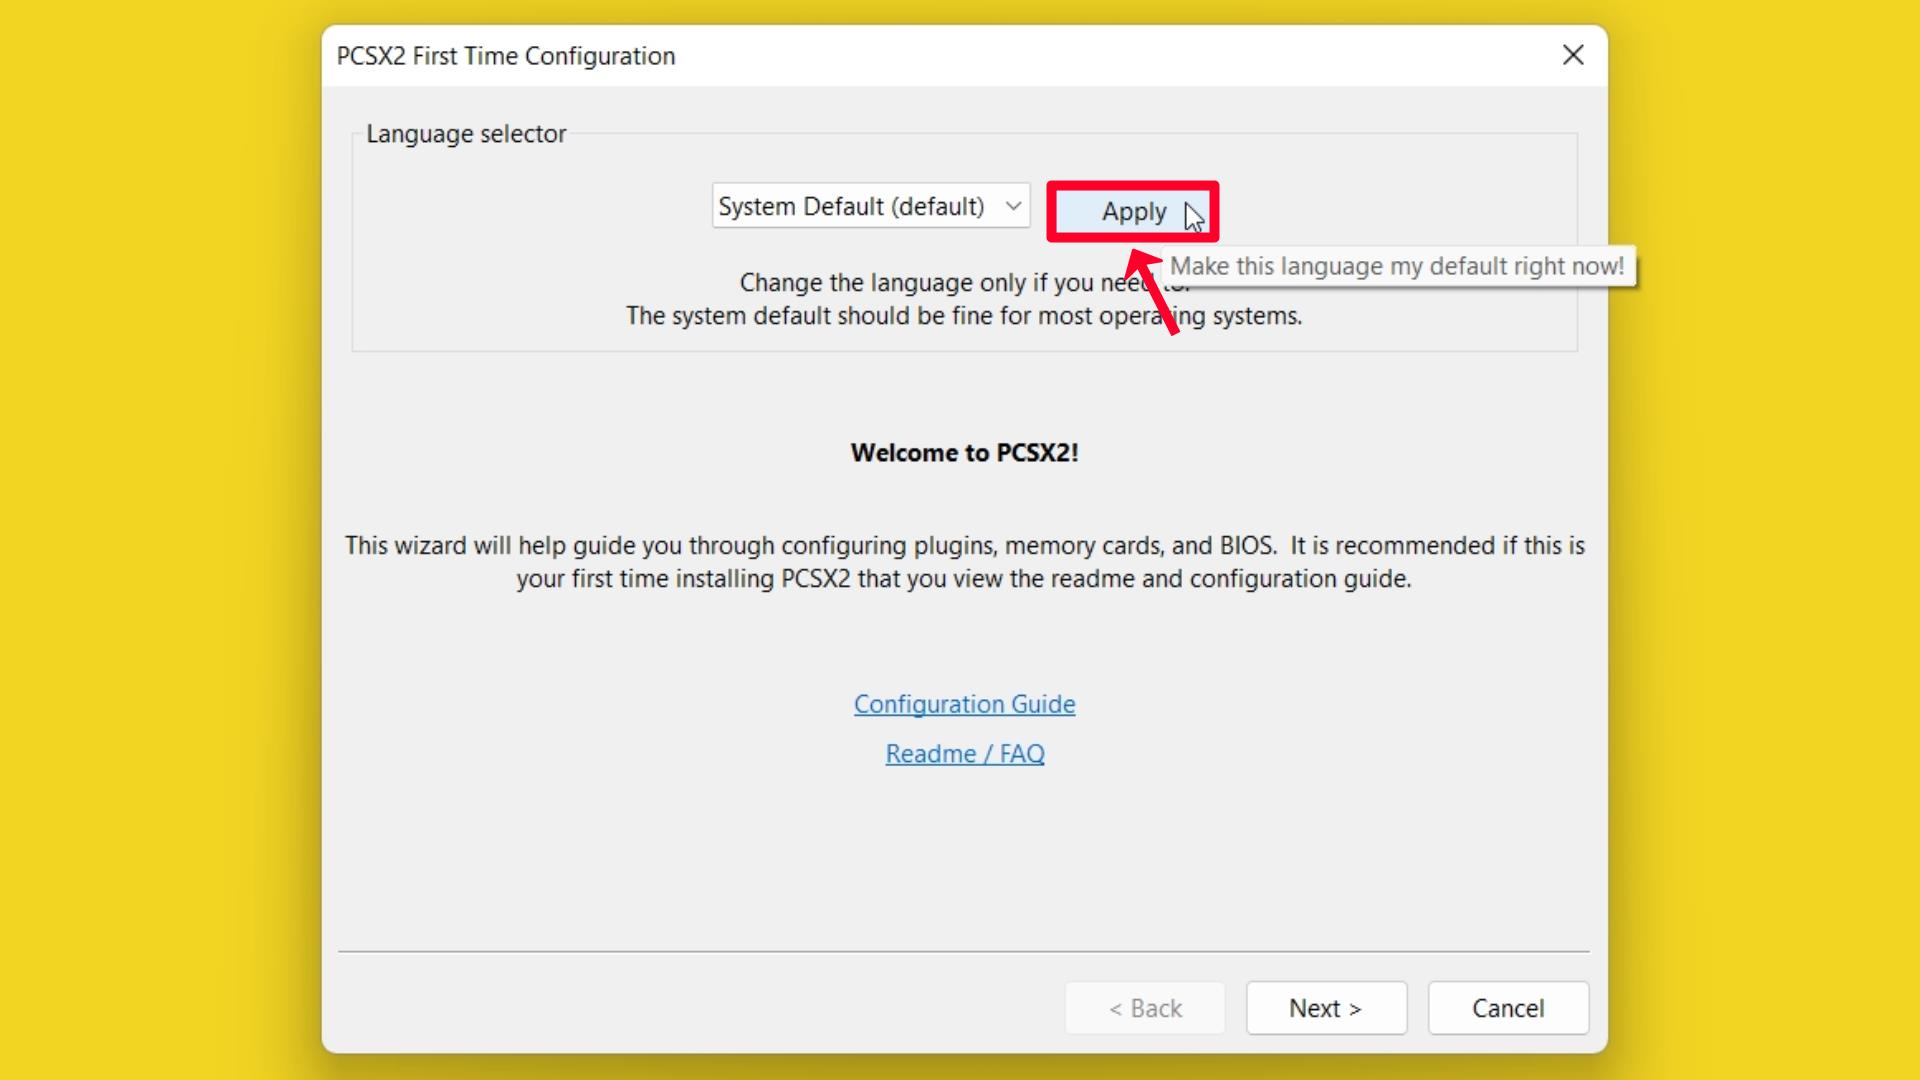
- Note:
- Change the language only if needed.
- The system default language should be fine for most operating systems.
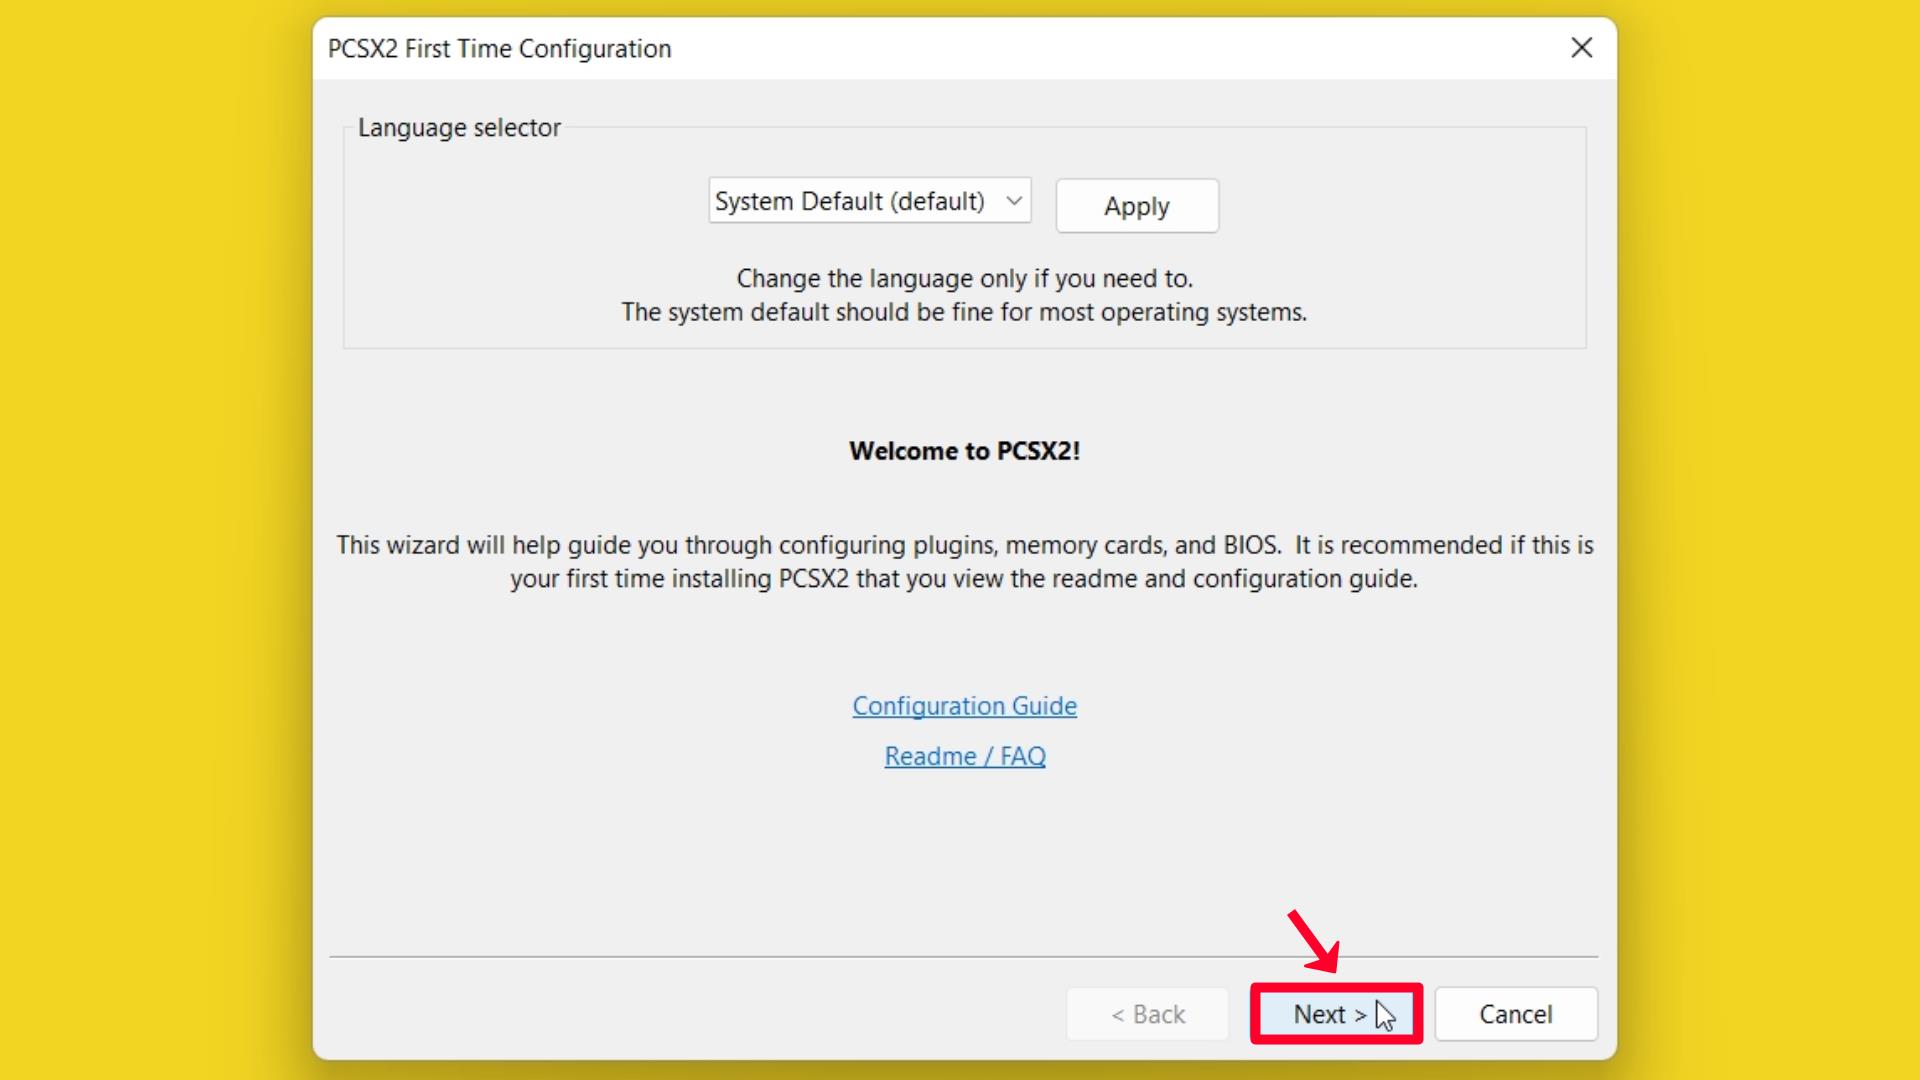
Step 4 – Click on the Next button.
Step 5 – Always use the default Plugins setting.
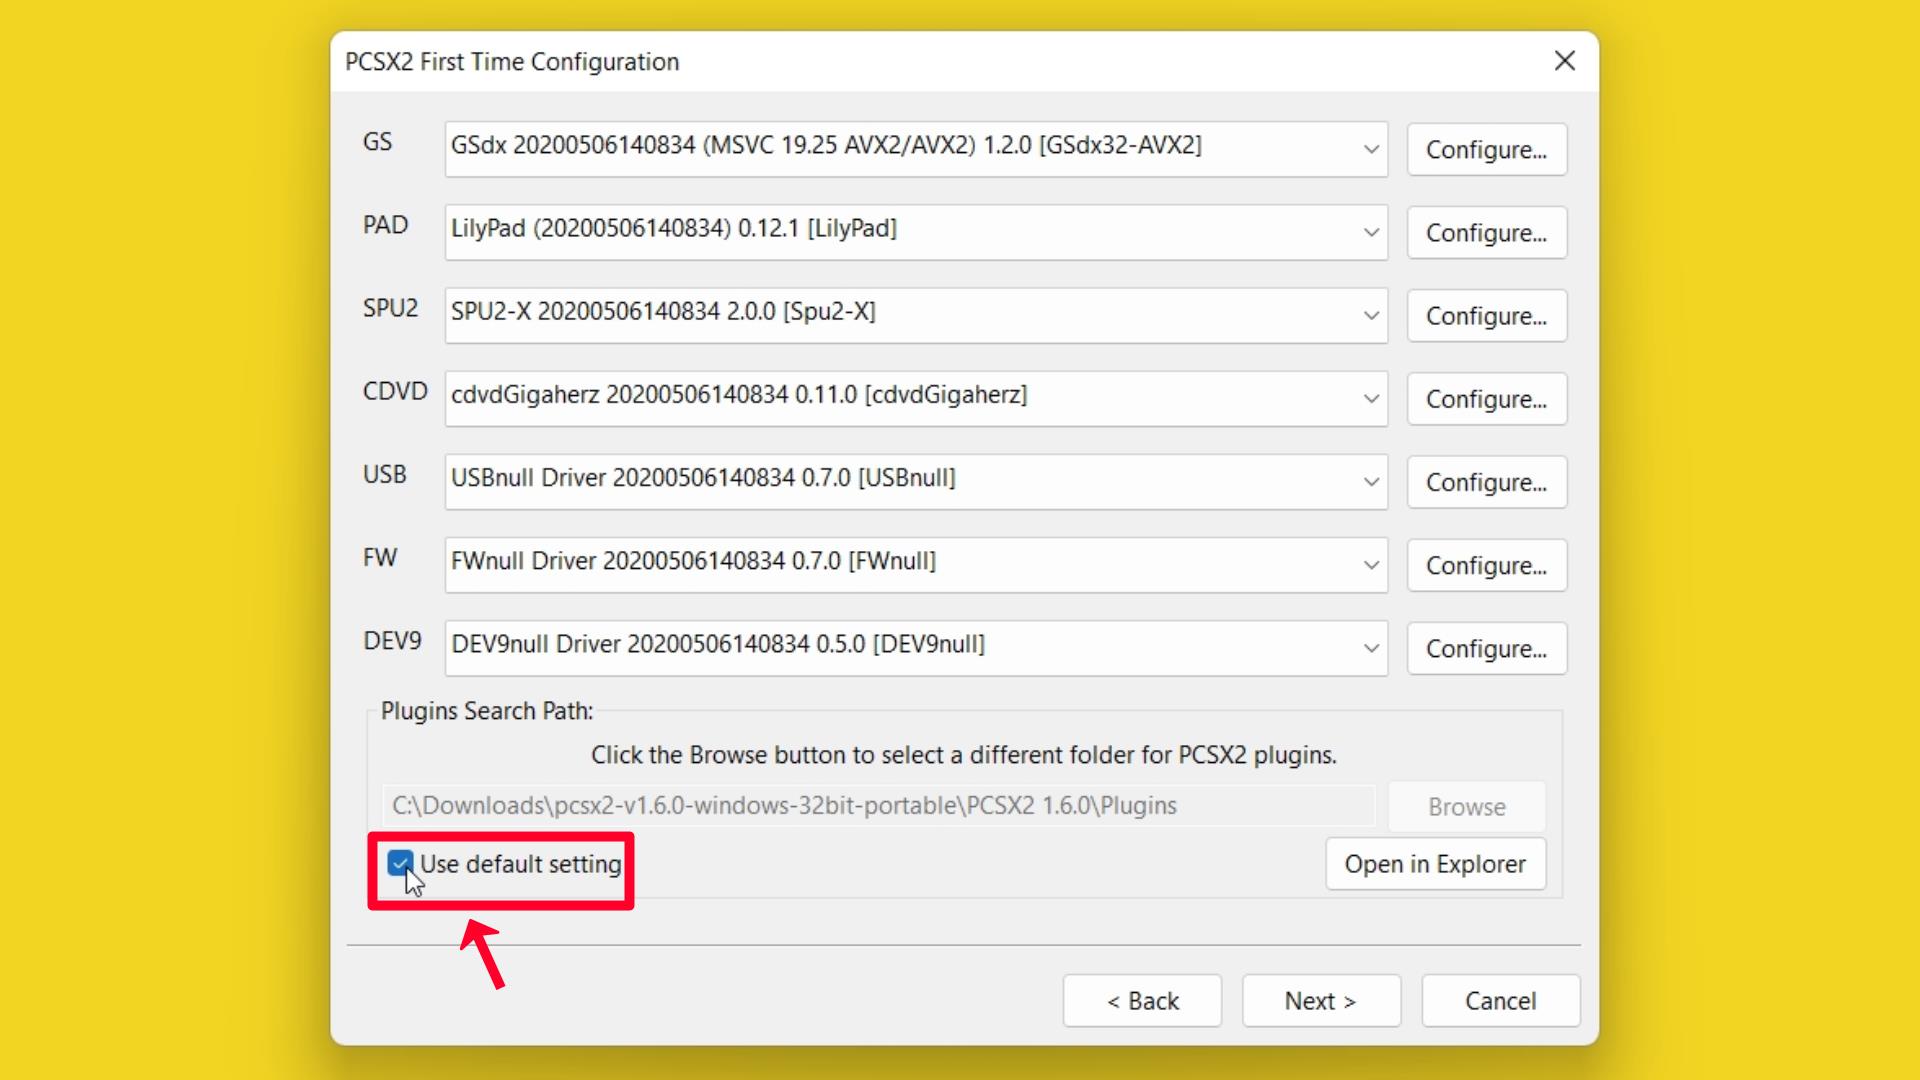
Note: PCSX2 Plugins provided by PCSX2 are officially in the 7z archive file.
Step 6 – Always select the latest GS plugin (Recommended).
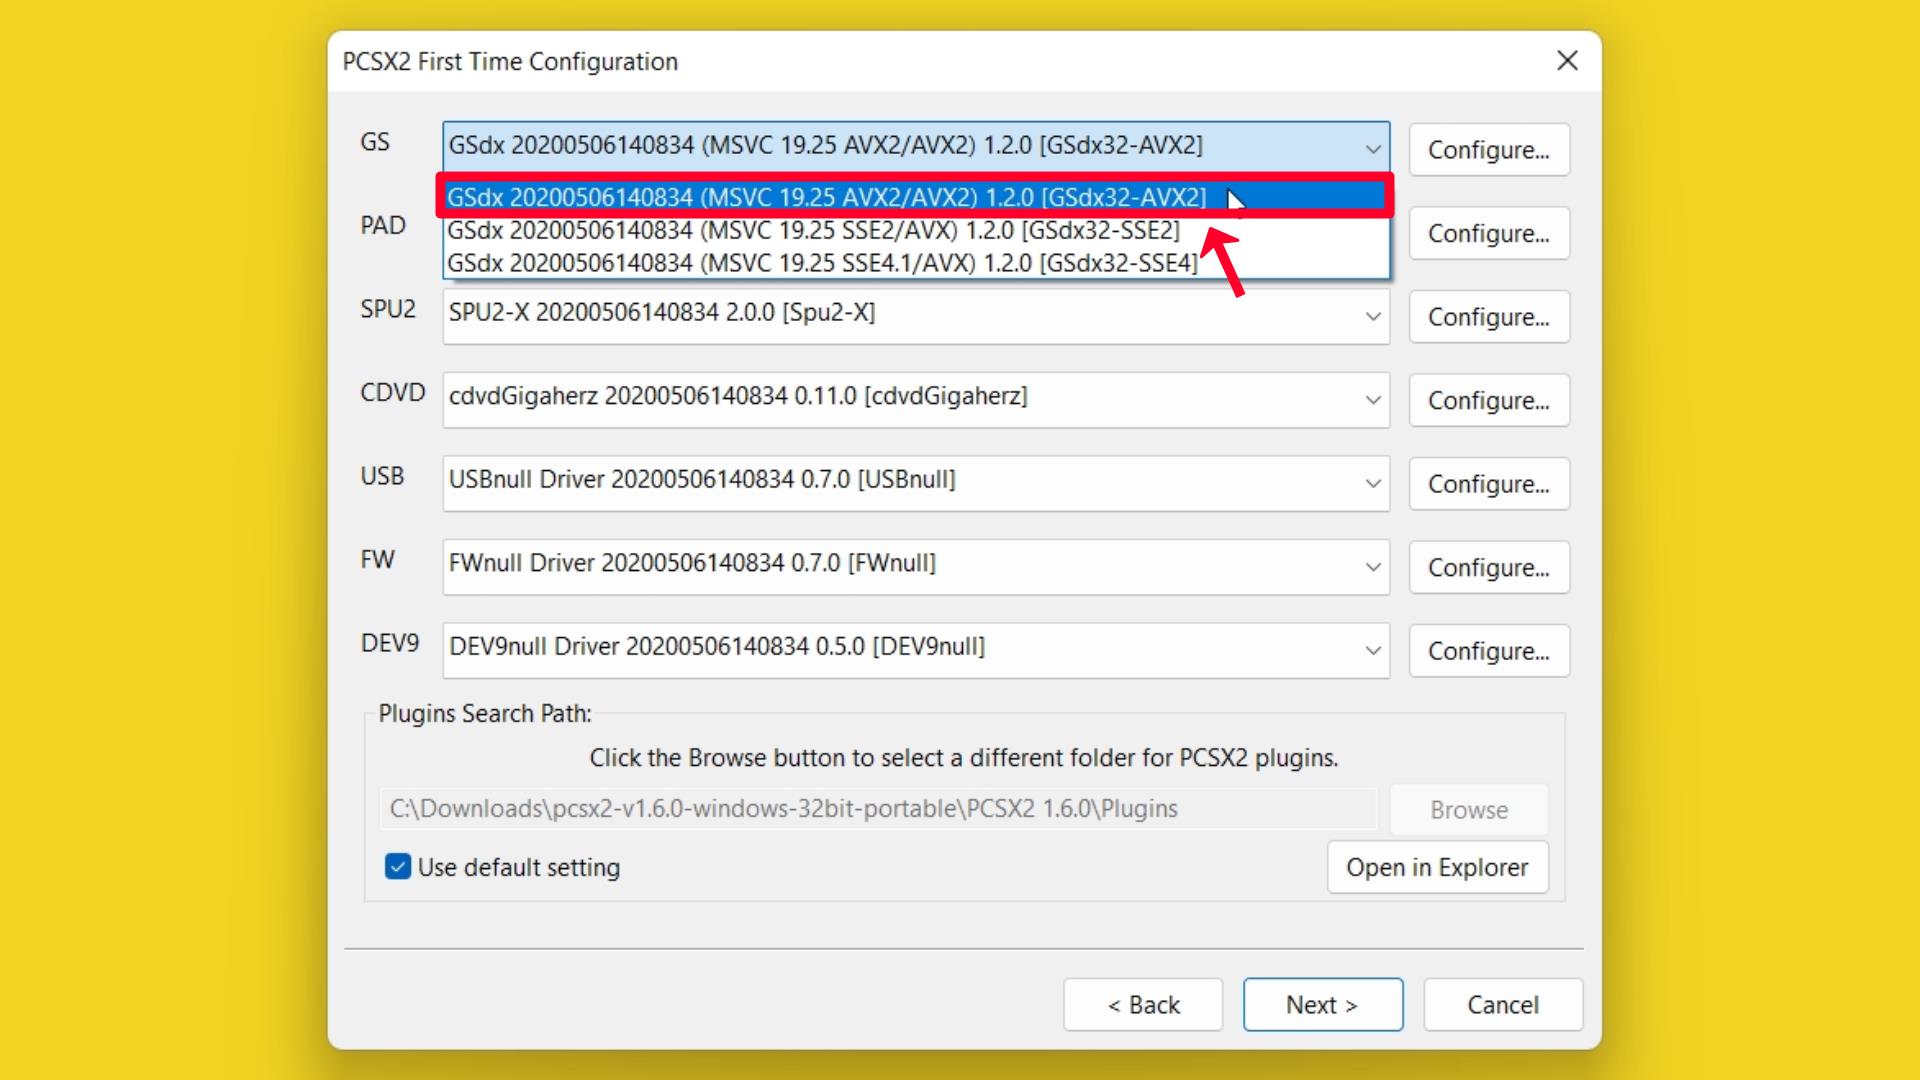
- GS → GSdx 20200506140834 (MSVC 19.25 AVX2/AVX2) 1.2.0 [GSdx32-AVX2]
Step 7 – Always select the latest PAD plugin.
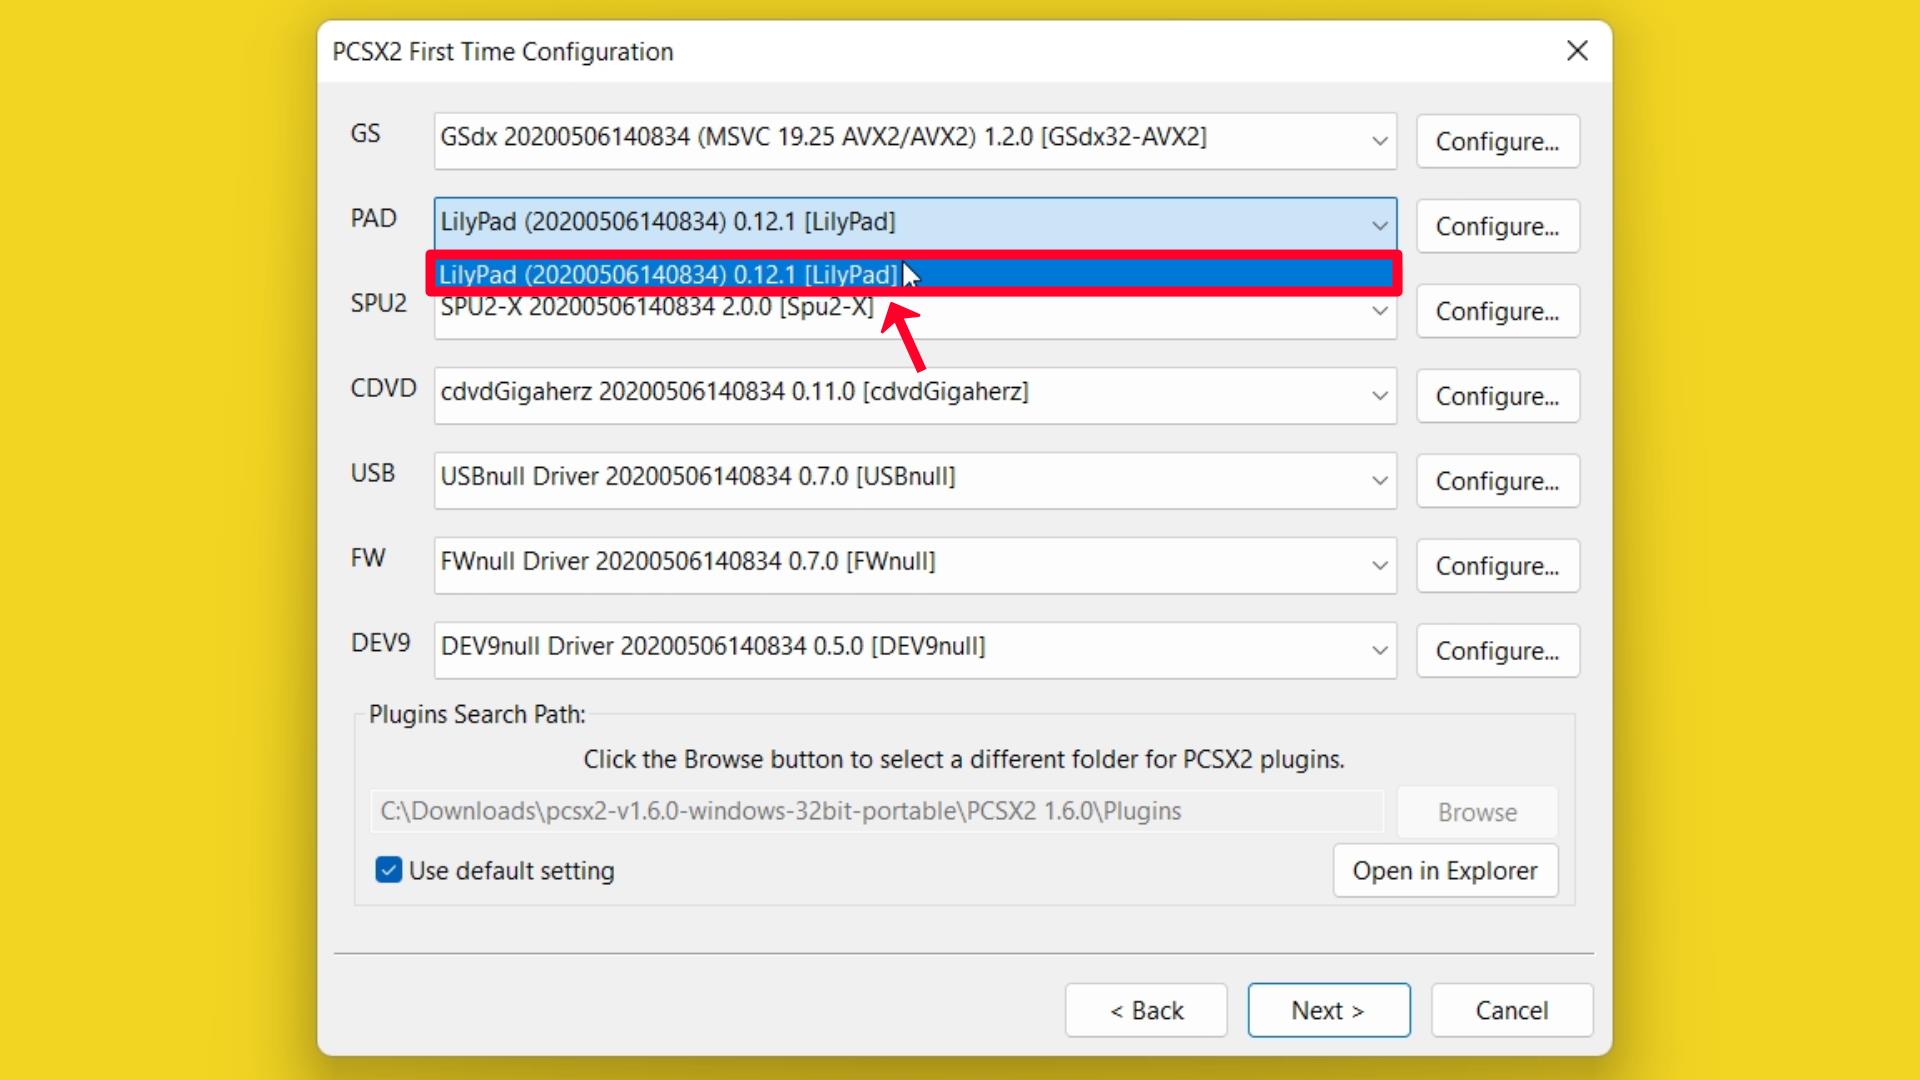
- PAD → LilyPad (20200506140834) 0.12.1 [LilyPad]
Step 8 – Always select the latest SPU2 plugin.
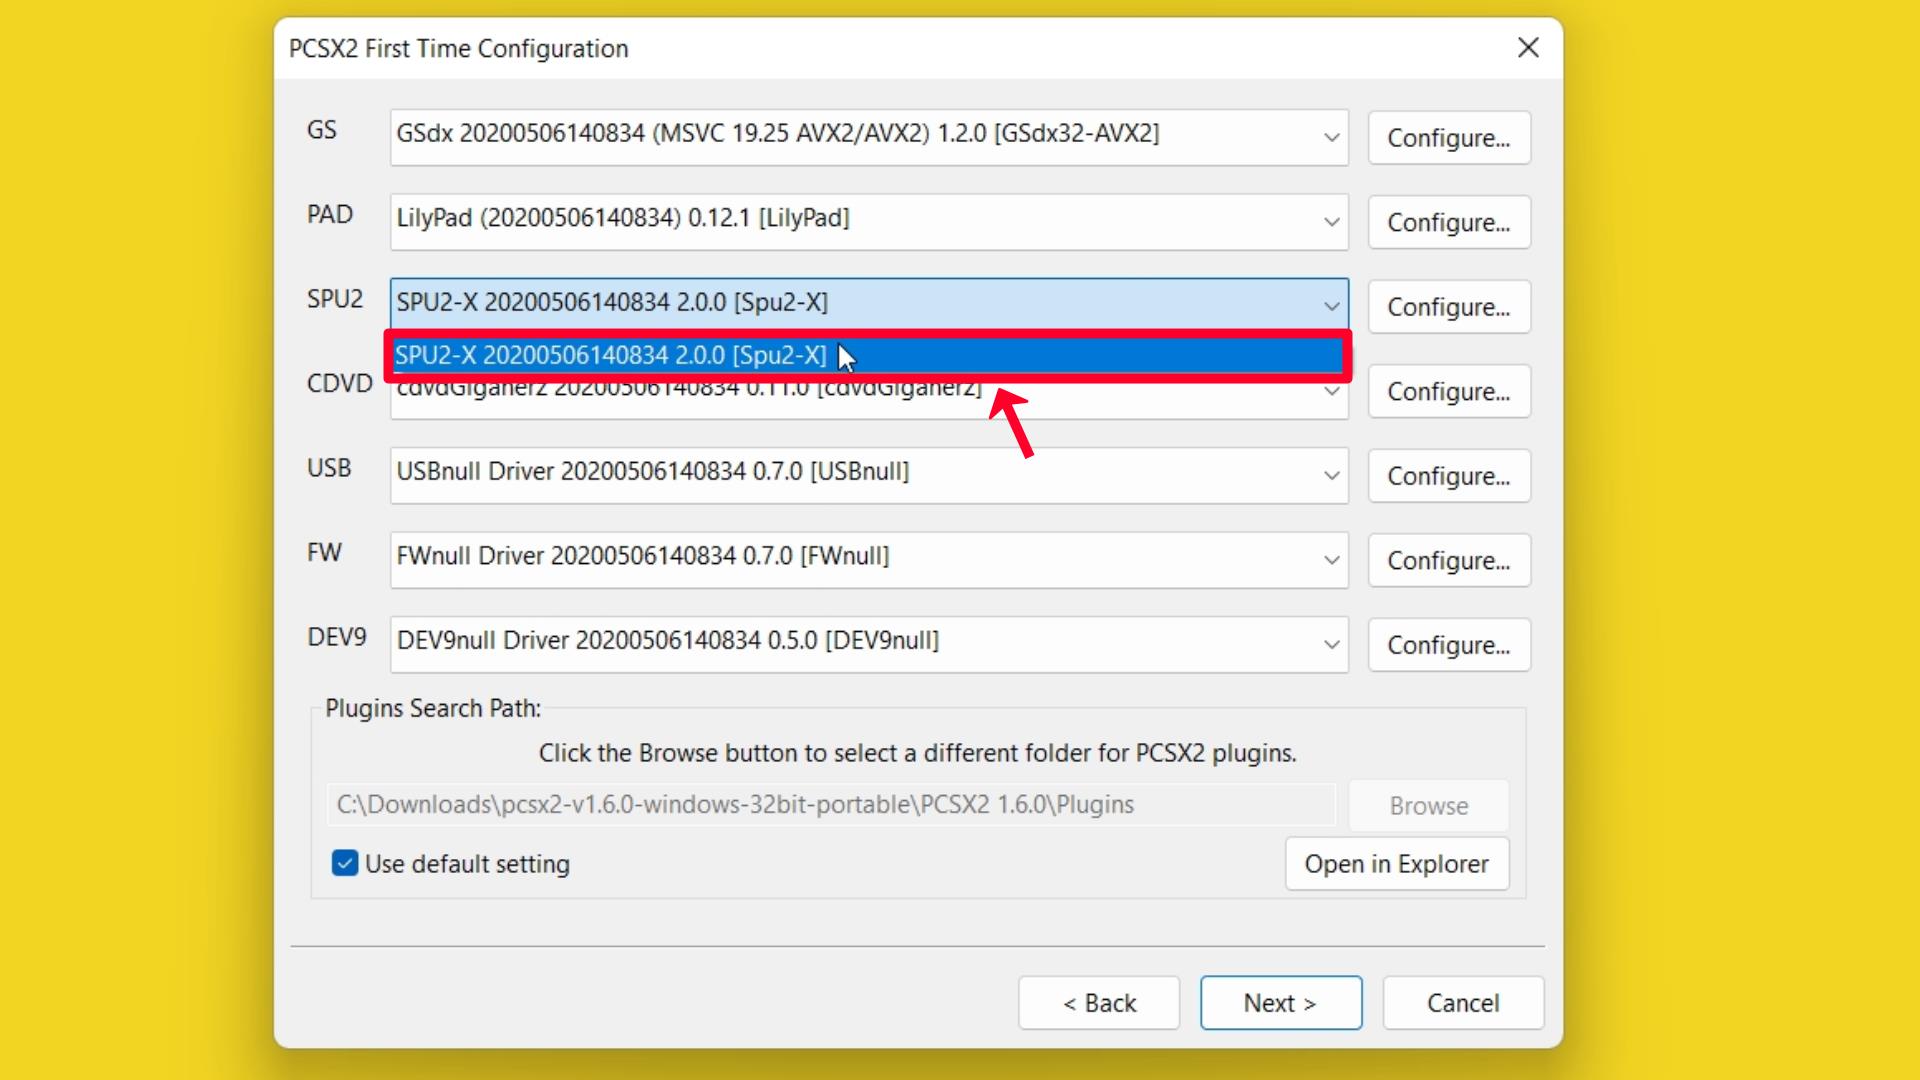
- SPU2 → SPU2-X 20200506140834 2.0.0 [Spu2-X]
Step 9 – Always select the latest CDVD plugin.
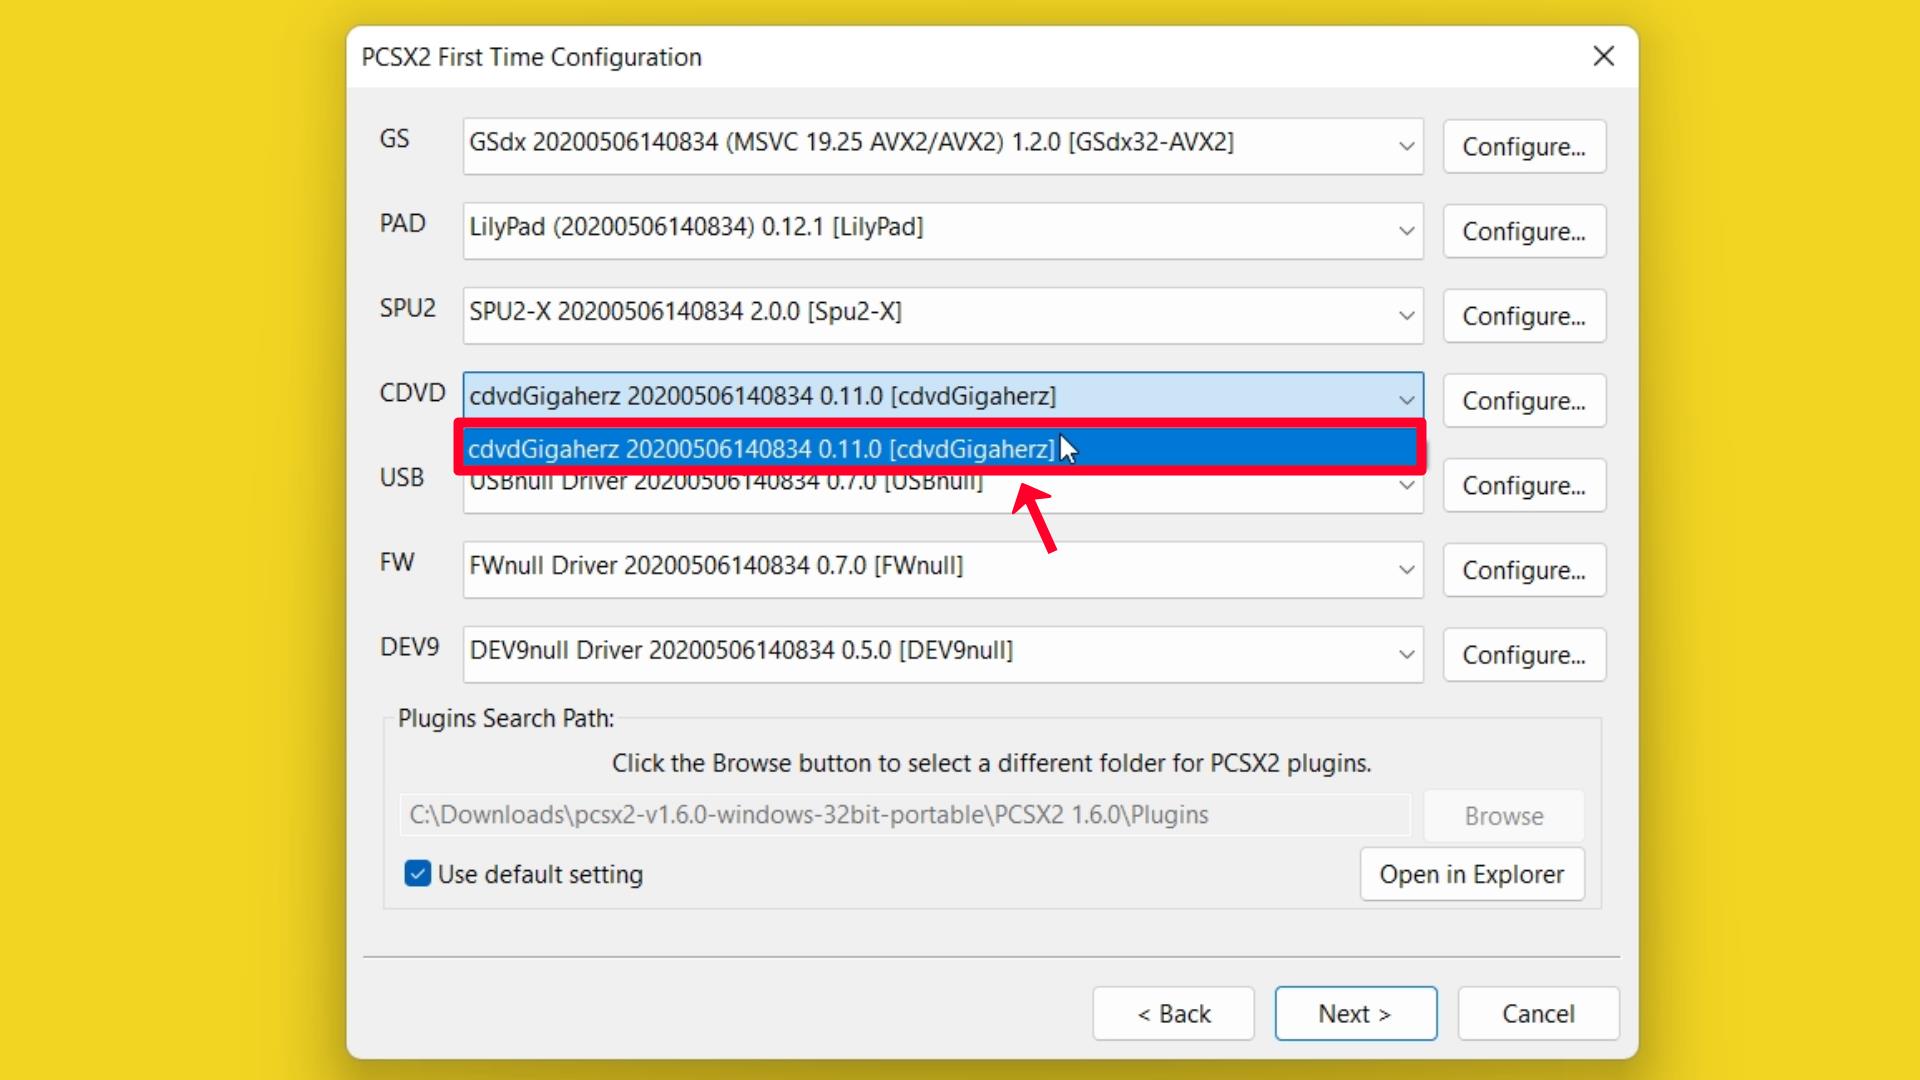
- CDVD → cdvdGigaherz 20200506140834 0.11.0 [cdvdGigaherz]
Step 10 – Always select the latest USB plugin.
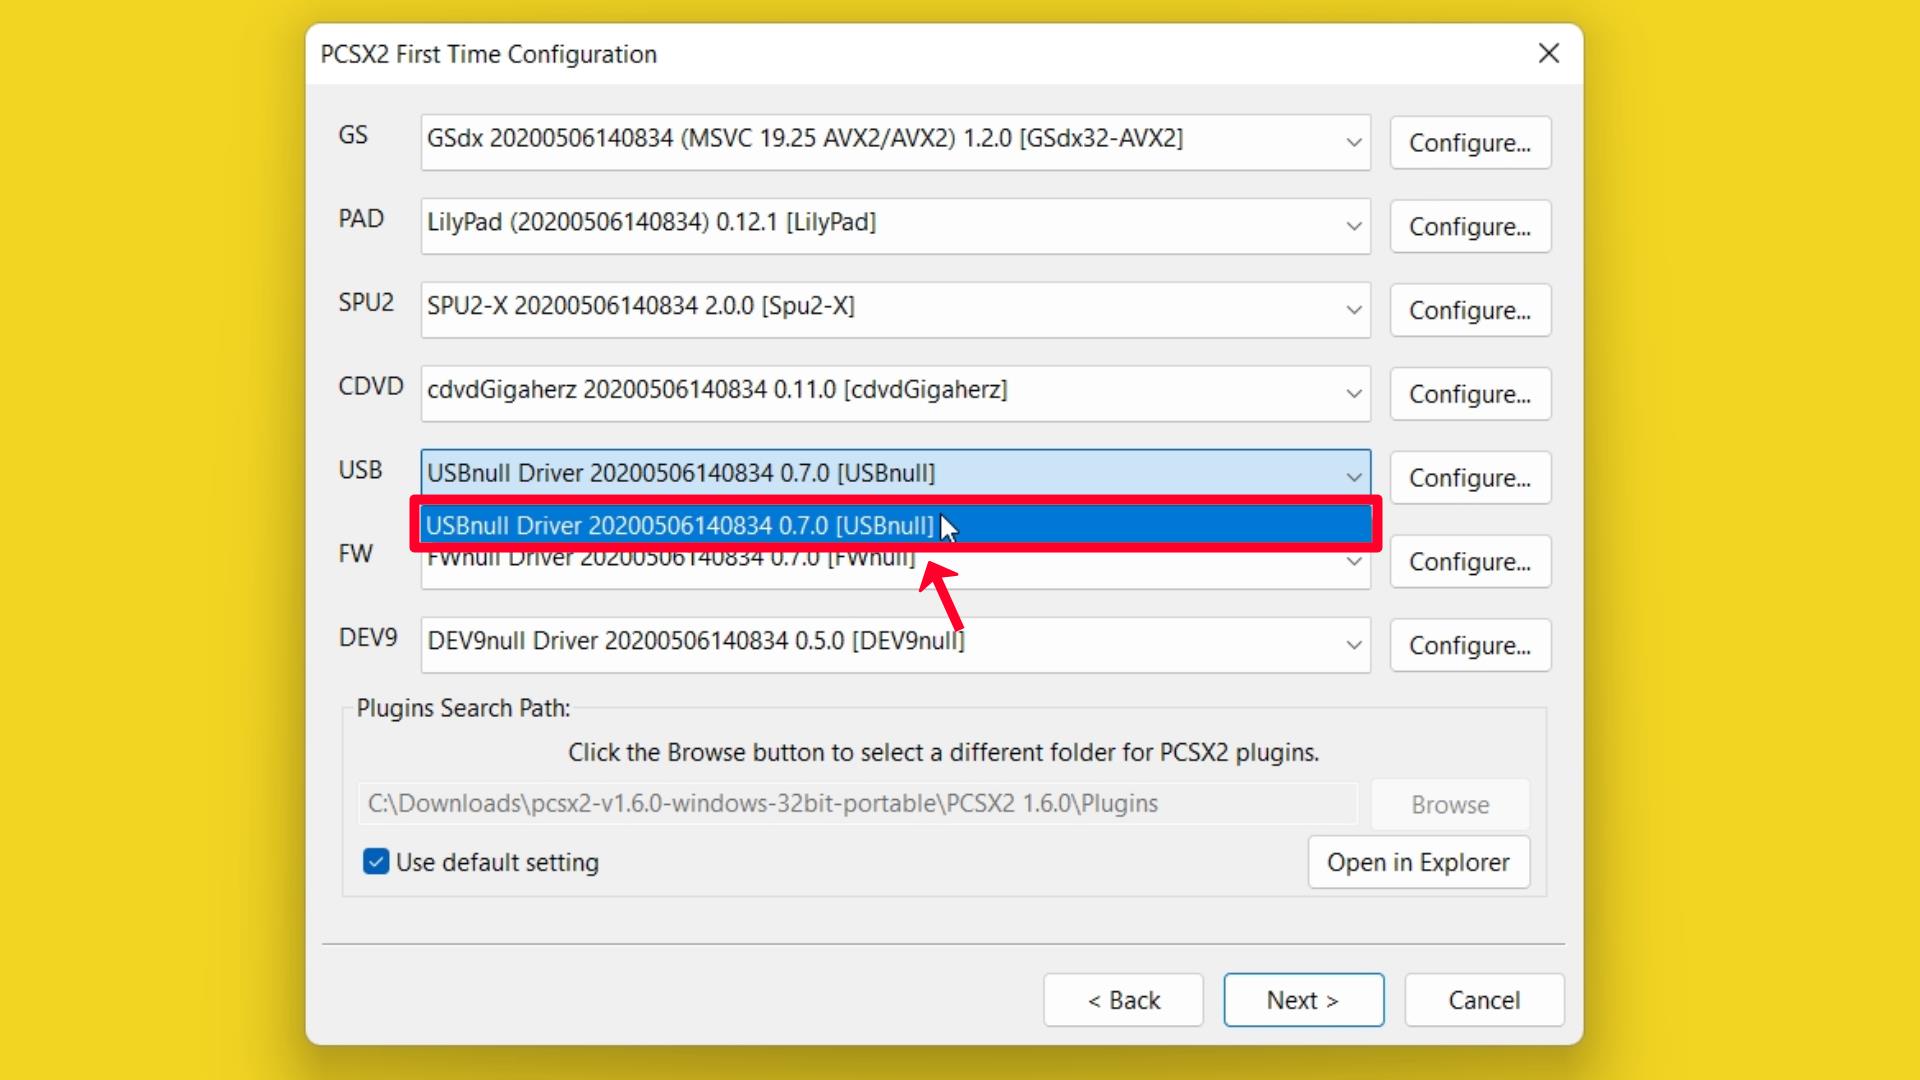
- USB → USBnull Driver 20200506140834 0.7.0 [USBnull]
Step 11 – Always select the latest FW plugin.
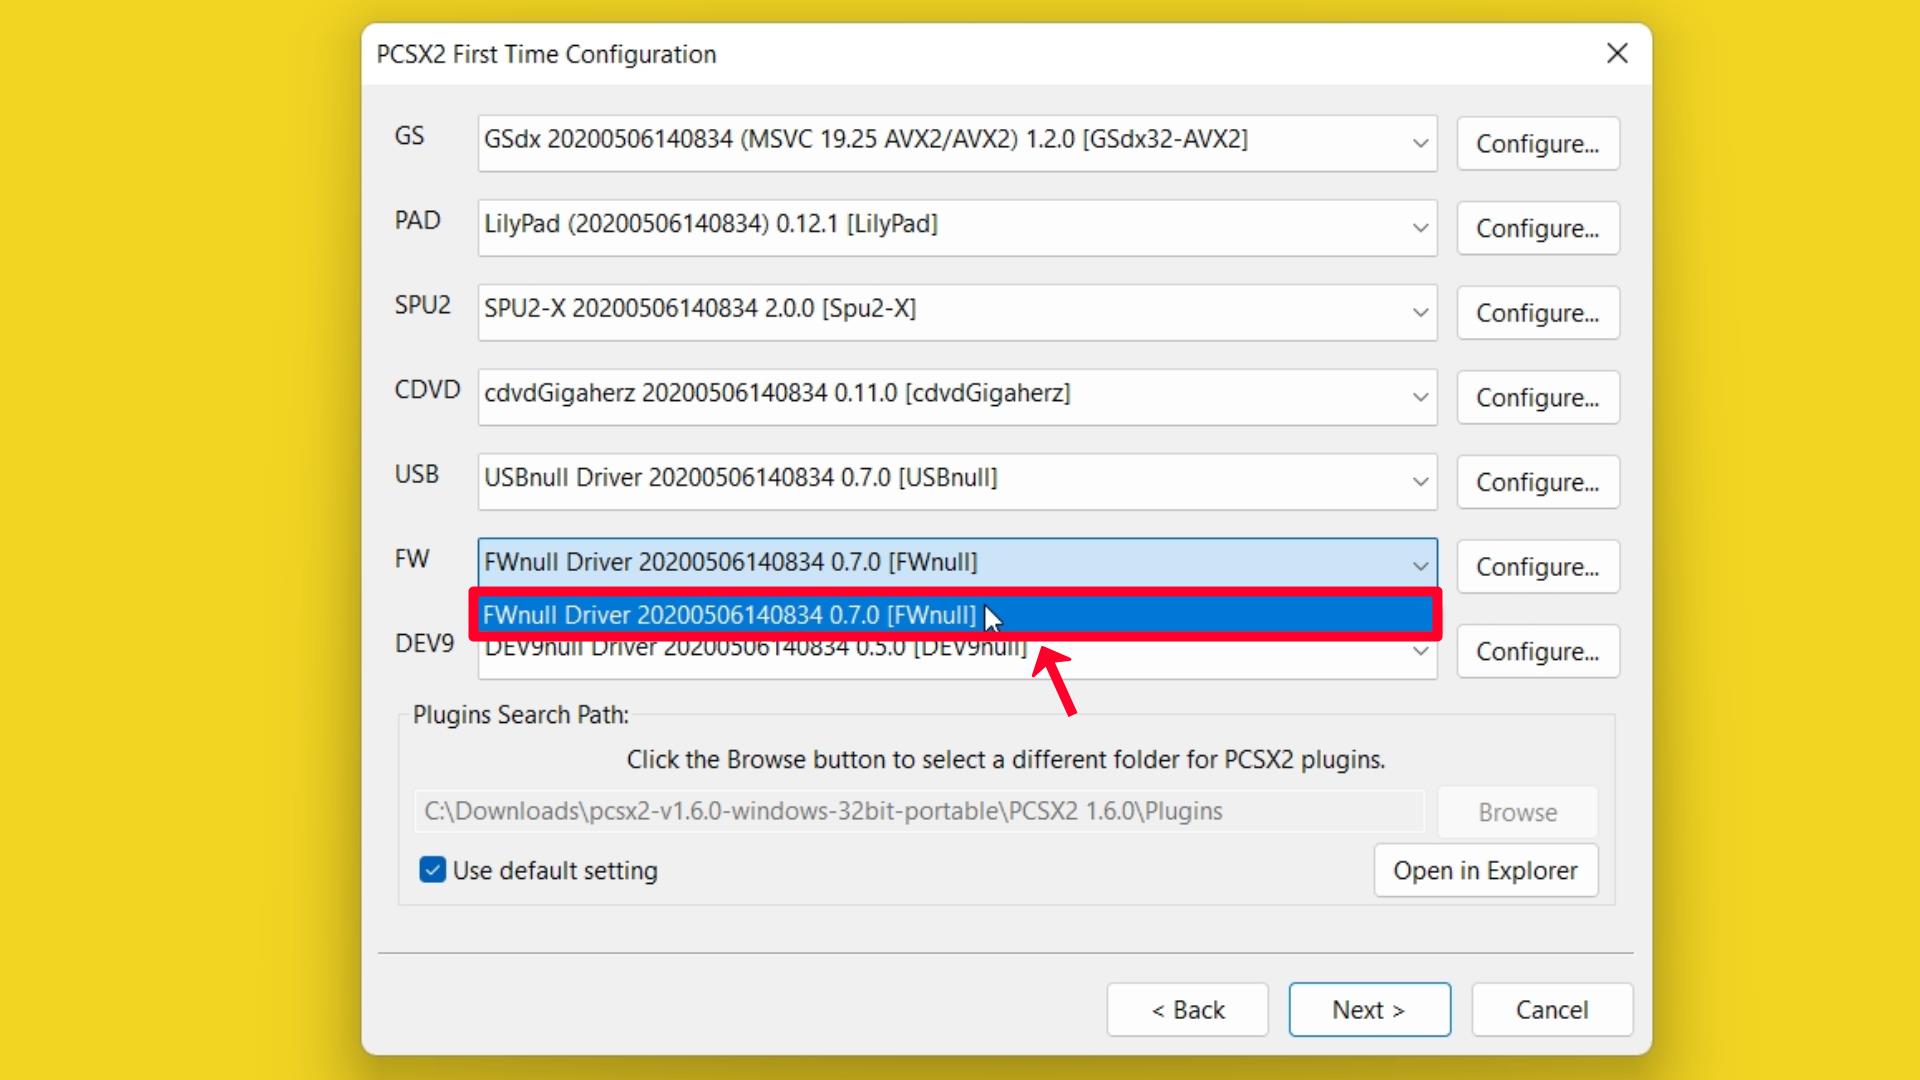
- FW → FWnull Driver 20200506140834 0.7.0 [FWnull]
Step 12 – Always select the latest DEV9 plugin.
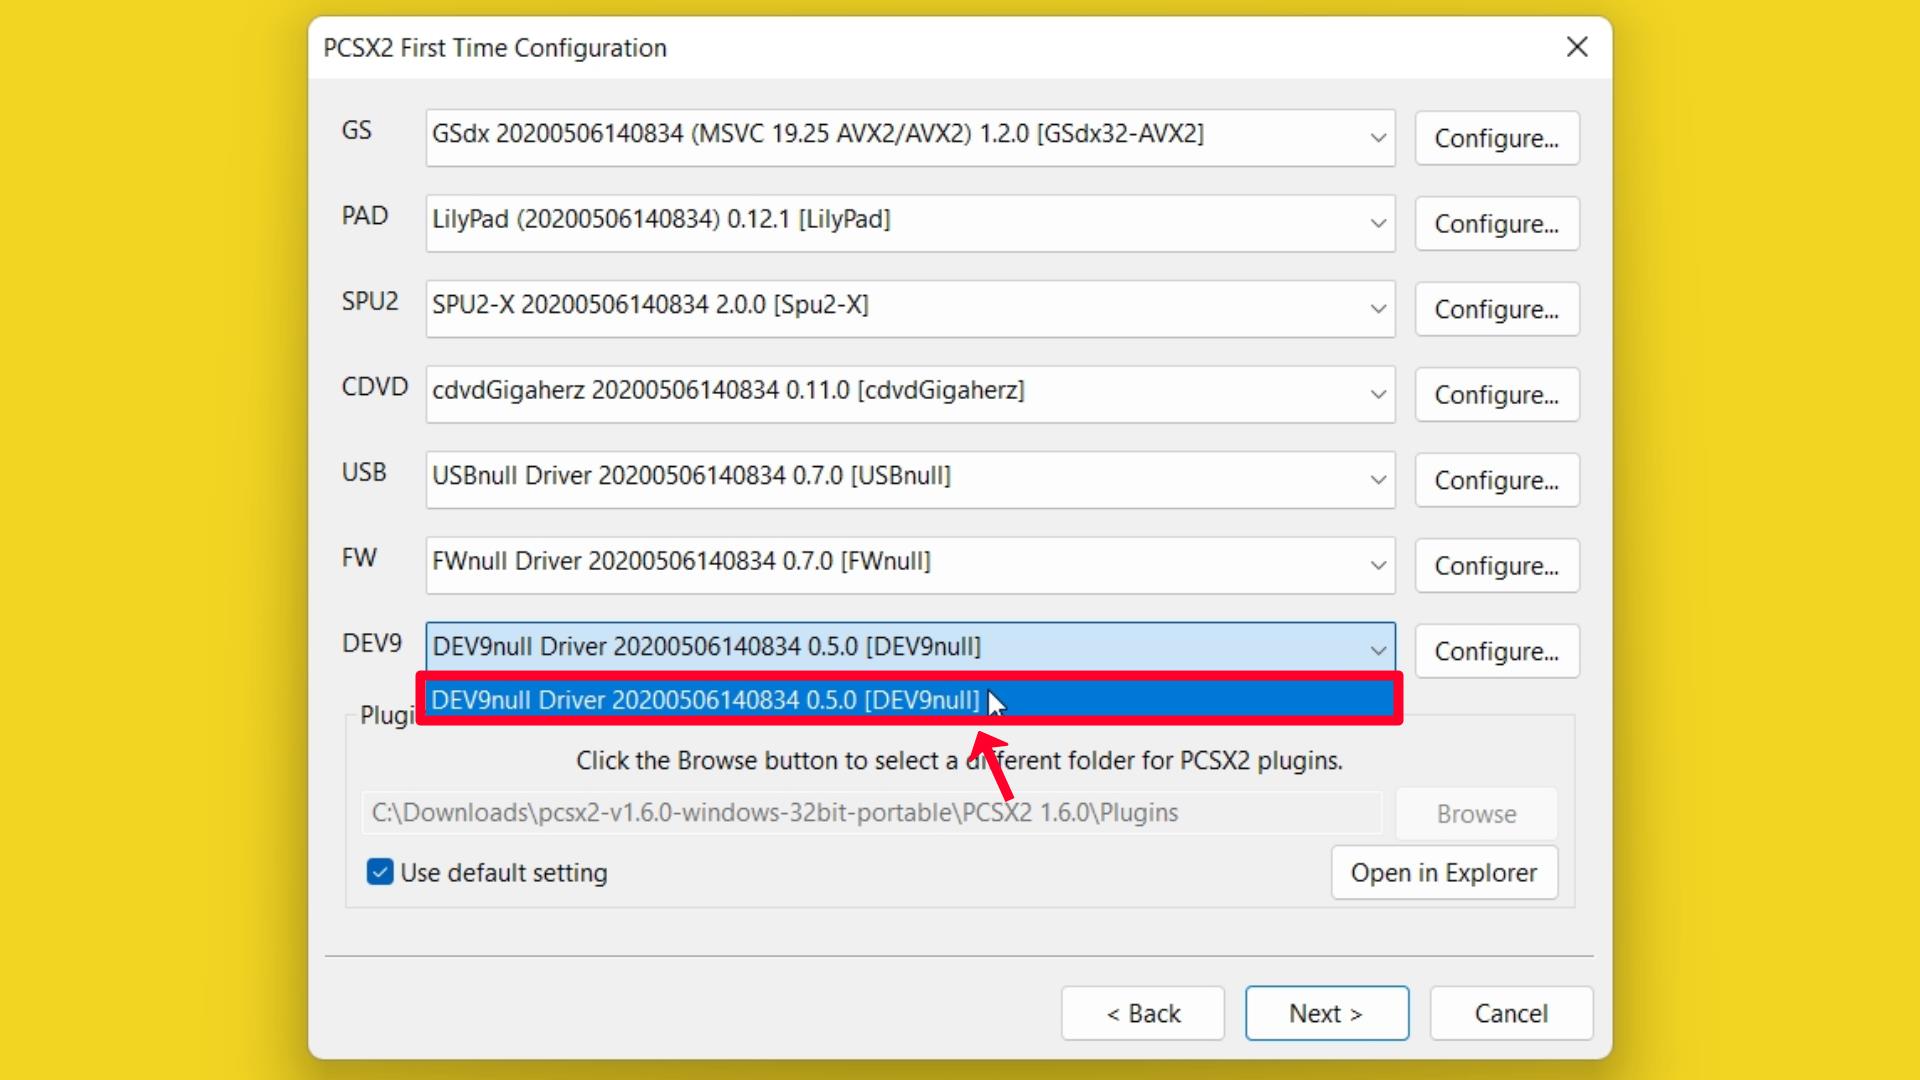
DEV9 → DEV9null Driver 20200506140834 0.5.0 [DEV9null]
Step 13 – Click on the Next button.

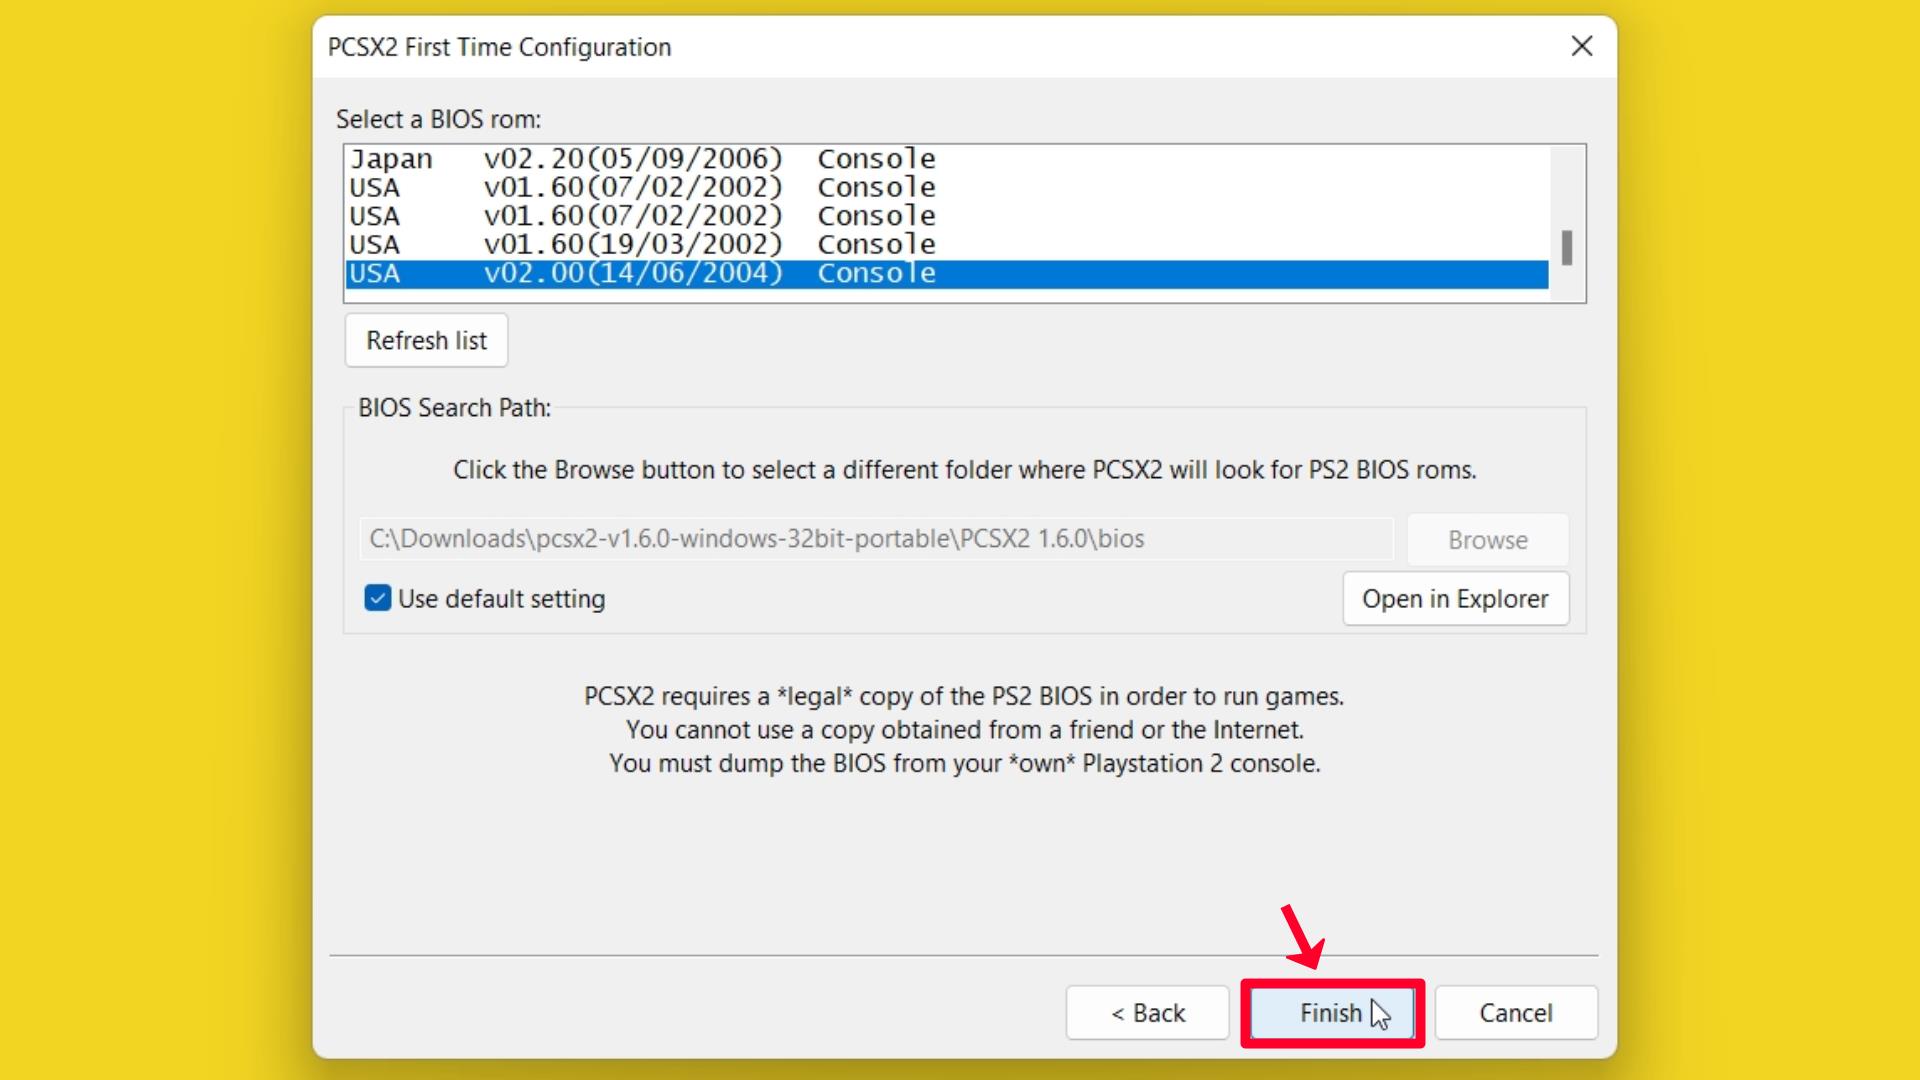
PCSX2 BIOS Setup
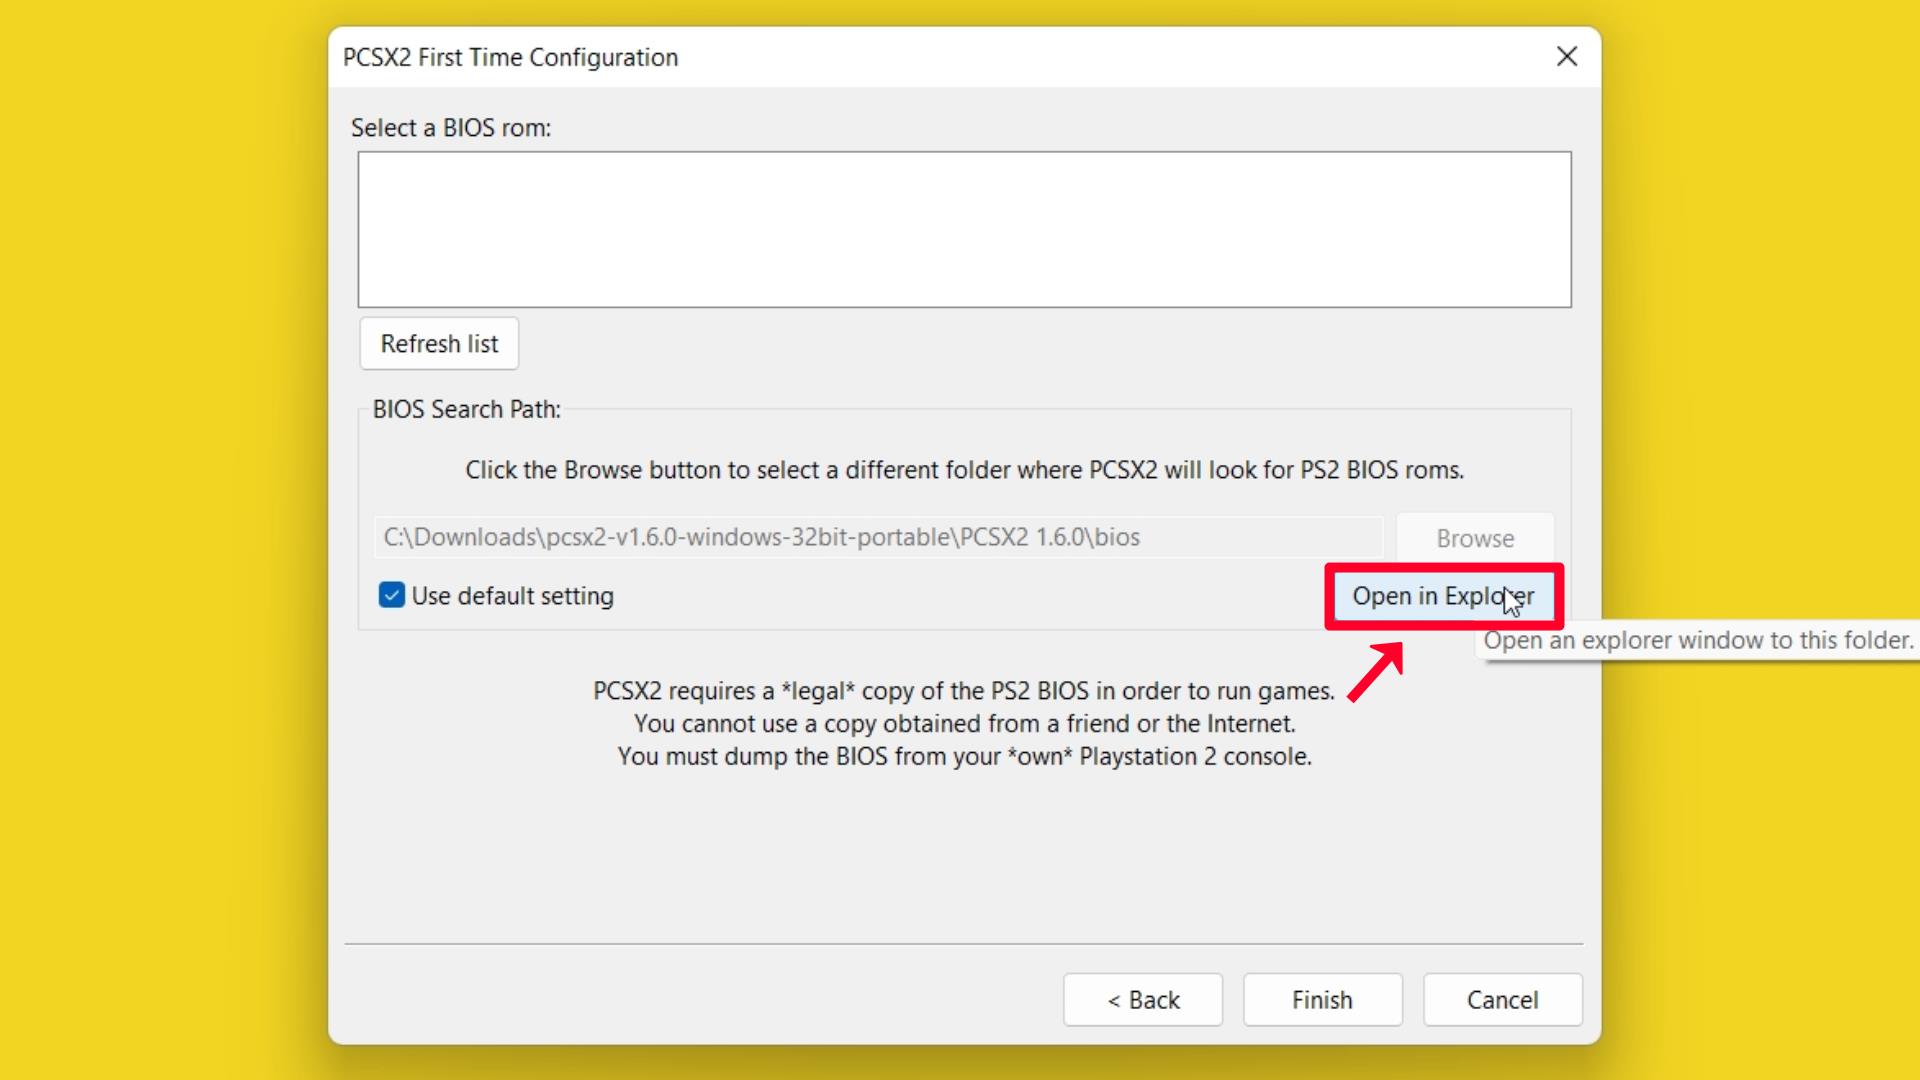
The “bios” folder in the PCSX2 installation directory is required to contain PS2 BIOS rom files. In order to play PS2 games using PCSX2, you will need to select the correct BIOS rom for your region in the PCSX2 Configuration window. It is essential to keep in mind that the PS2’s BIOS files are protected by copyright and cannot be distributed legally. The BIOS files will need to be obtained independently.
Step 1 – Click on Open in Explorer option.
Step 2 – Download, Copy, and Paste your PS2 bios rom files here.
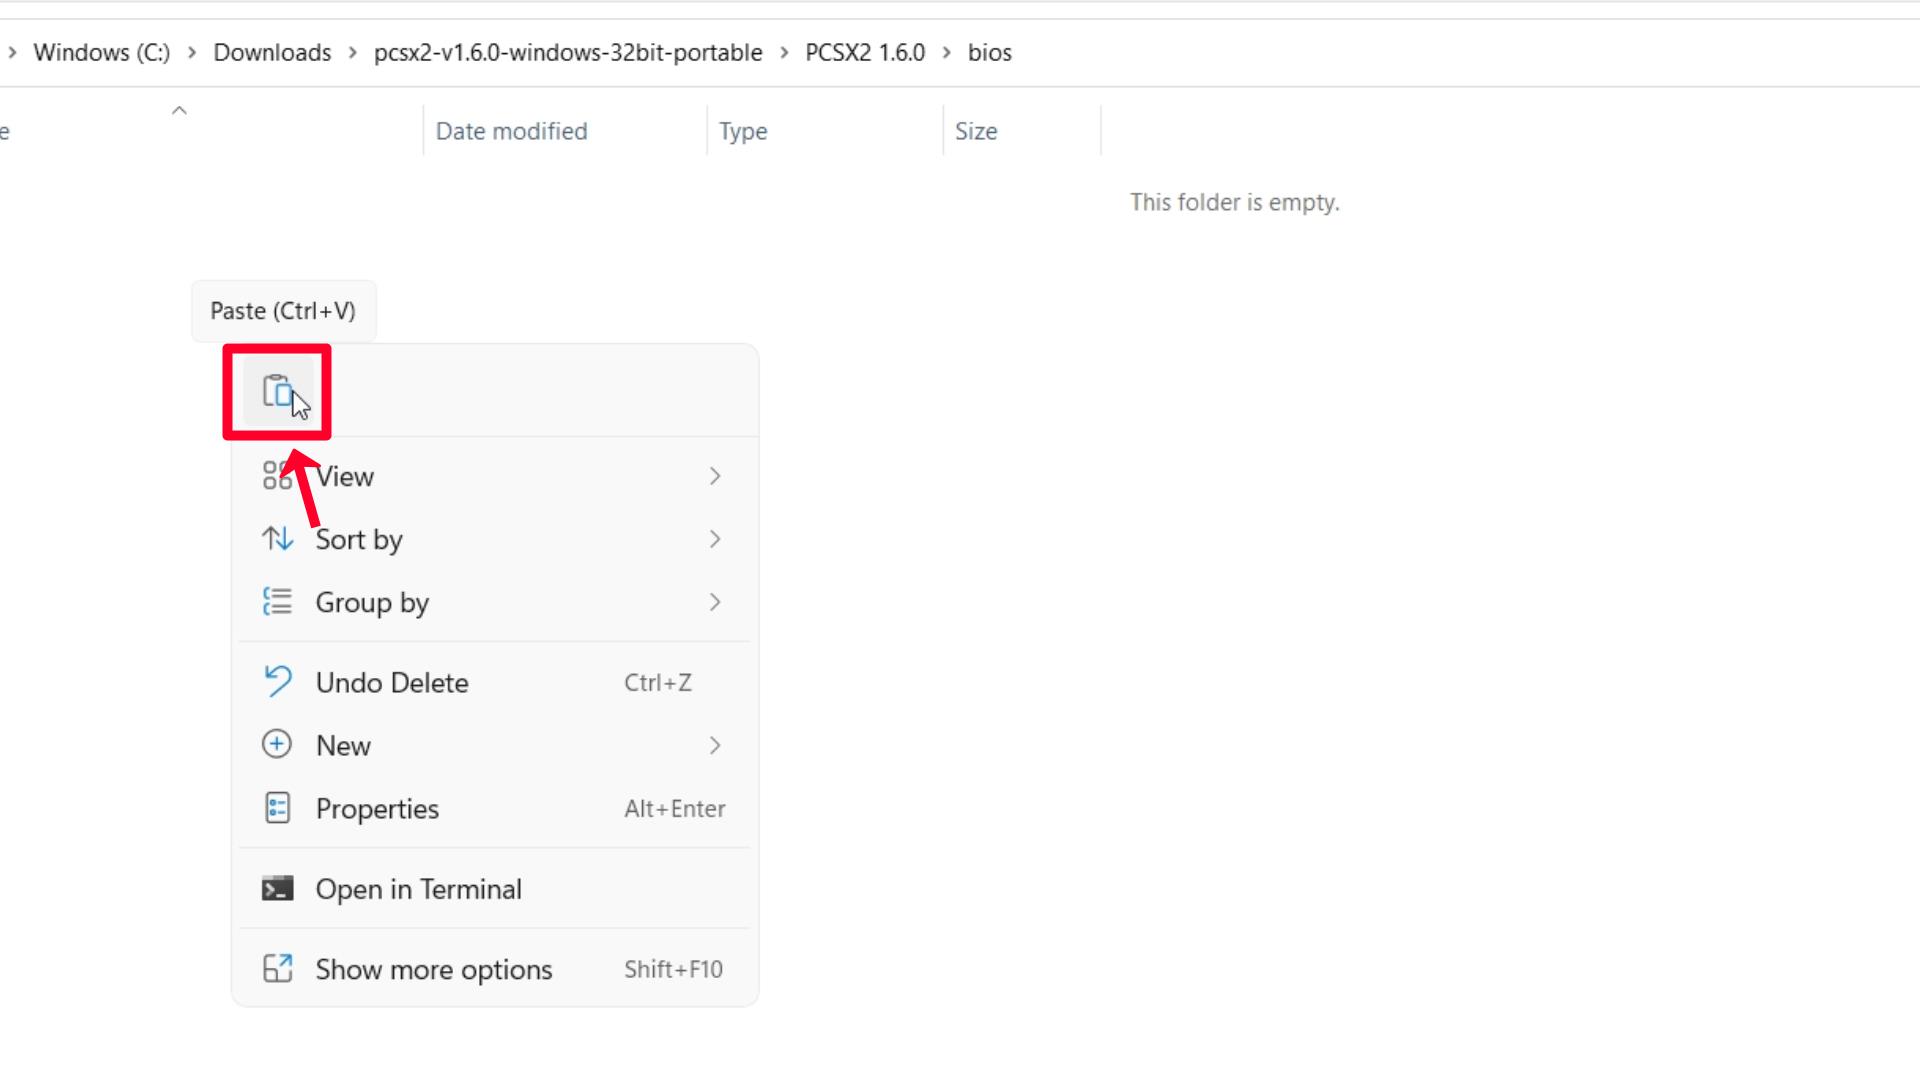
Click Here To Download ⇒ PS2 BIOS For PCSX2 Emulator
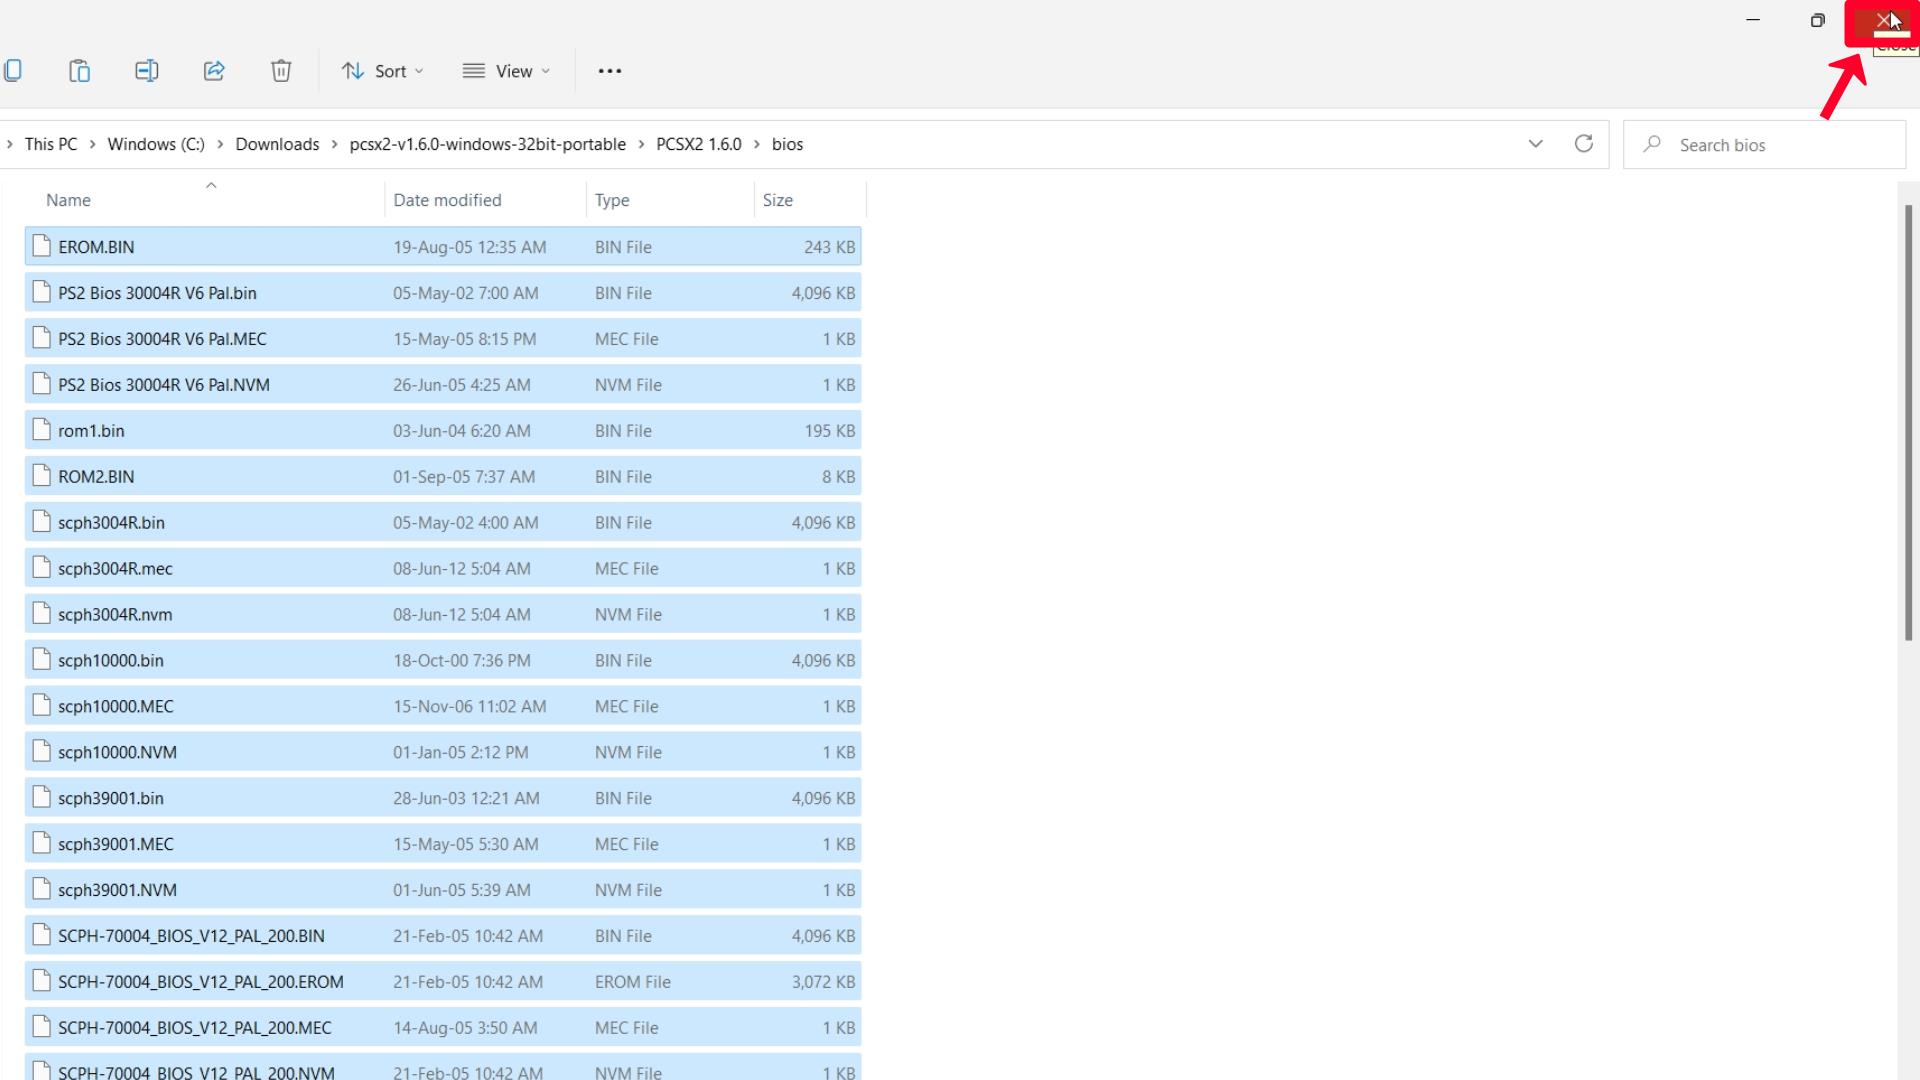
Step 3 – Close this Windows Tab.
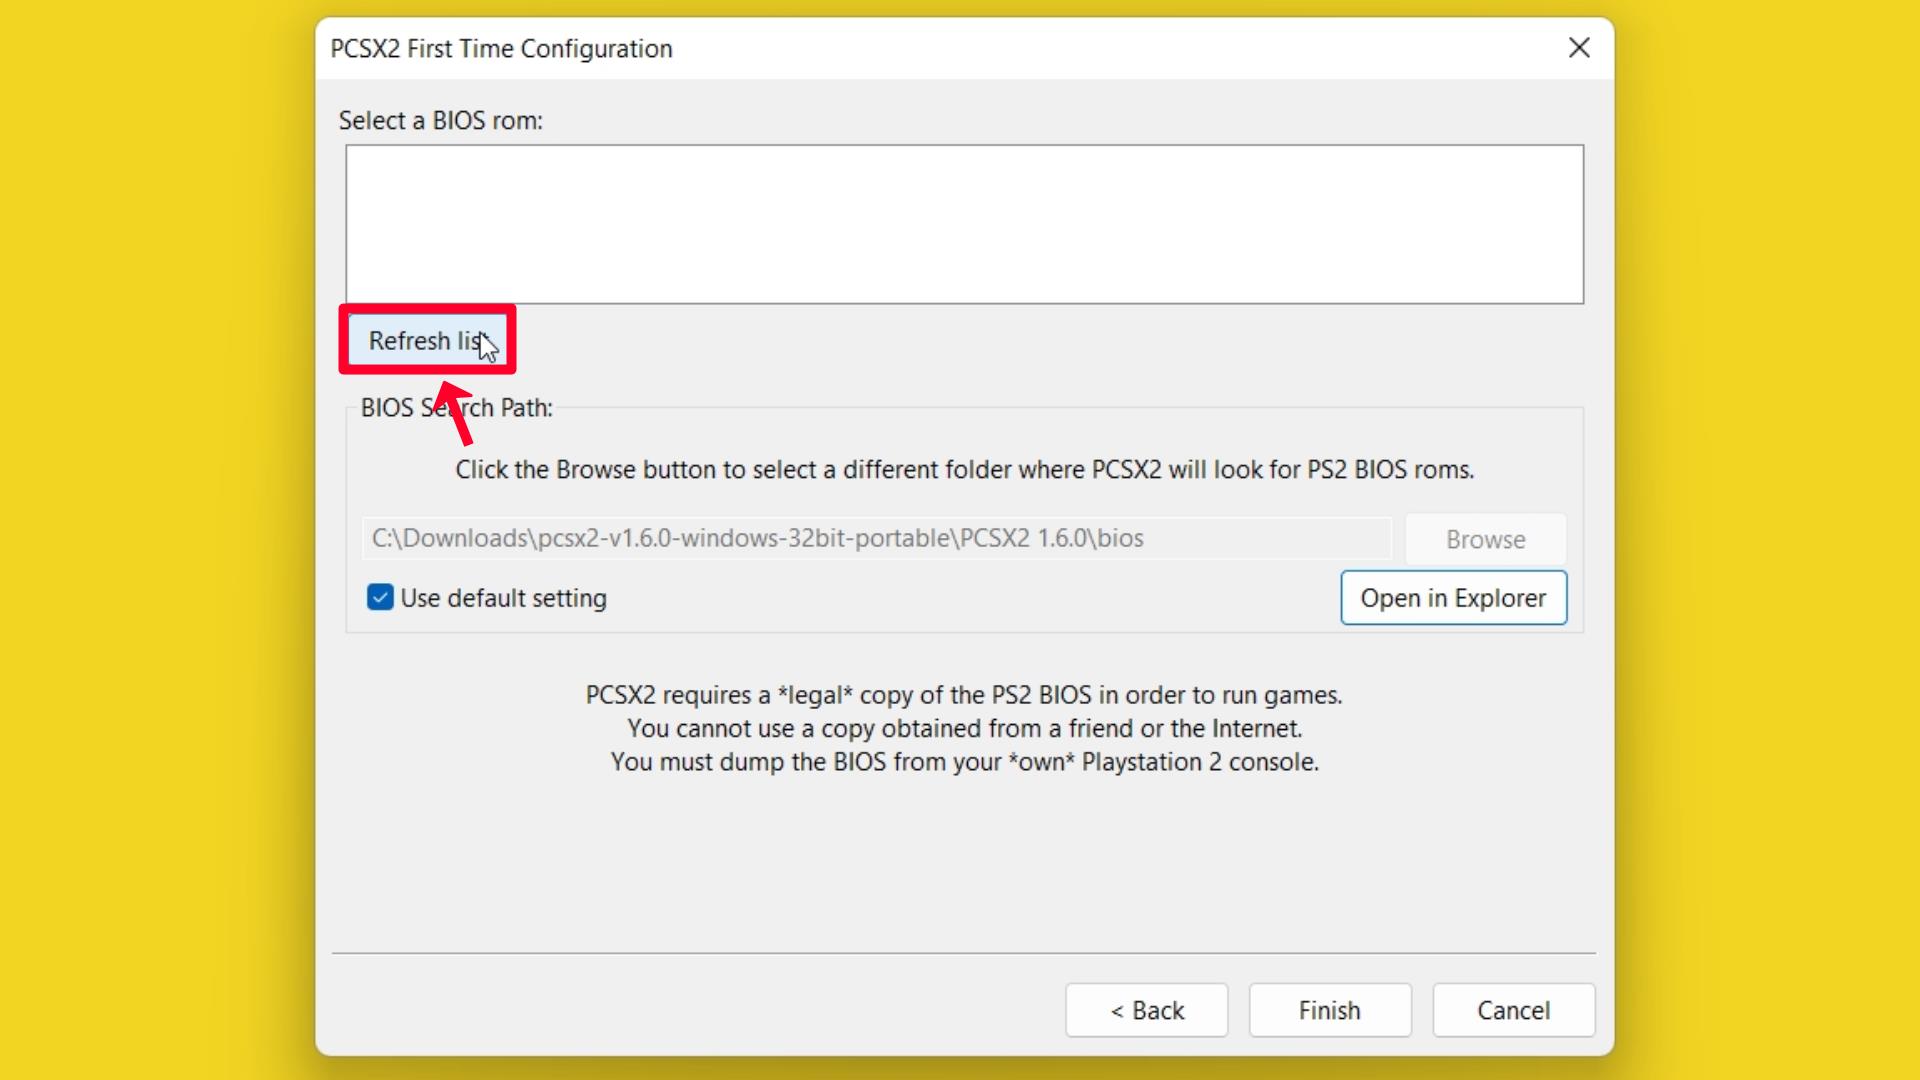
Step 4 – Click on the Refresh list button to get the BIOS rom list.
Step 5 – Select the latest version of PS2 BIOS rom.
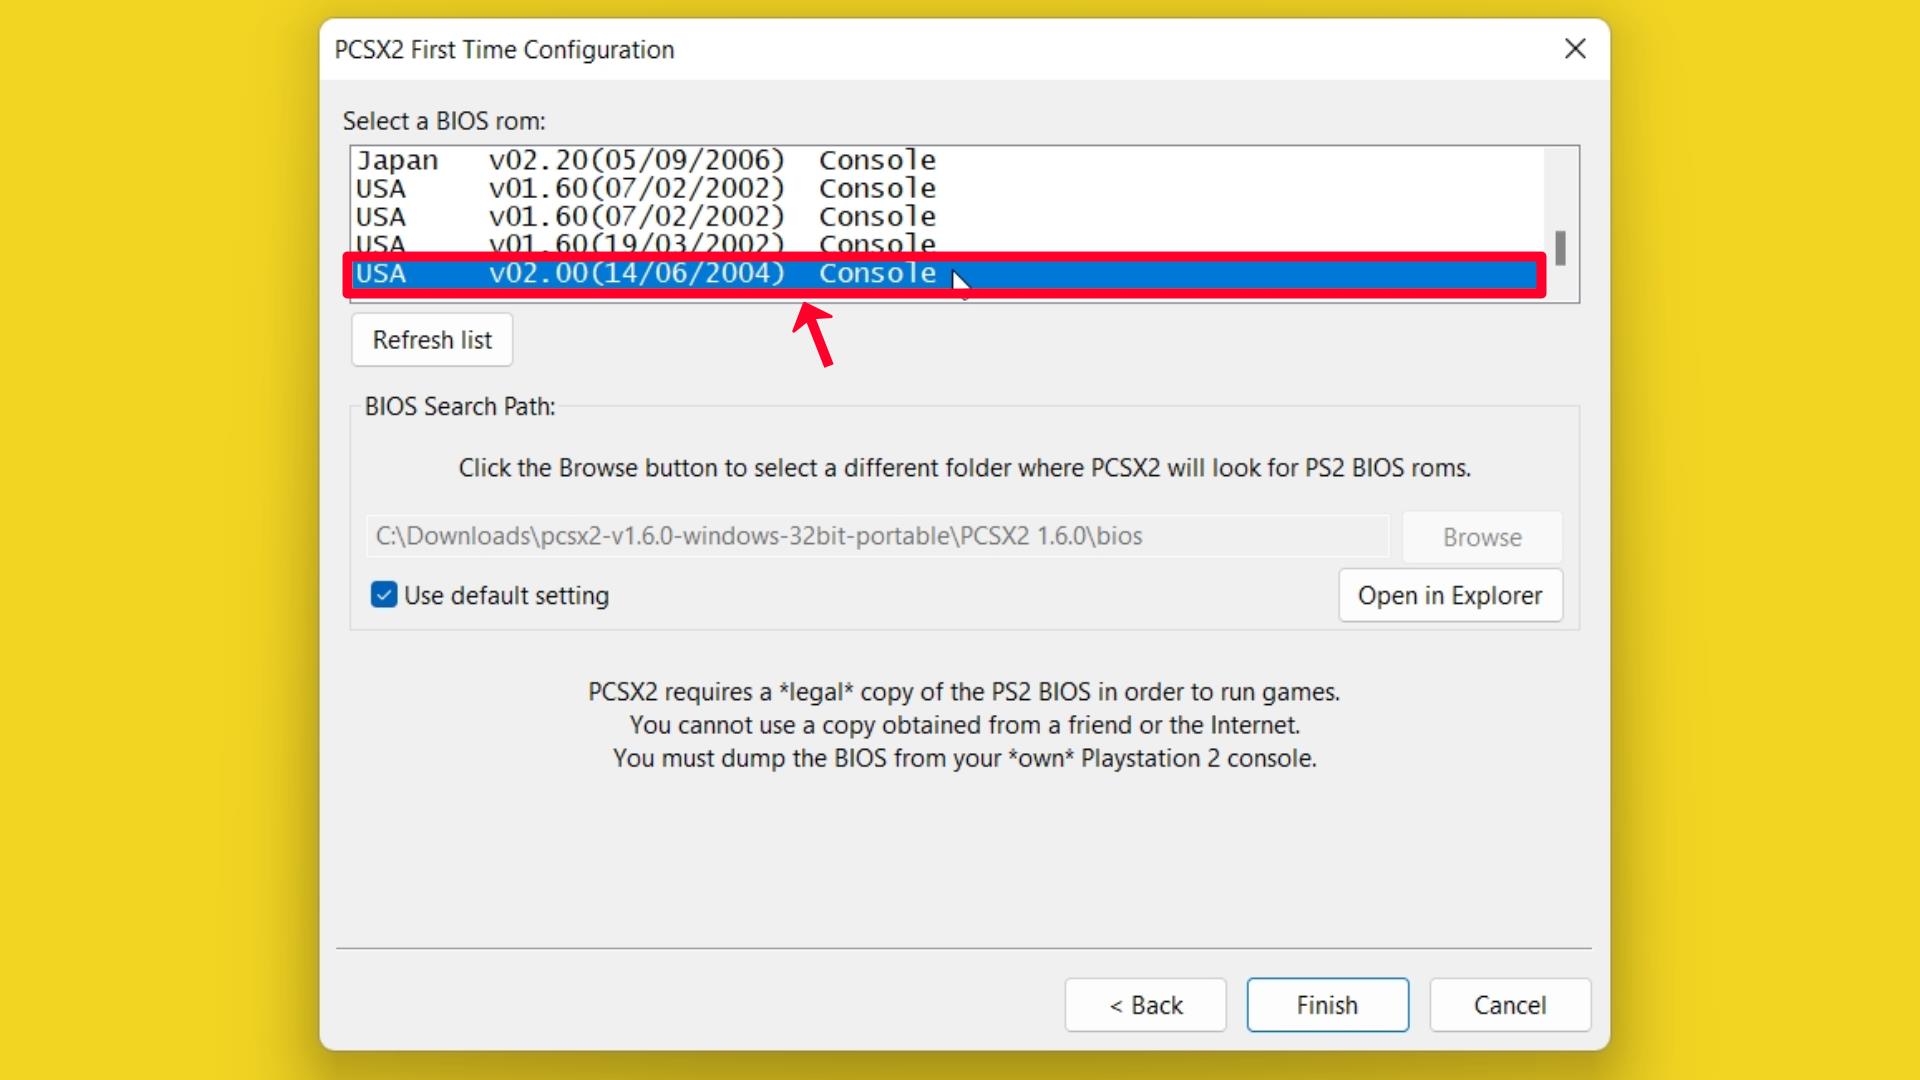
- BIOS rom → USA – v02.00(14/06/2004) Console.
Step 6 – Click on the Finish button.
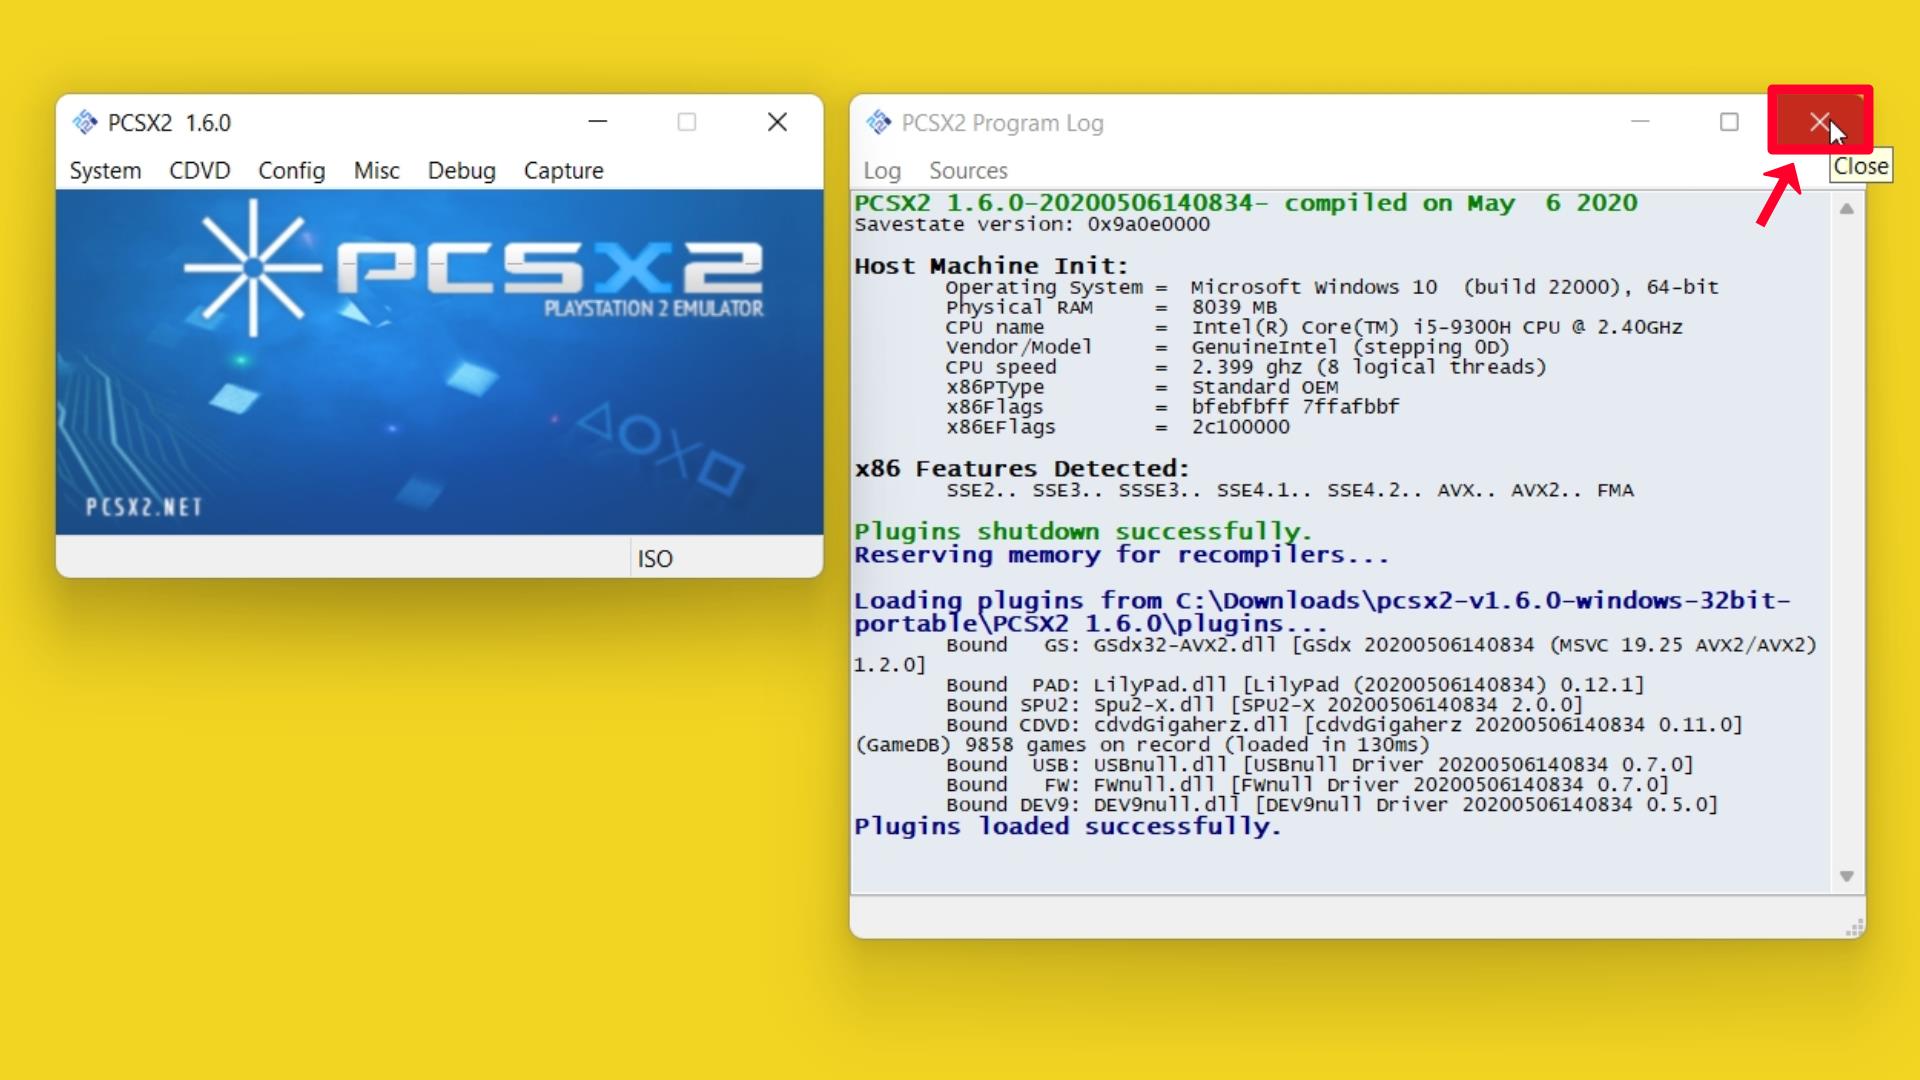
Step 7 – Close PCSX2 Program Log.
How To Setup PCSX2
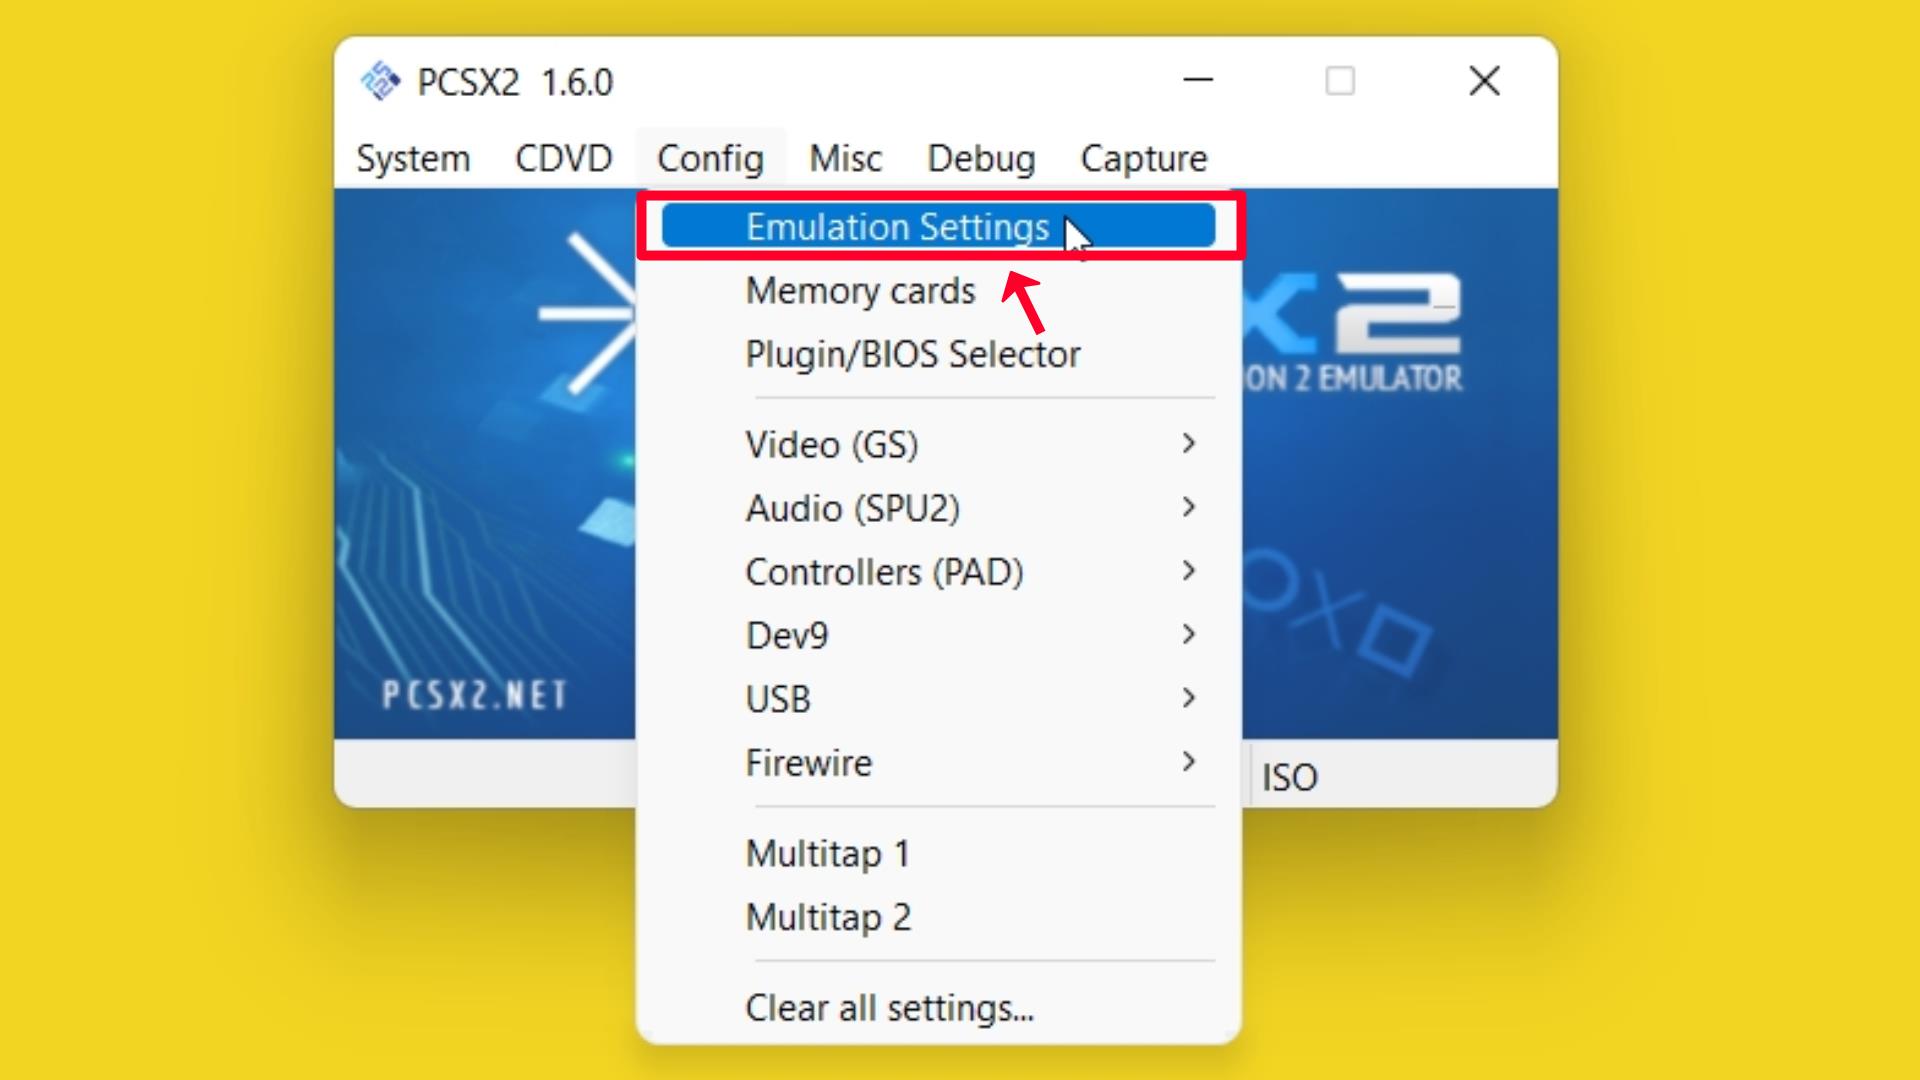
Once the installation is complete, launch the PCSX2 emulator and click on the “Config” button in the main window.
Configuration
Step 1 – Go to the Config option and click on Emulation Settings.
Emulation Settings
Step 2 – Use Preset → Safe (Default) option (Recommended).
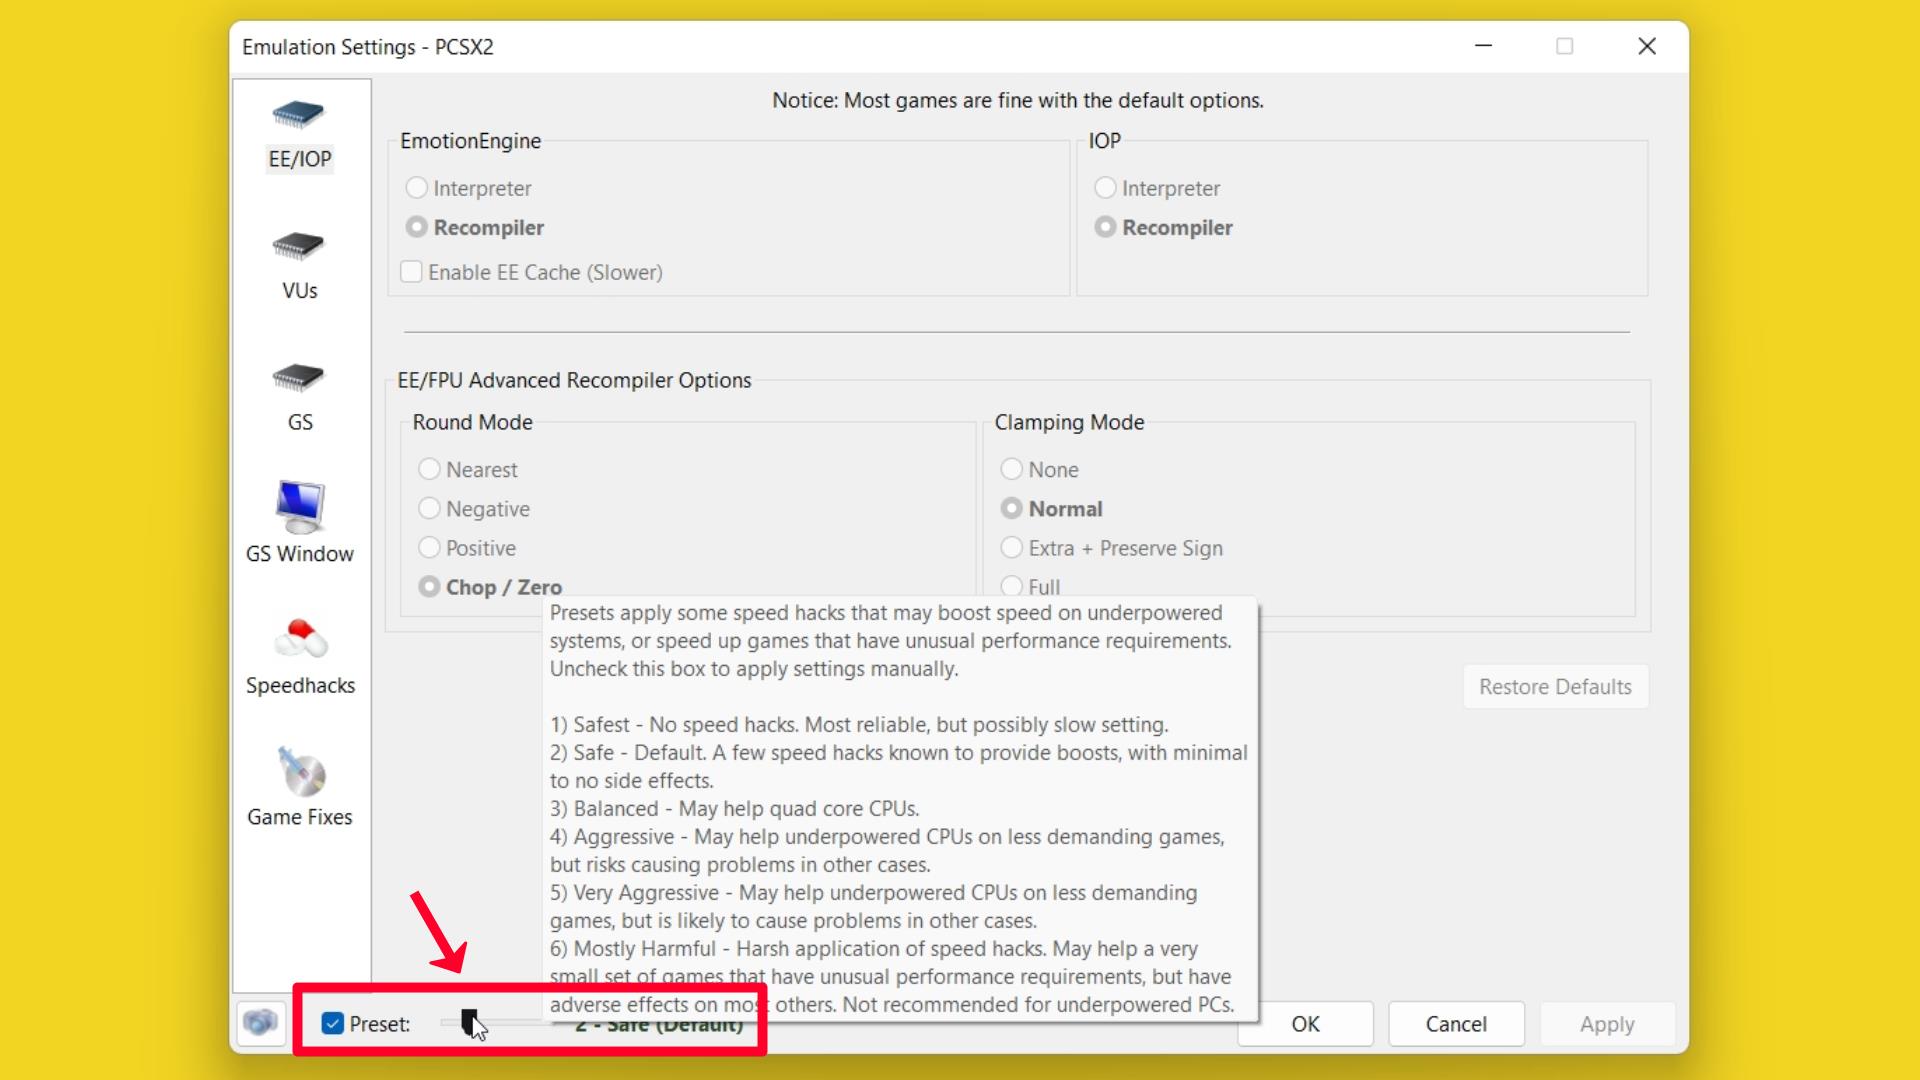
- Presets apply some speed hacks that may boost speed on underpowered
systems, or speed up games that have unusual performance requirements.
Uncheck this box to apply settings manually.
- Safest – No speed hacks. Most reliable, but possibly slow setting.
- Safe – Default. A few speed hacks are known to provide boosts, with minimal
to no side effects.☑ - Balanced – This may help quad-core CPUs.
- Aggressive – May help underpowered CPUs on less demanding games,
but risks causing problems in other cases. - Very Aggressive – May help underpowered CPUs on less demanding
games, but is likely to cause problems in other cases. - Mostly Harmful – Harsh application of speed hacks. May help a very
small set of games that have unusual performance requirements, but have
adverse effects on most others. Not recommended for underpowered PCs.
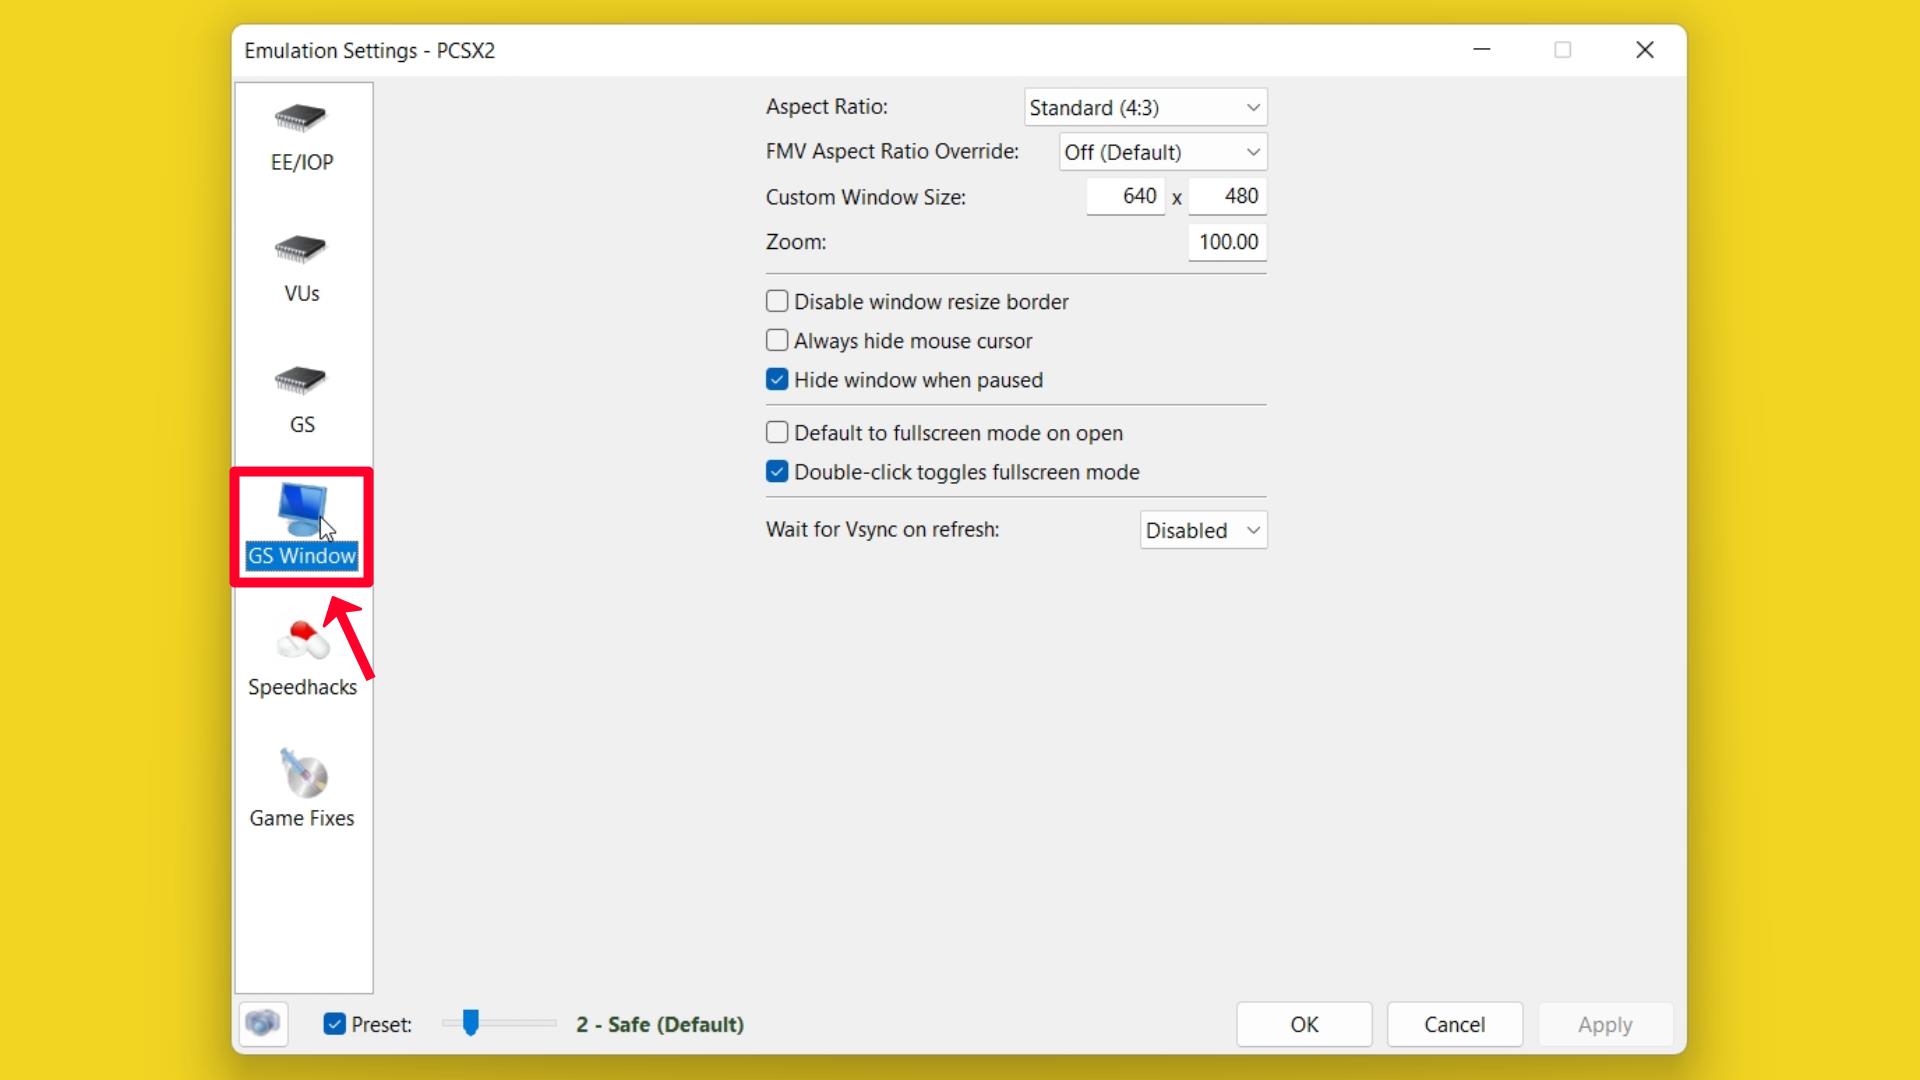
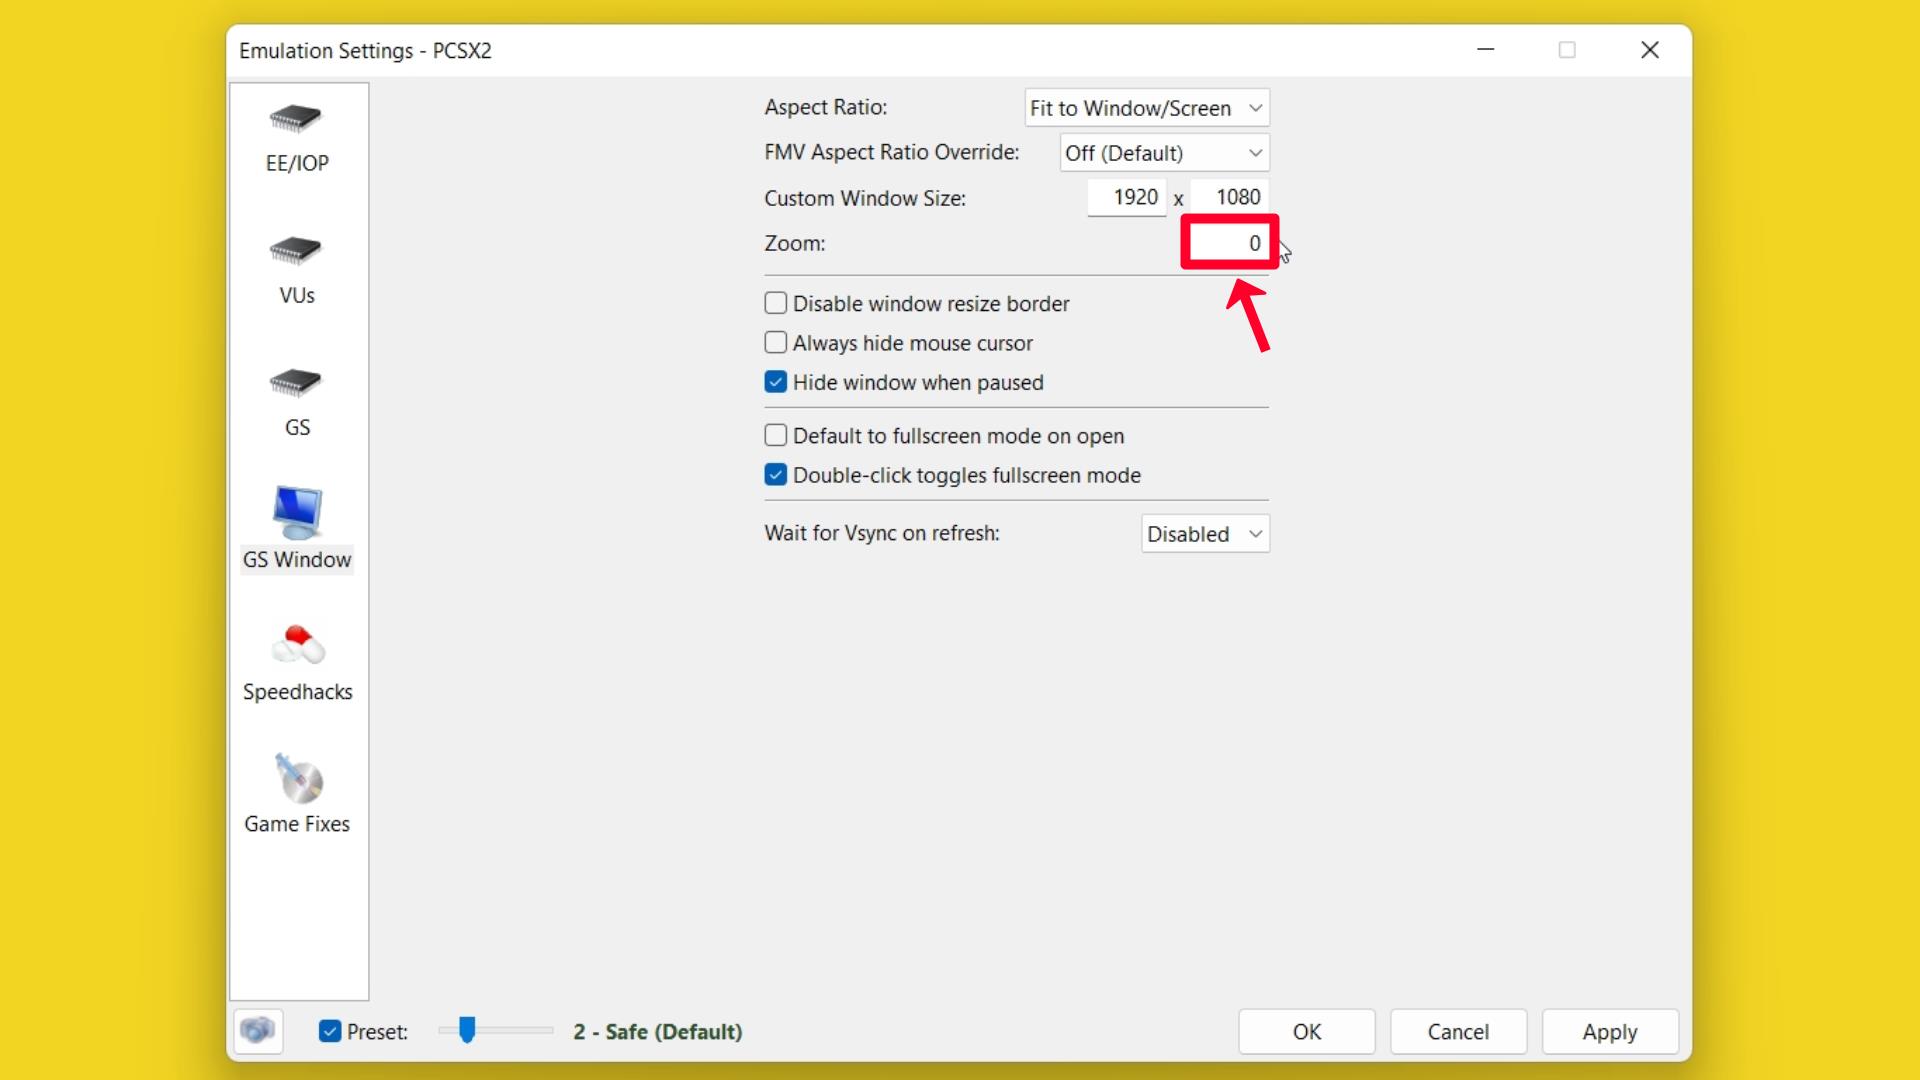
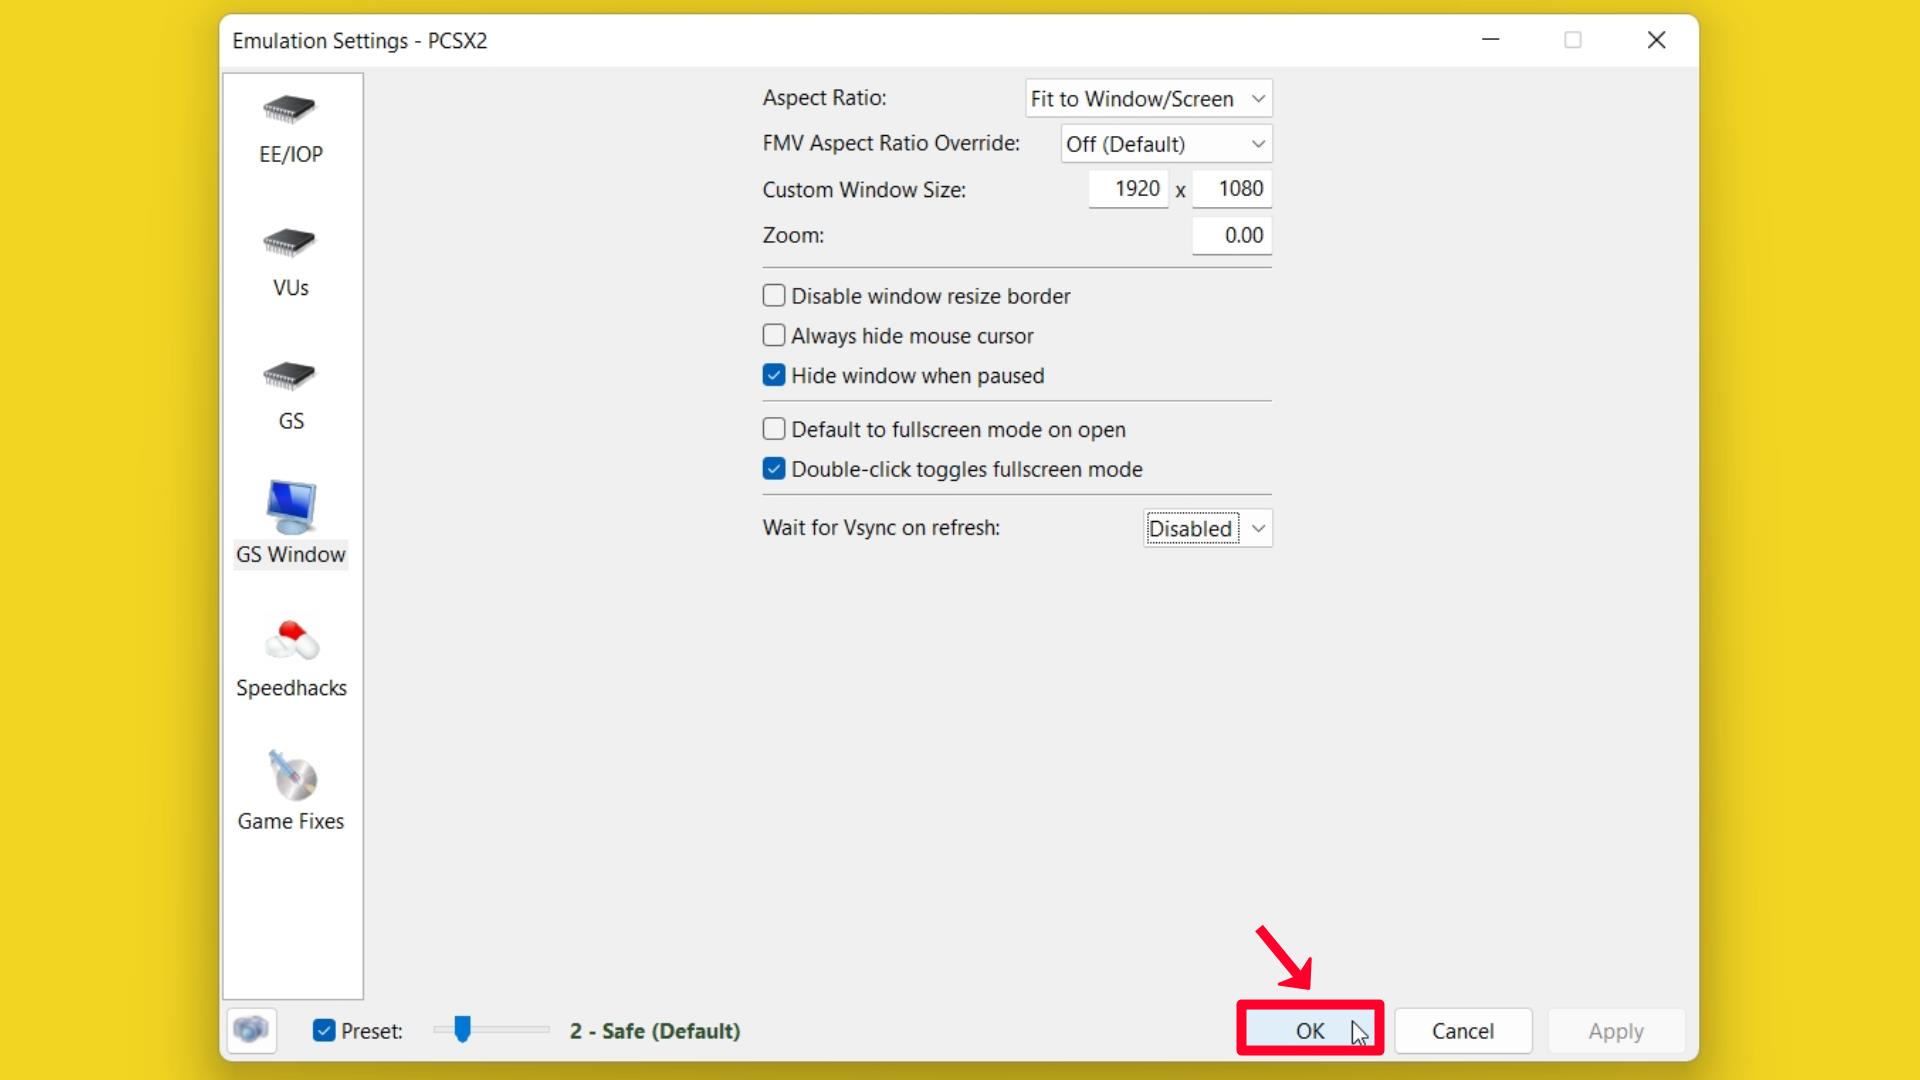
Step 3 – Click on the GS Window setting.
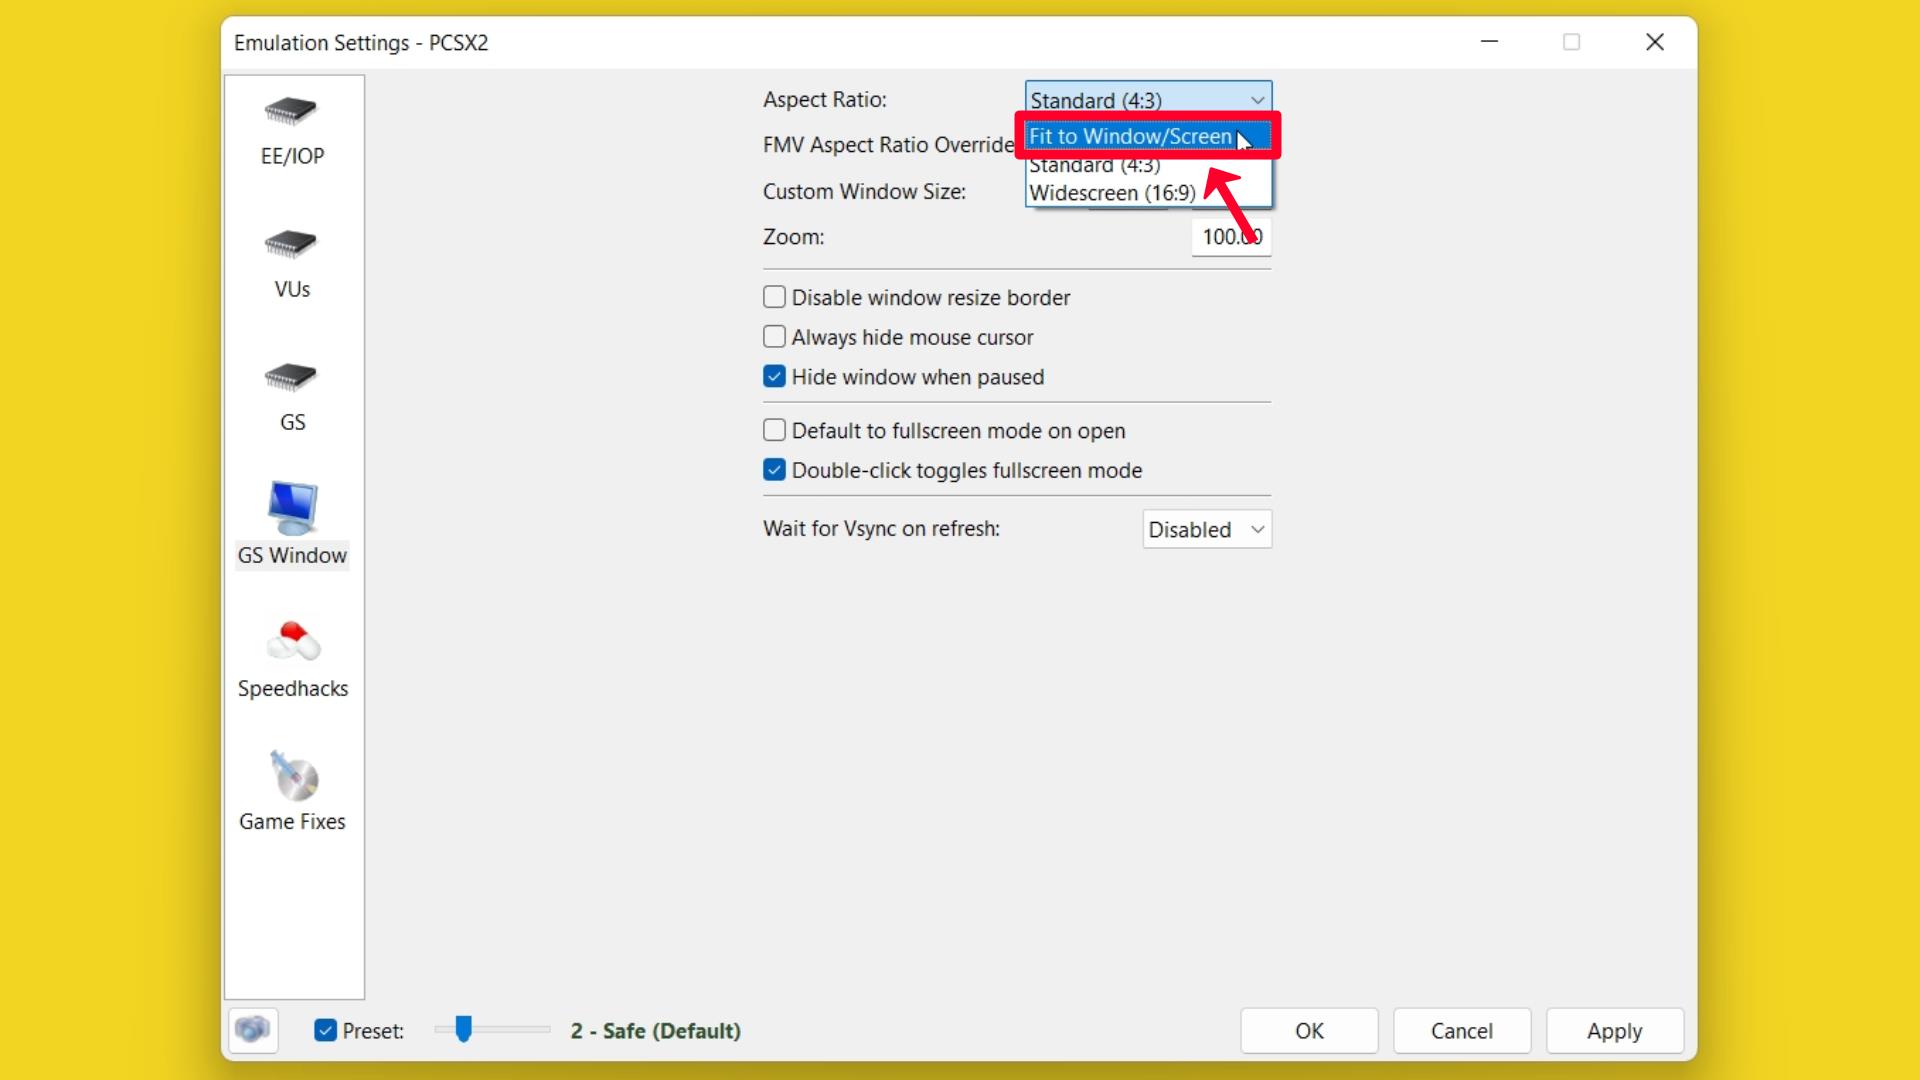
Step 4 – Select Aspect Ratio: Fit to Window/Screen (Recommended).
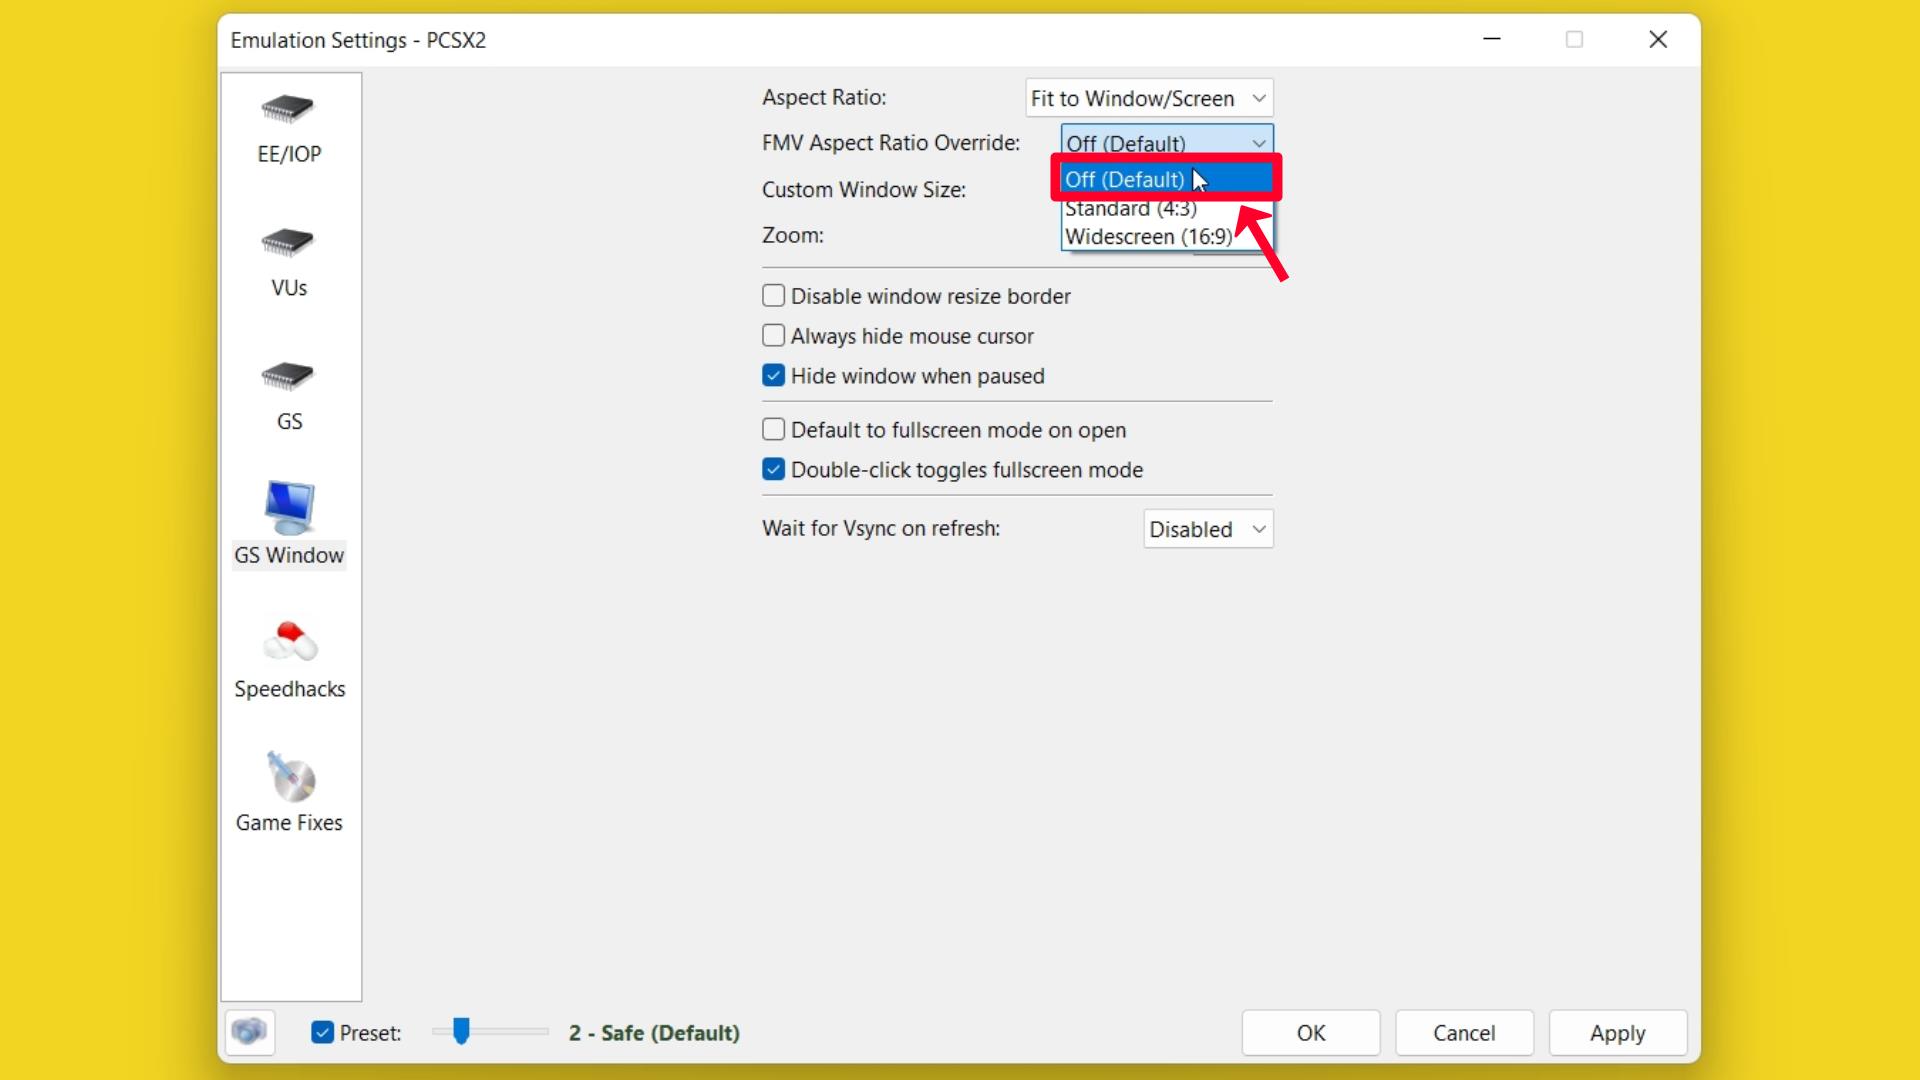
Step 5 – Select FMV Aspect Ratio Override: Off (Default) option (Recommended).
Step 6 – Enter your PC Window Screen Size on Custom Window Size.
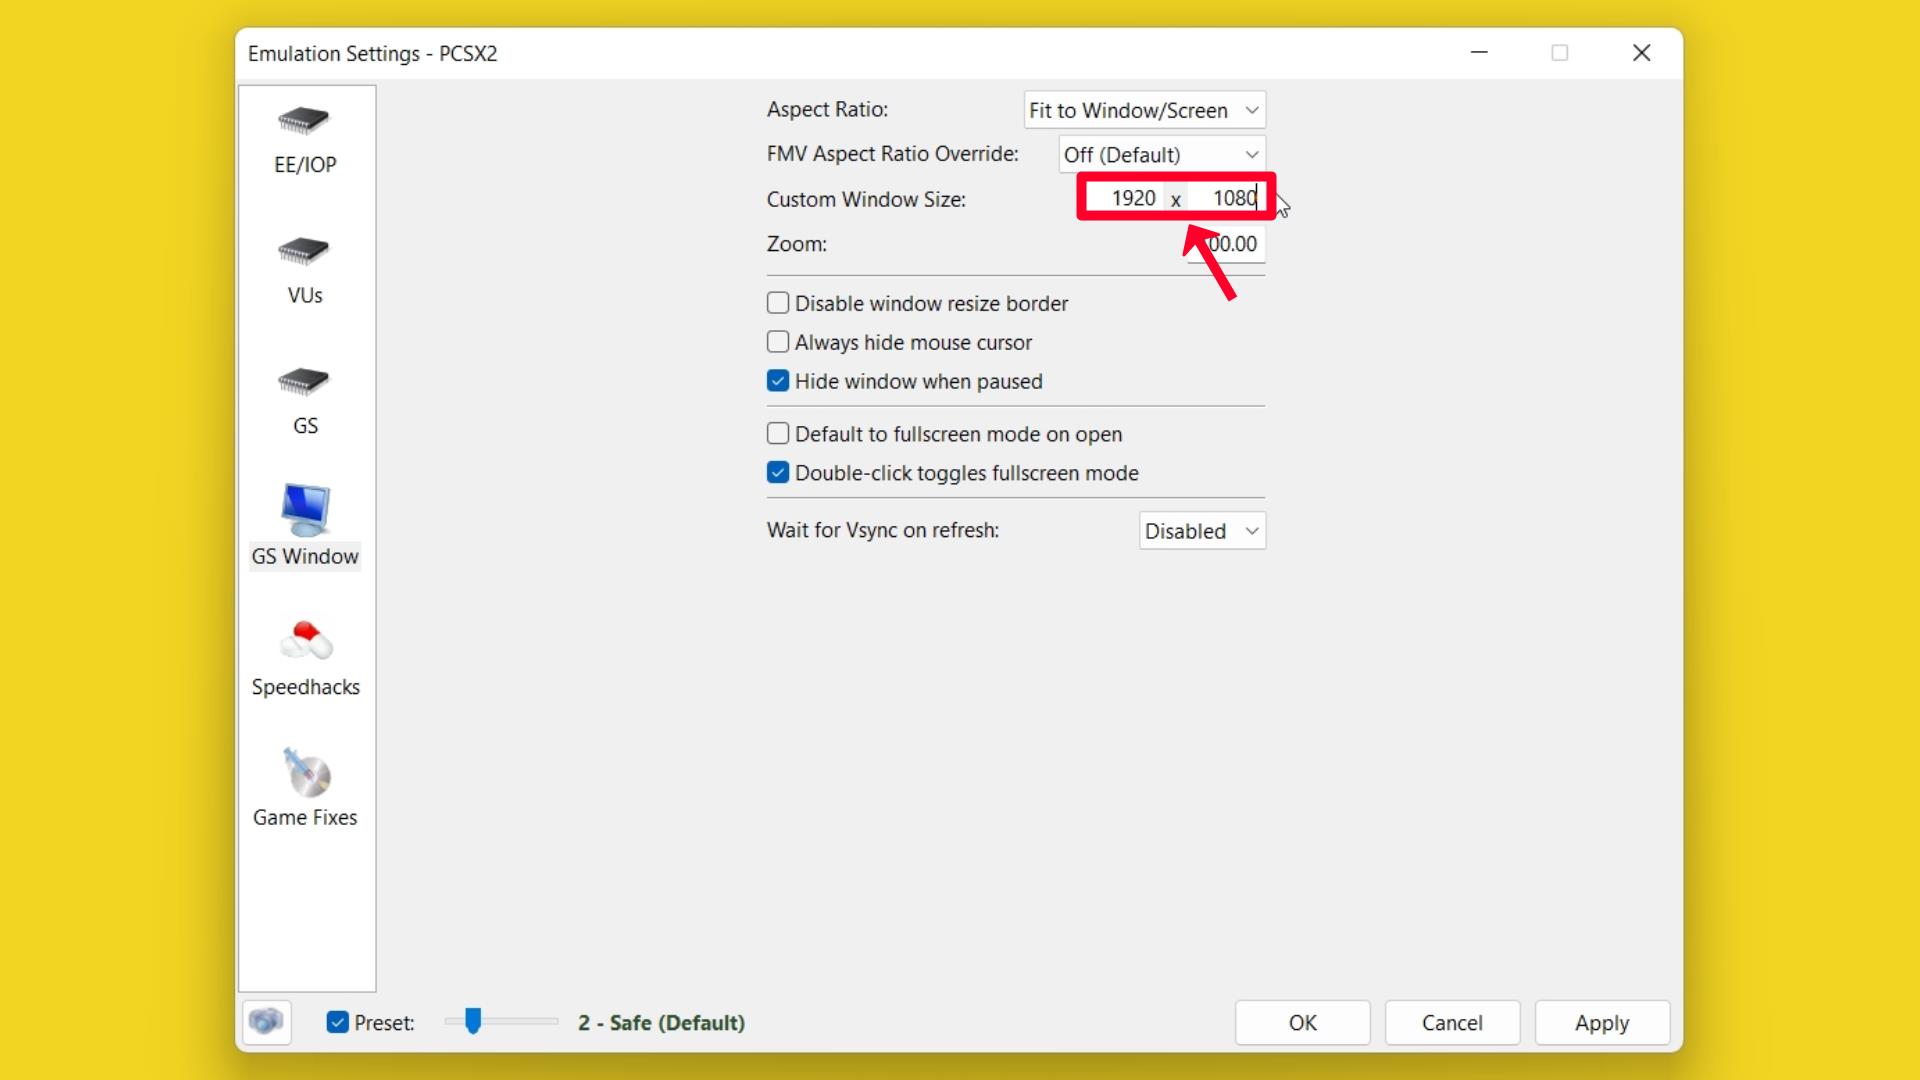
Step 7 – Enter Zoom: 0 (Recommended).
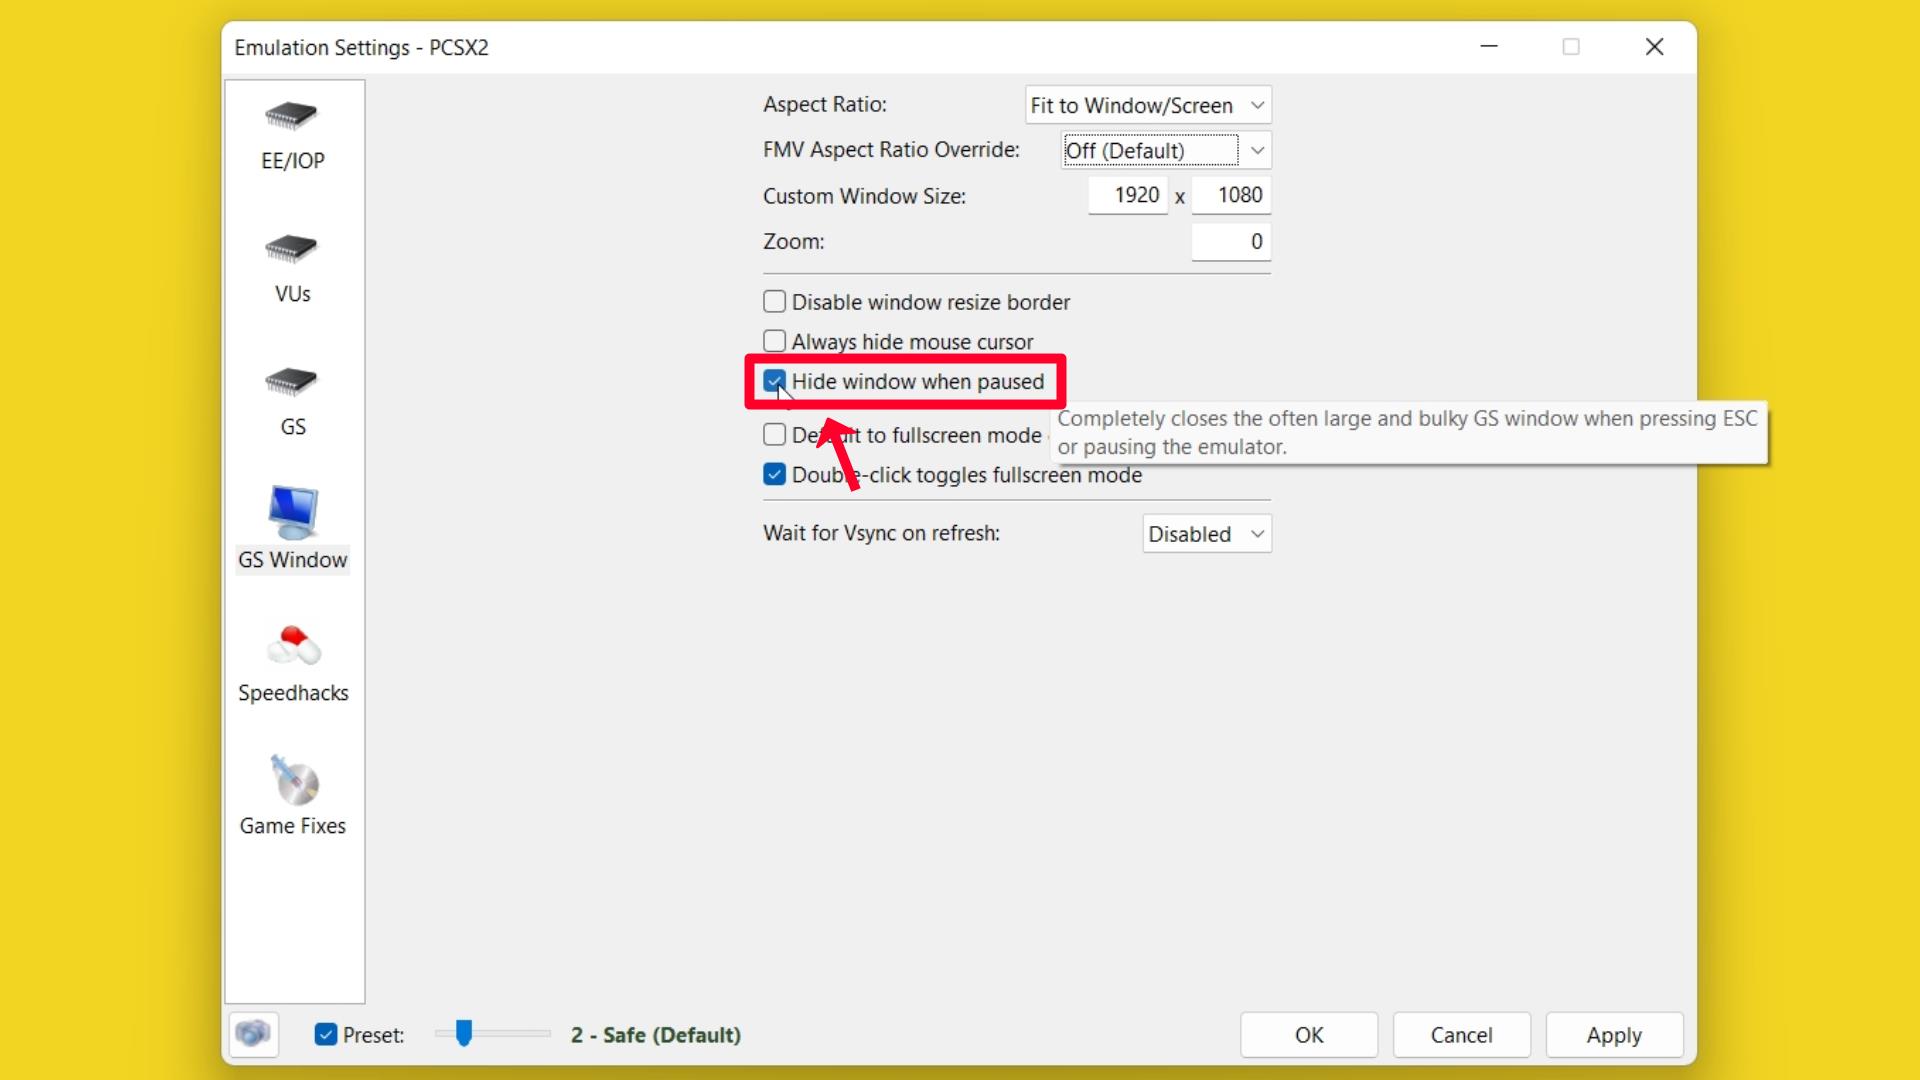
Step 8 – ☑ [Check Mark] Hide window when paused option (Recommended).
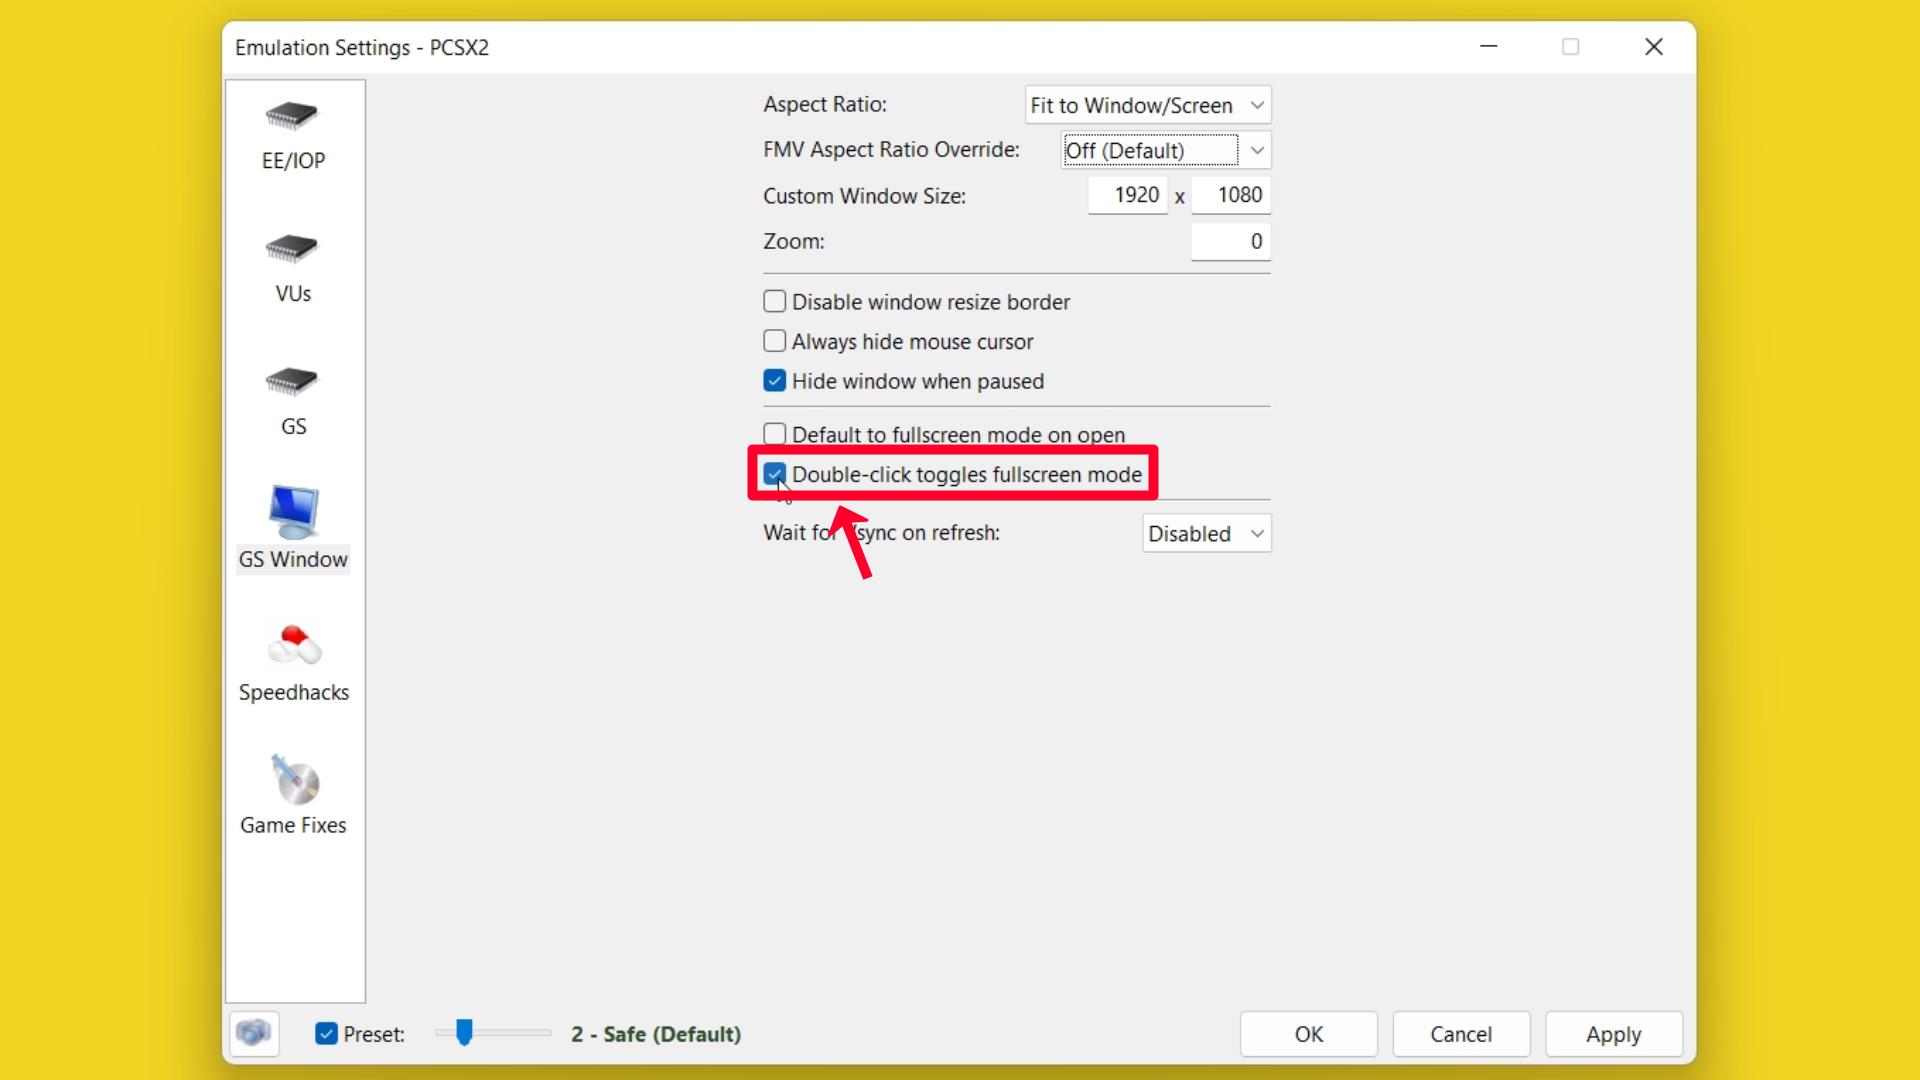
Step 9 – ☑ [Check Mark] Double-click toggle fullscreen mode option (Recommended).
Step 10 – Click on the Apply button.
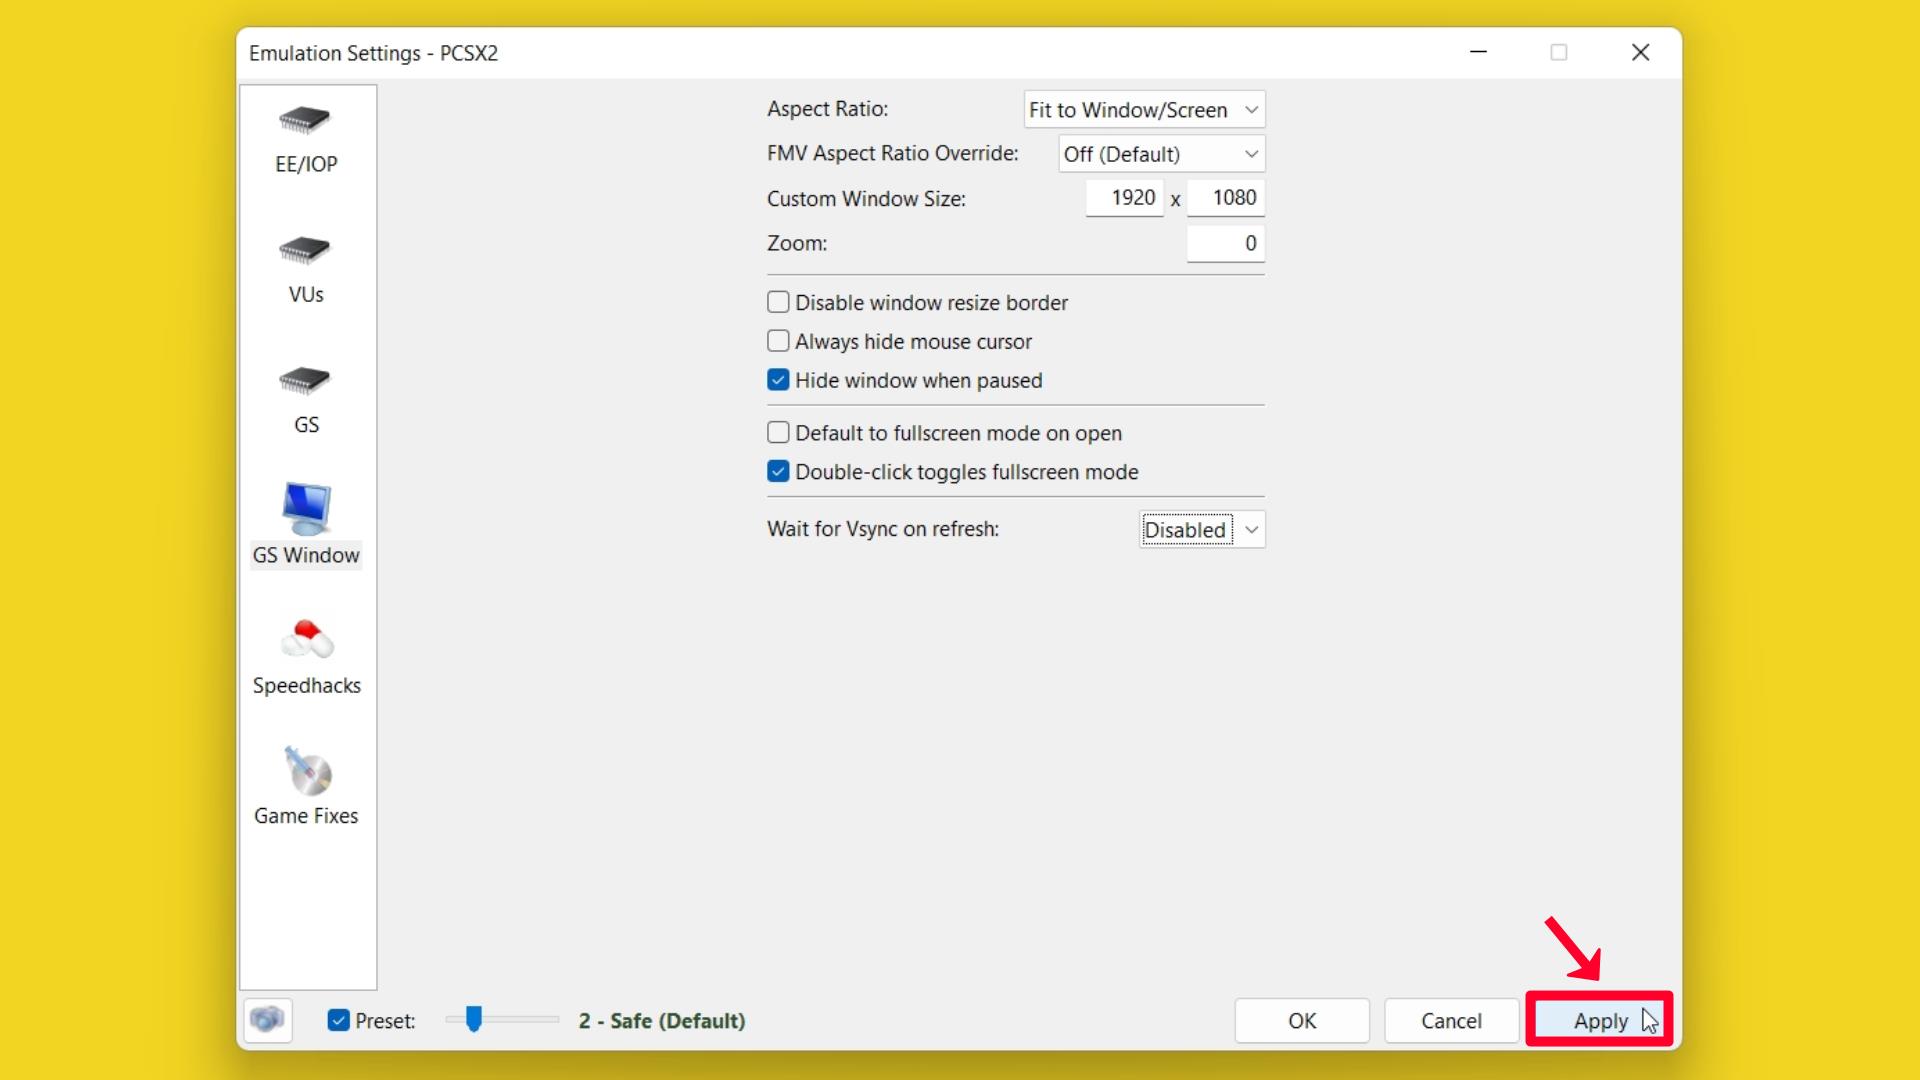
Step 11 – Click on the OK button.
Memory Cards
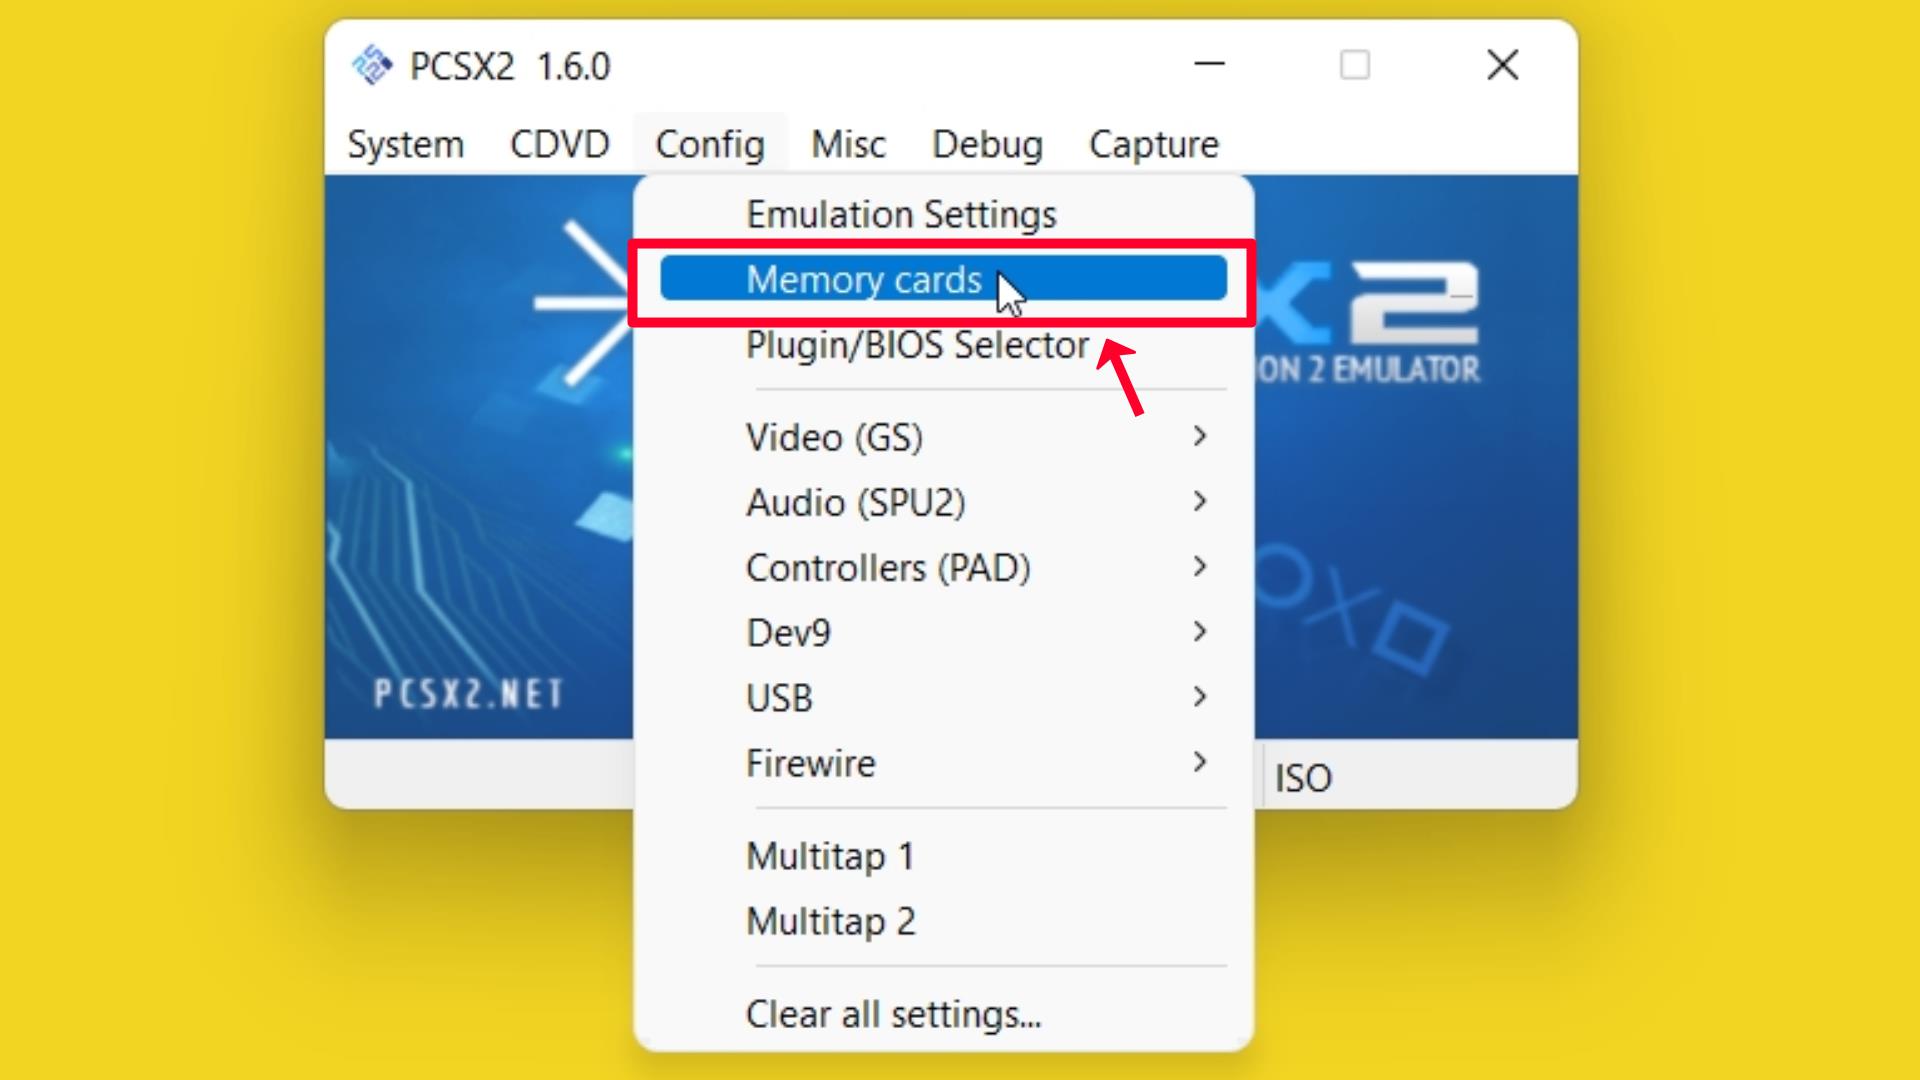
Step 1 – Go to Config and click on the Memory cards option.
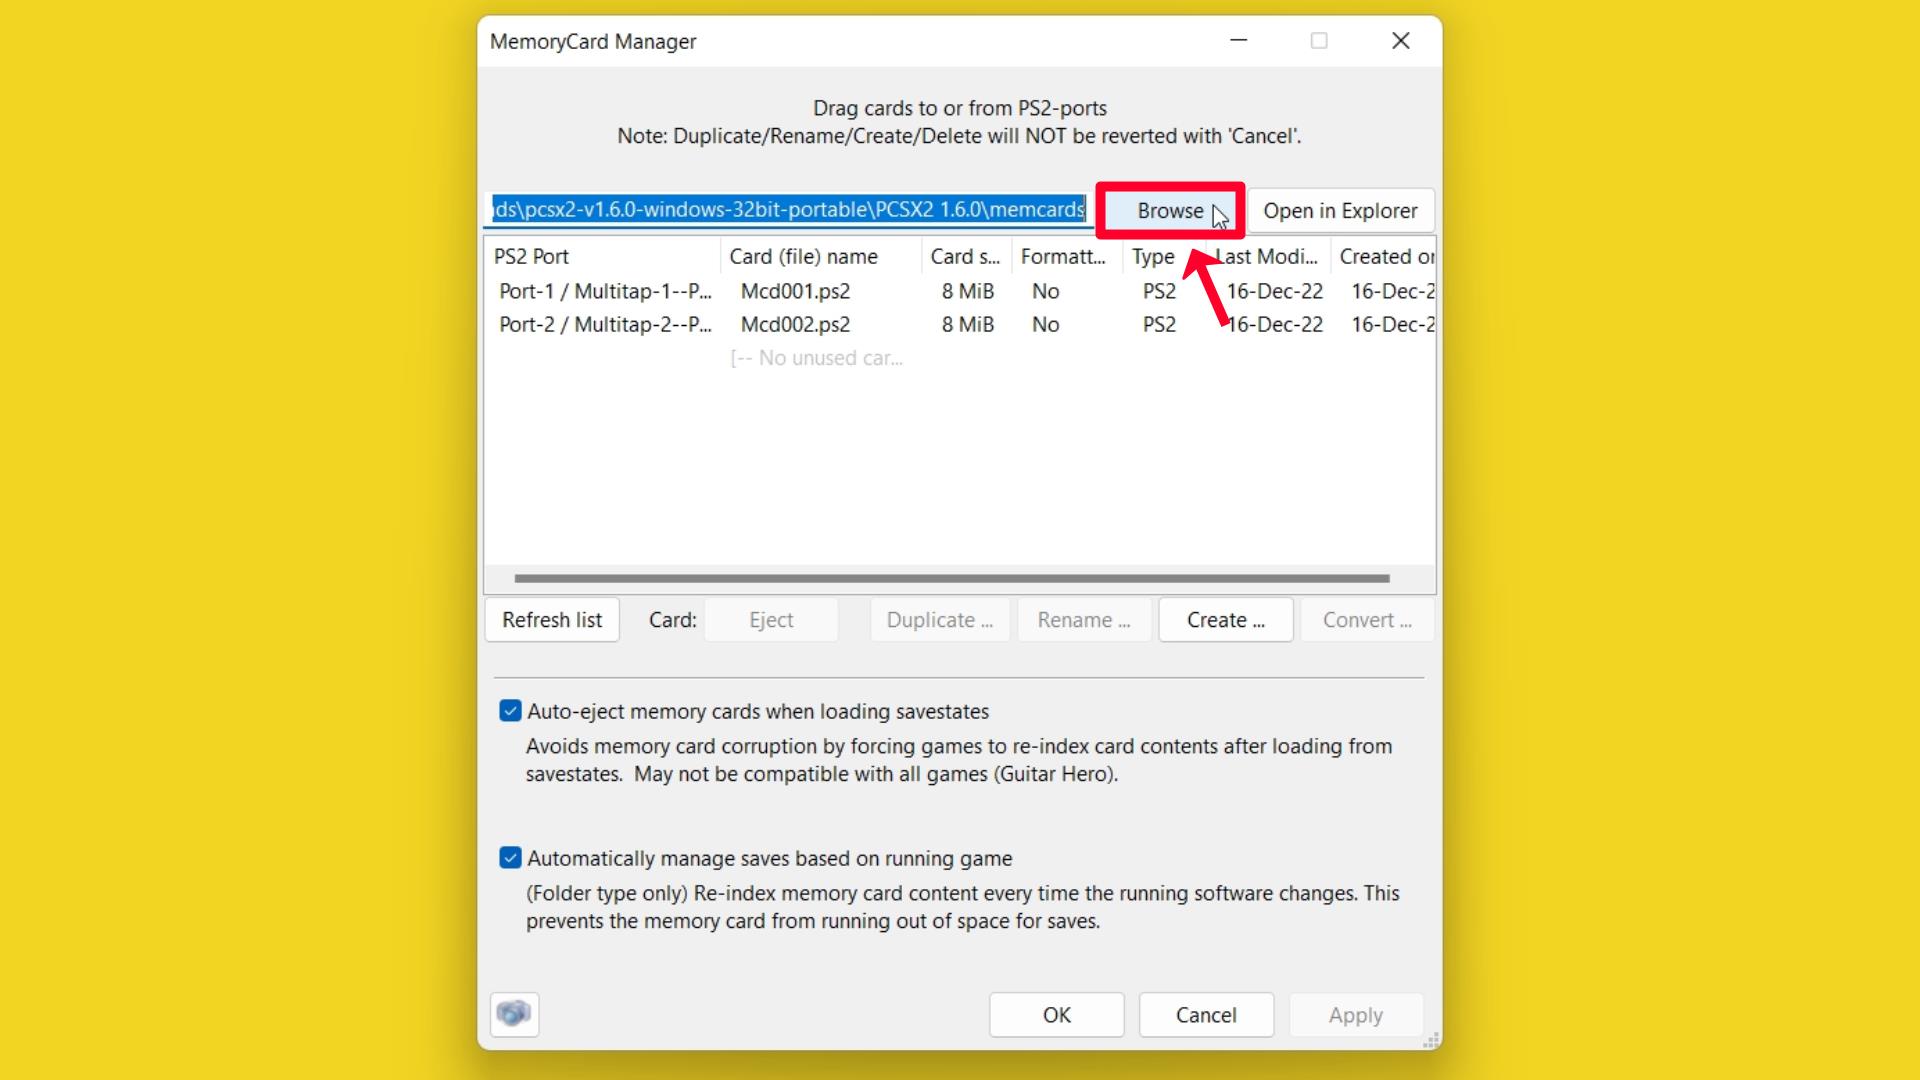
MemoryCard Manager
Step 2 – If your PCSX2 emulator does not detect any Memory Card file, you need to Browse and select and PCSX2 Memory card folder which contains Mcd001.ps2 and Mcd002.ps2 files.
Step 3 – ☑ [Check Mark] Auto-eject memory cards when loading savestates option (Recommended).
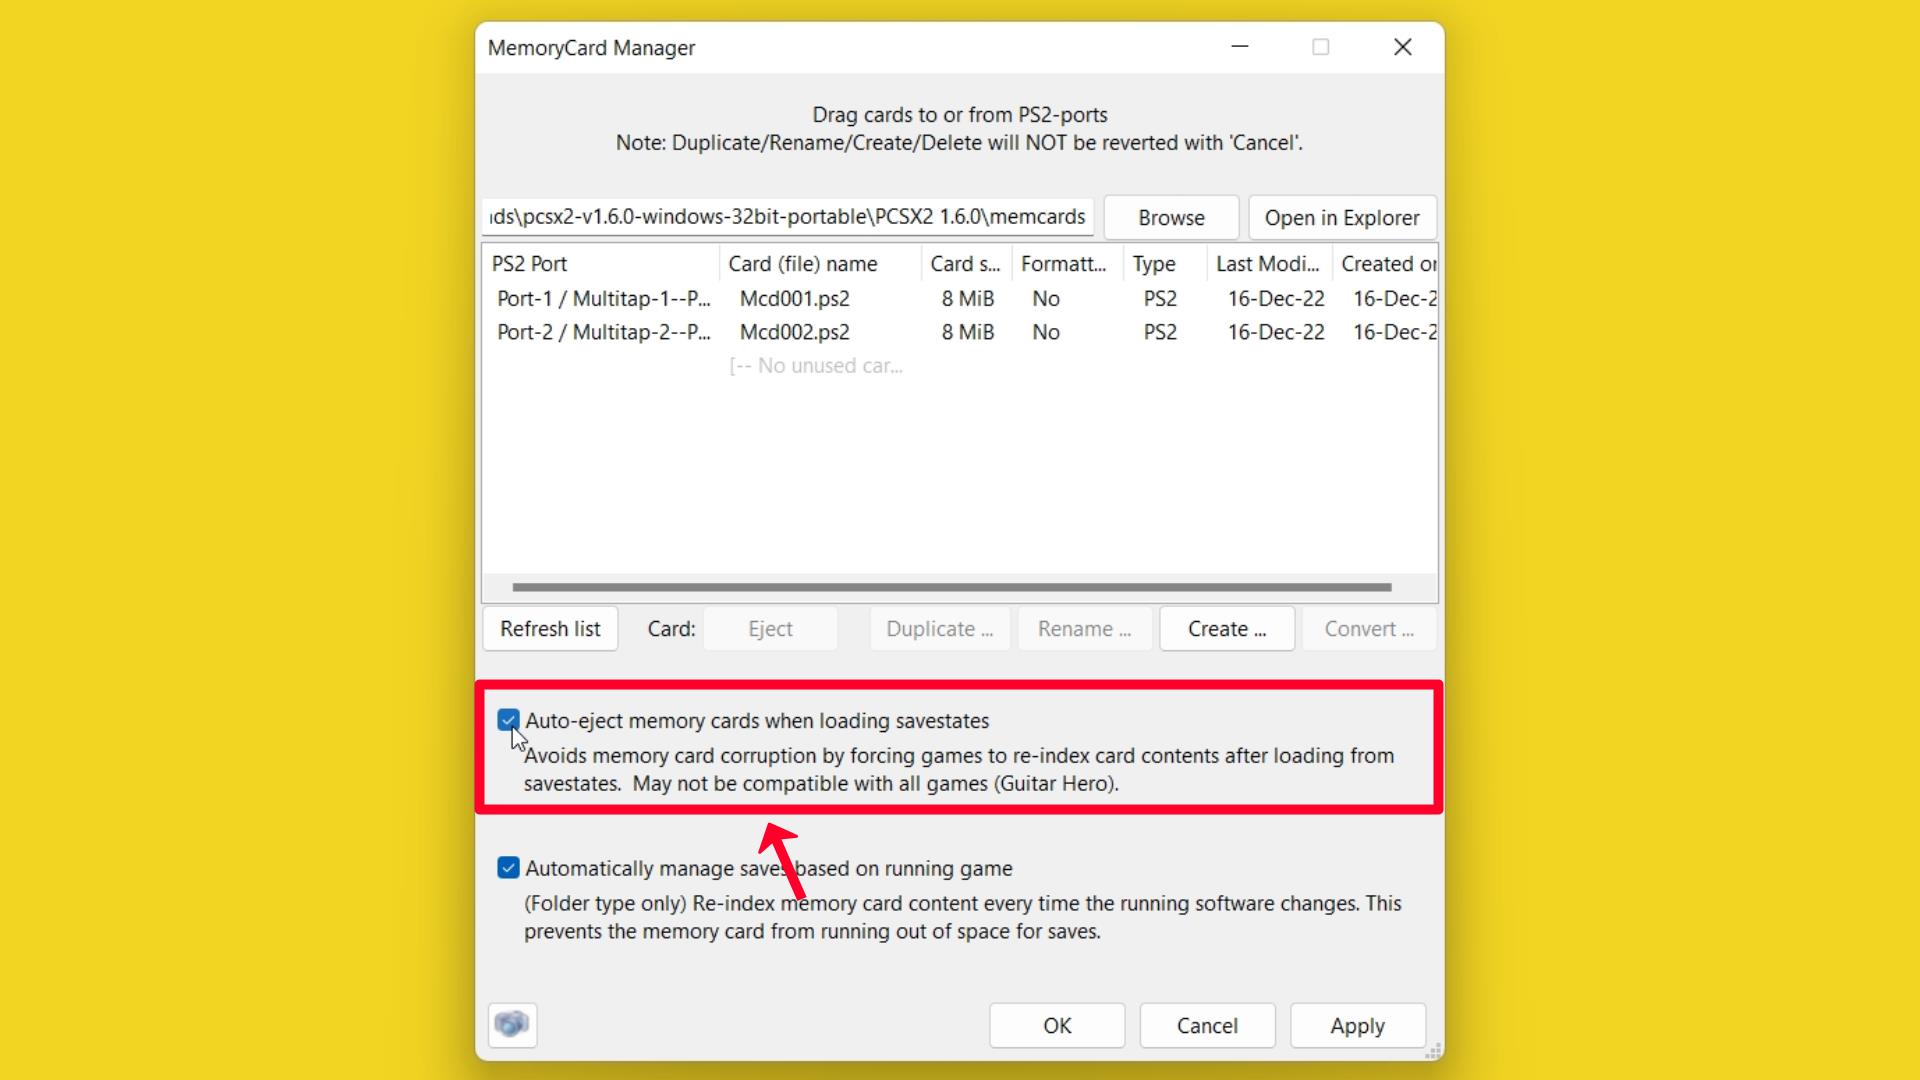
- Forces games to re-index card contents after loading from savestates, preventing memory card corruption. It’s possible that it won’t work with all games (Guitar Hero).
Step 4 – ☑ [Check Mark] Automatically manage saves based on the running game (Recommended).
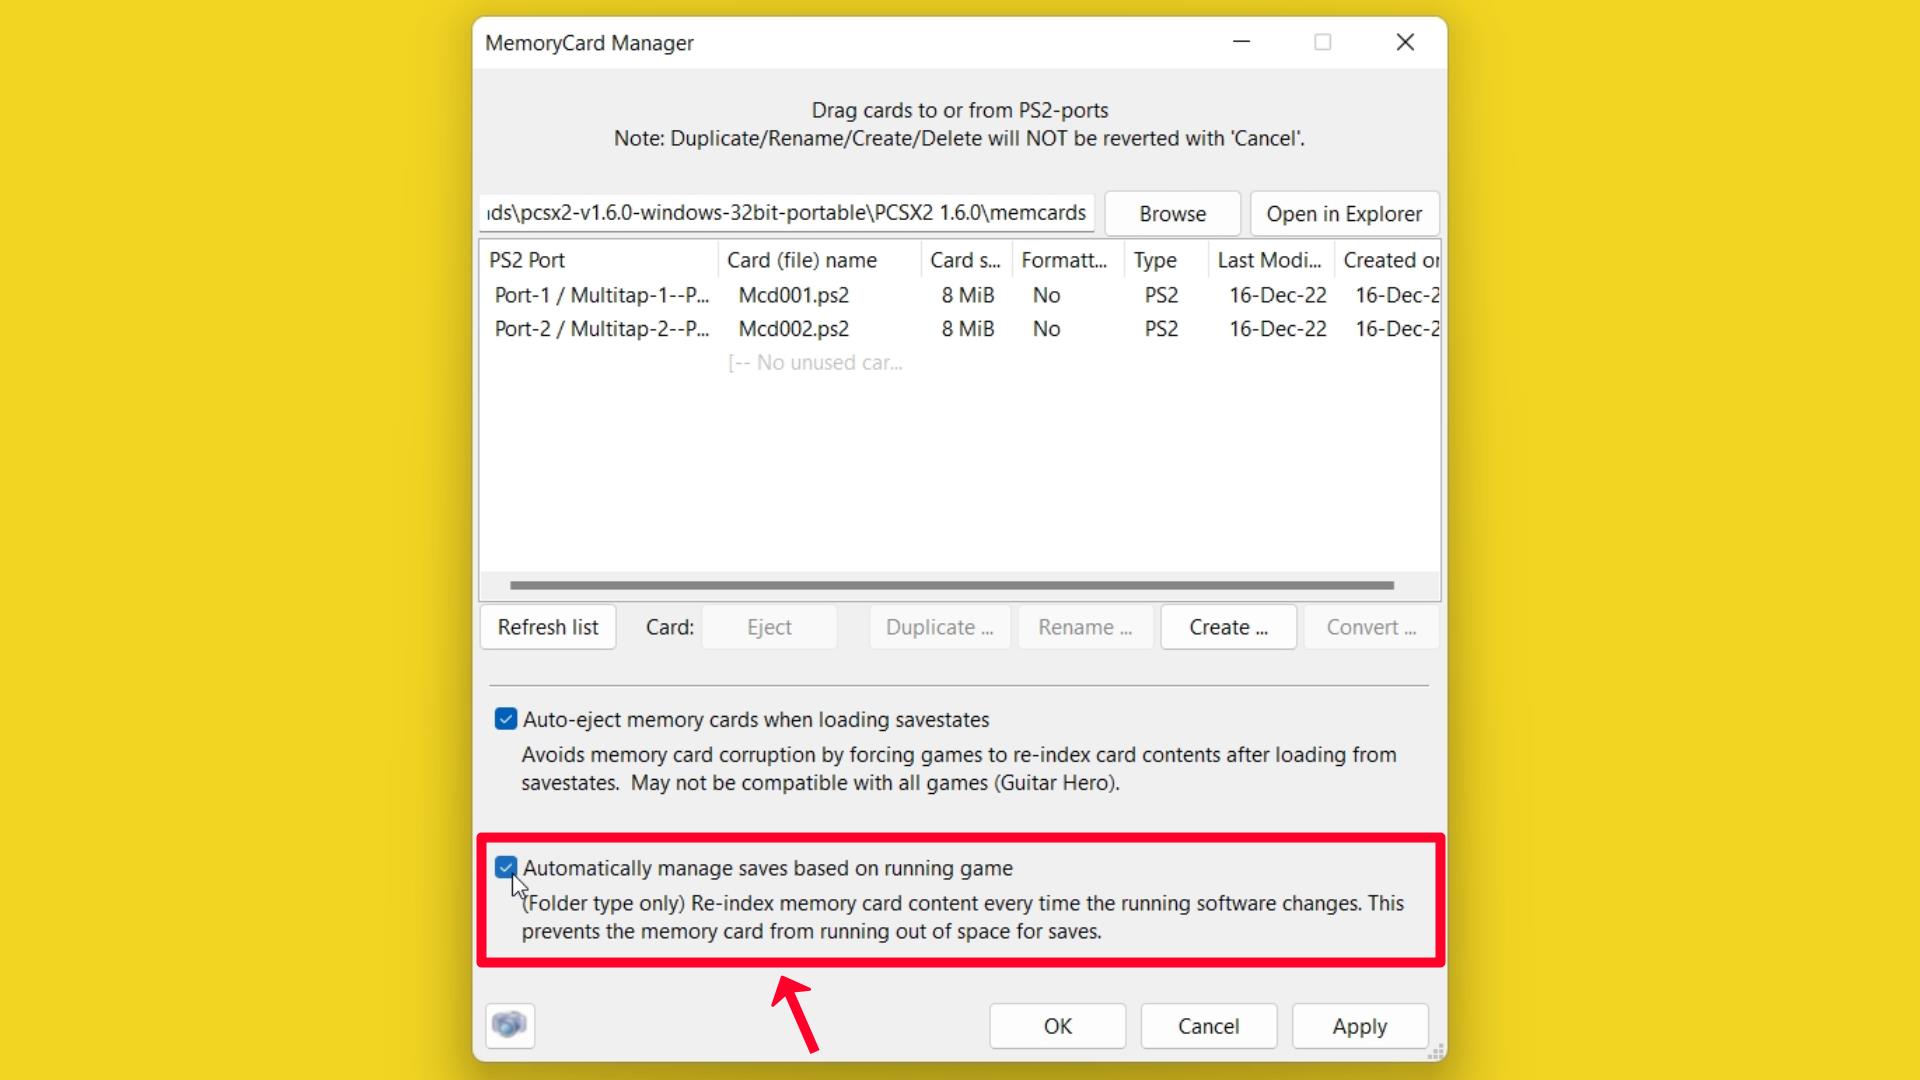
- Re-index the content of the memory card each time the running software changes (only for the folder type). The memory card will not run out of space for saves as a result of this.
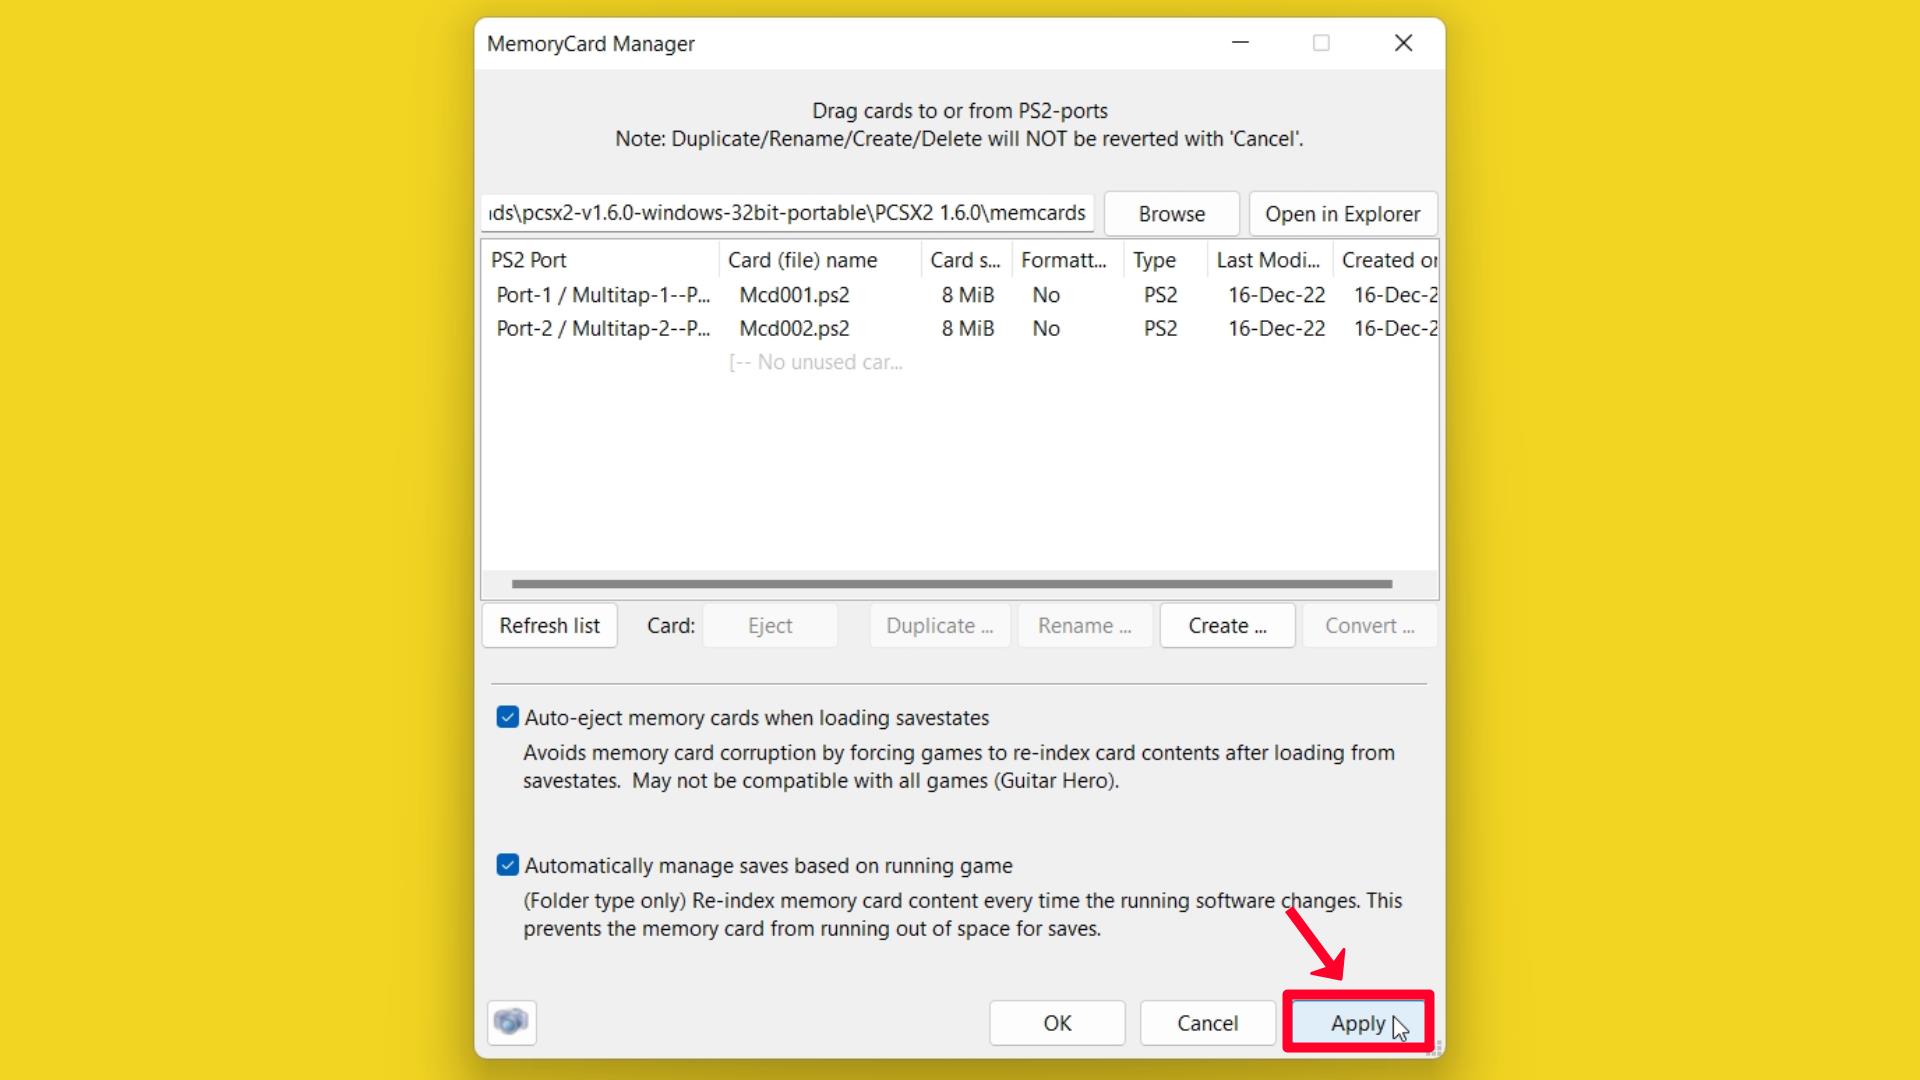
Step 5 – Click on the Apply button.
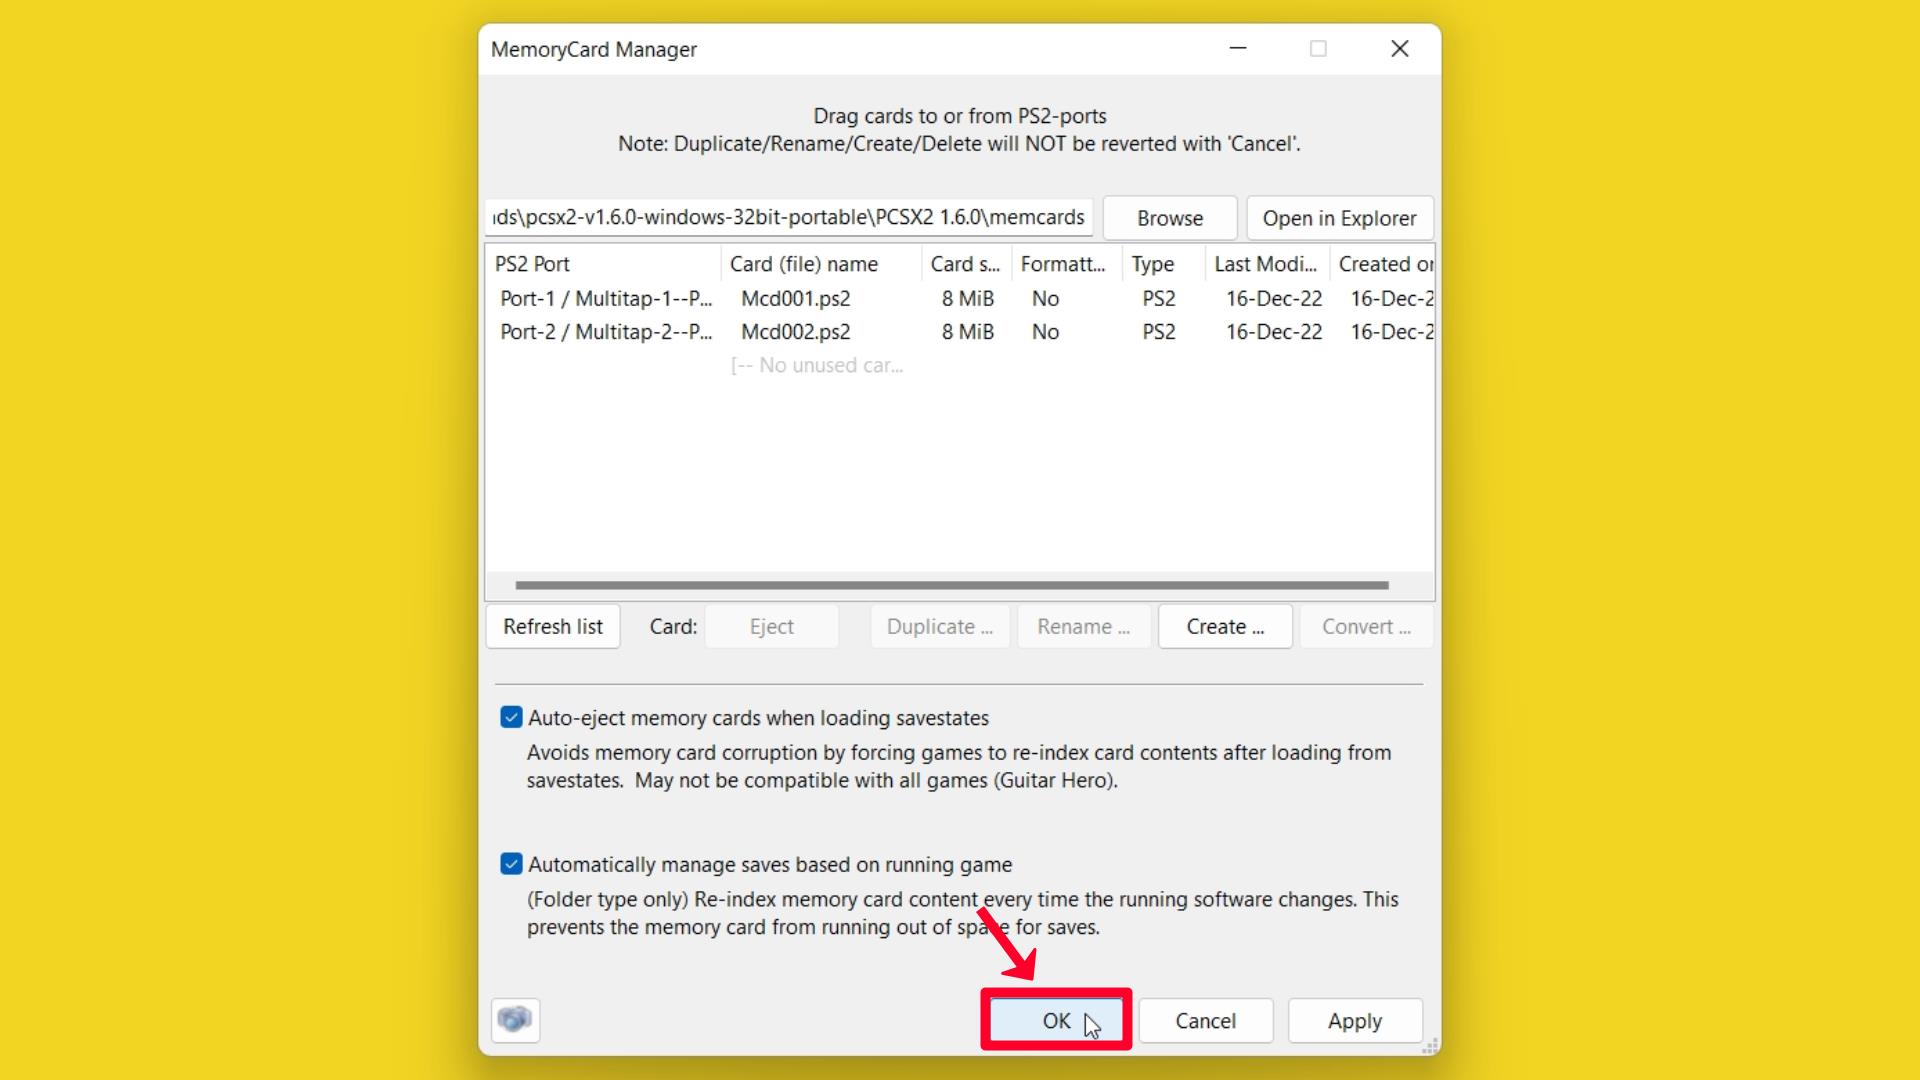
Step 6 – Click on the OK button.
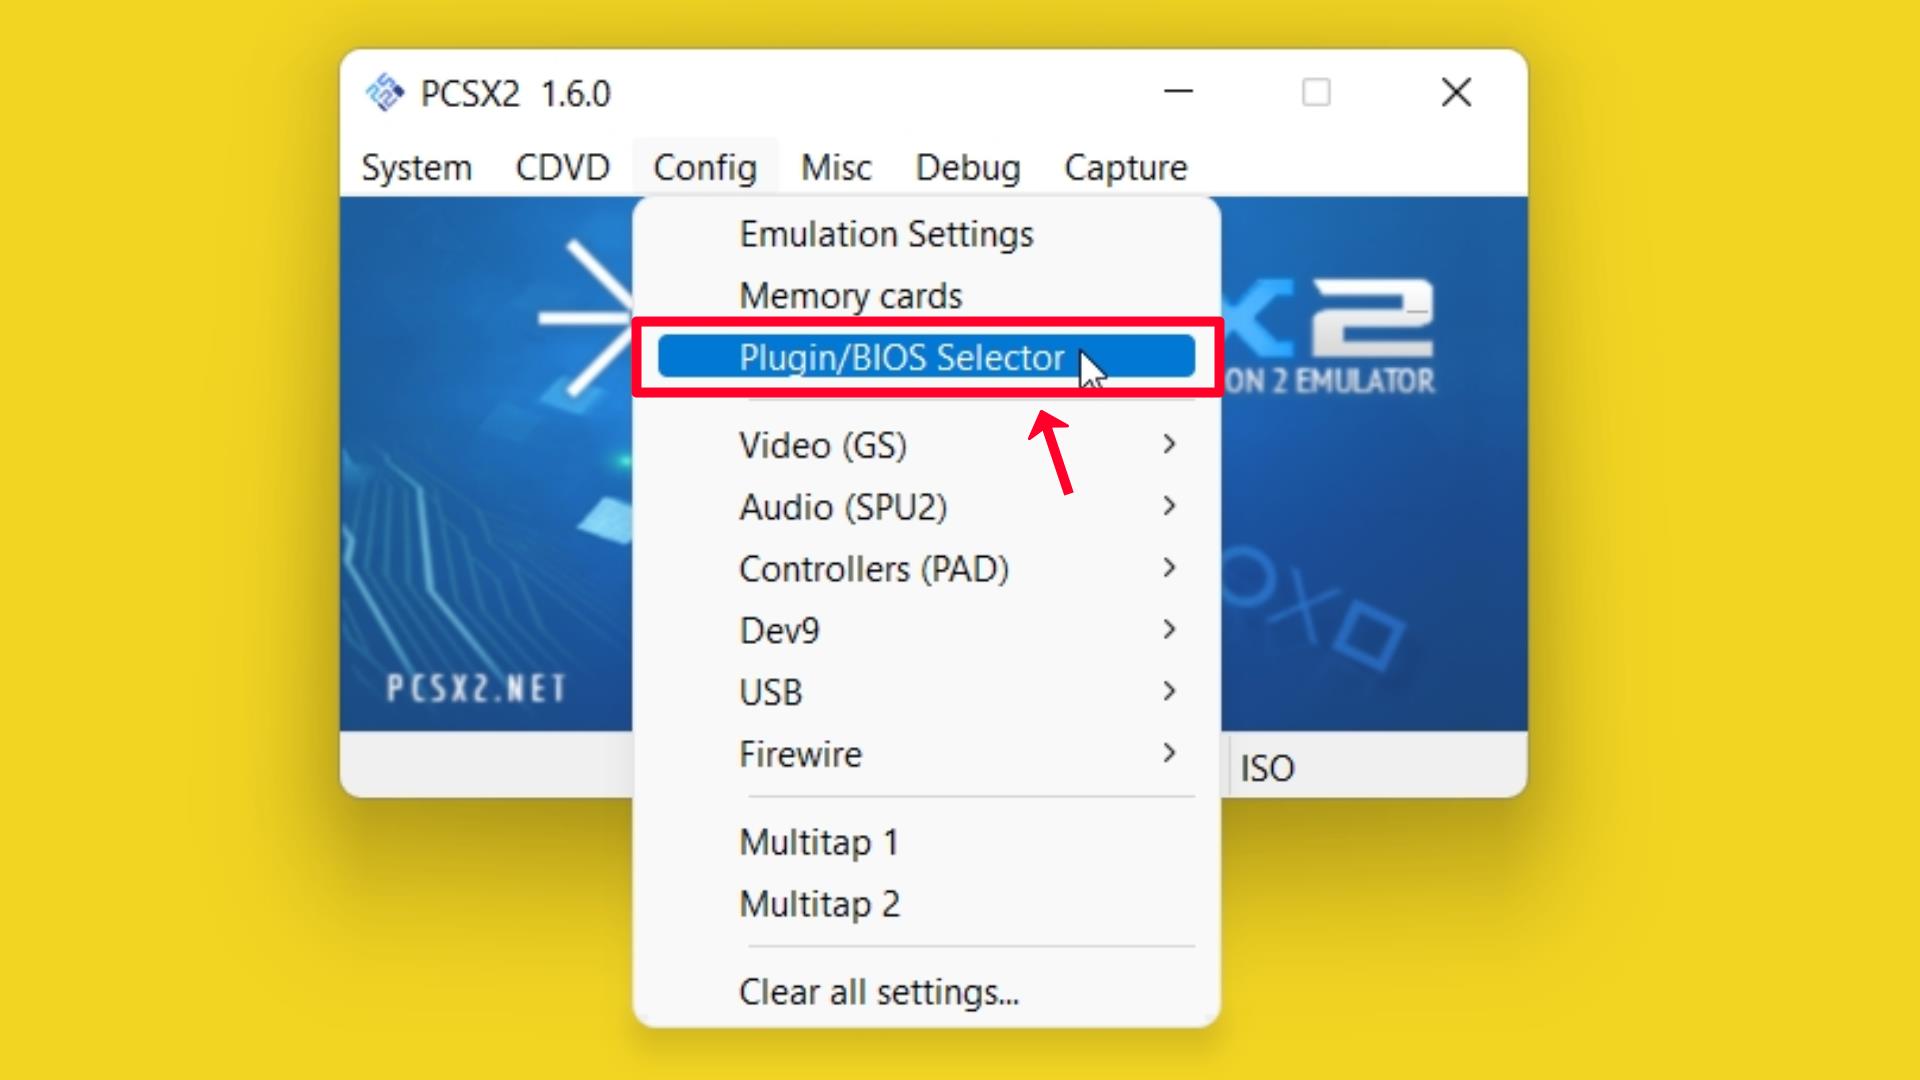
Plugin/BIOS Selector Settings
Step 1 – Open Plugin/BIOS Selector settings.
Components Selectors
Step 2 – Click on Folders Setting.
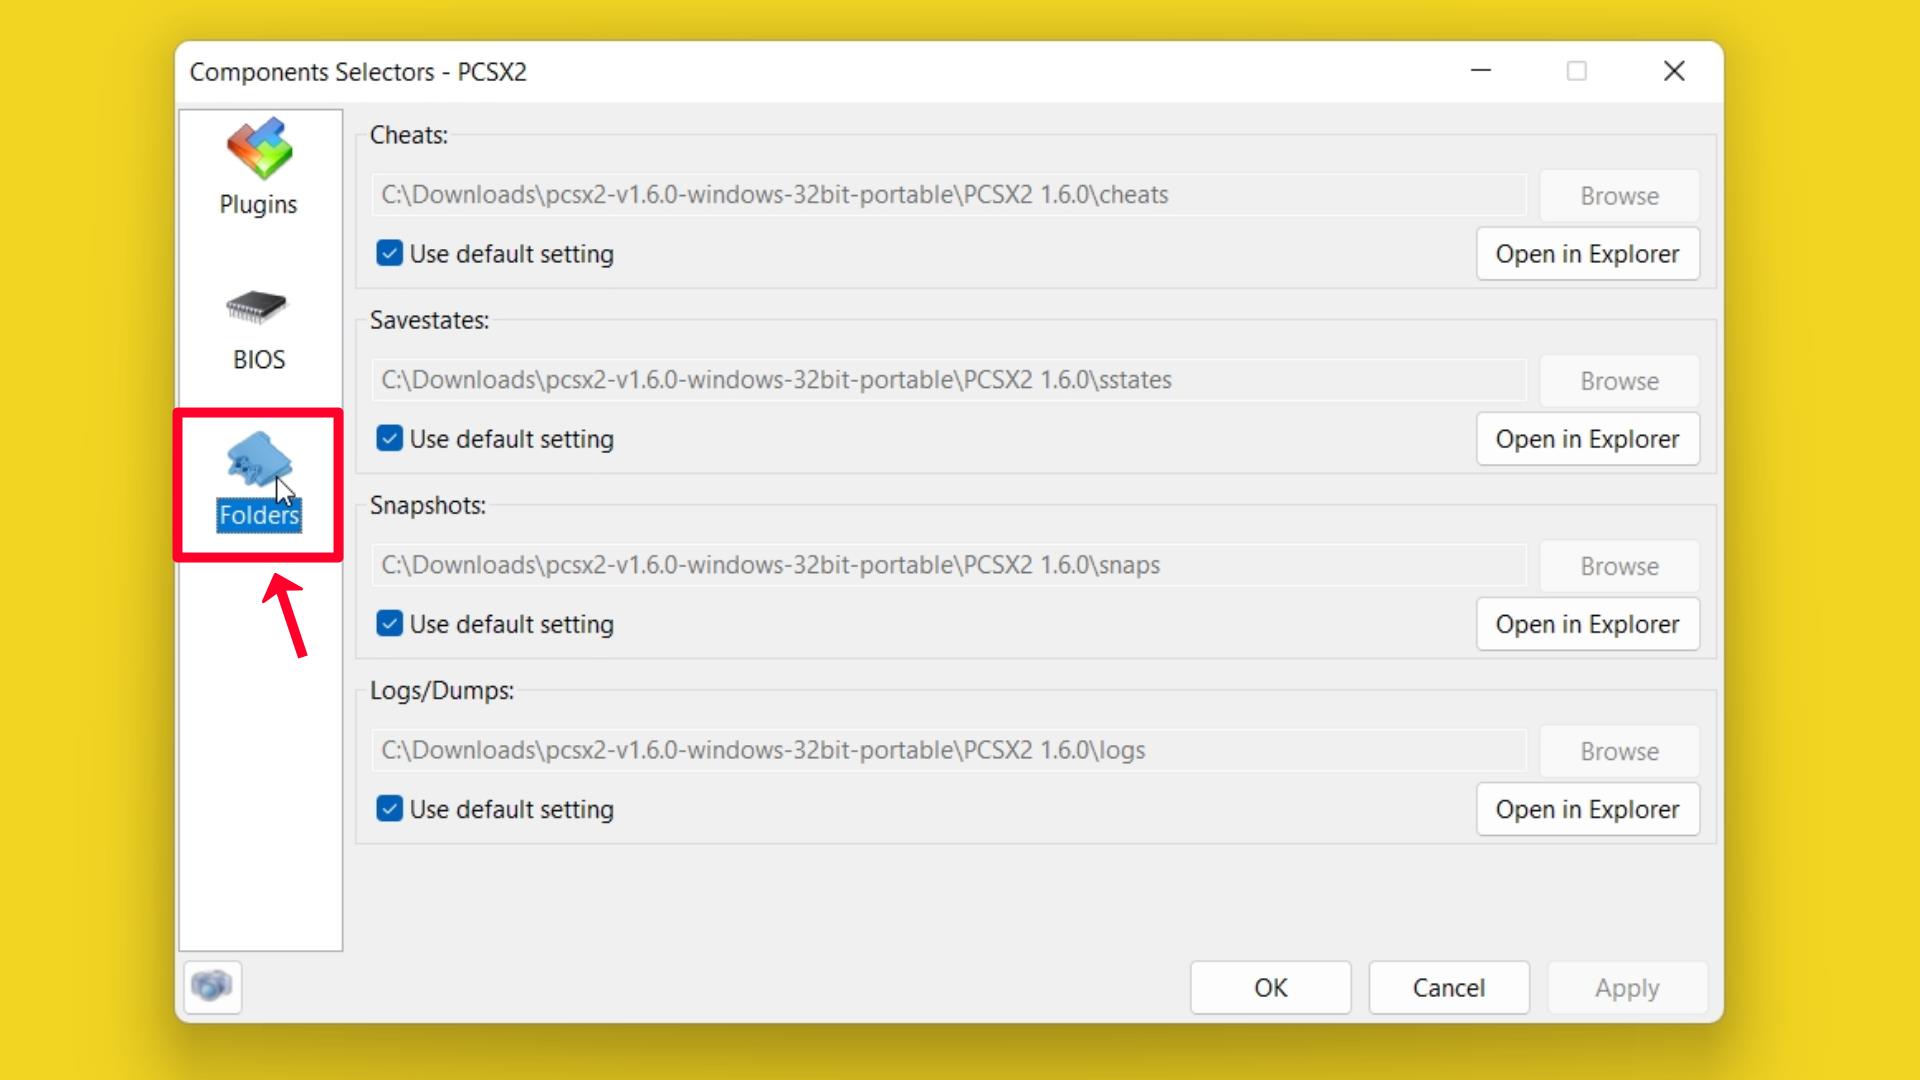
Step 3 – Always Use Default Settings (Recommended).
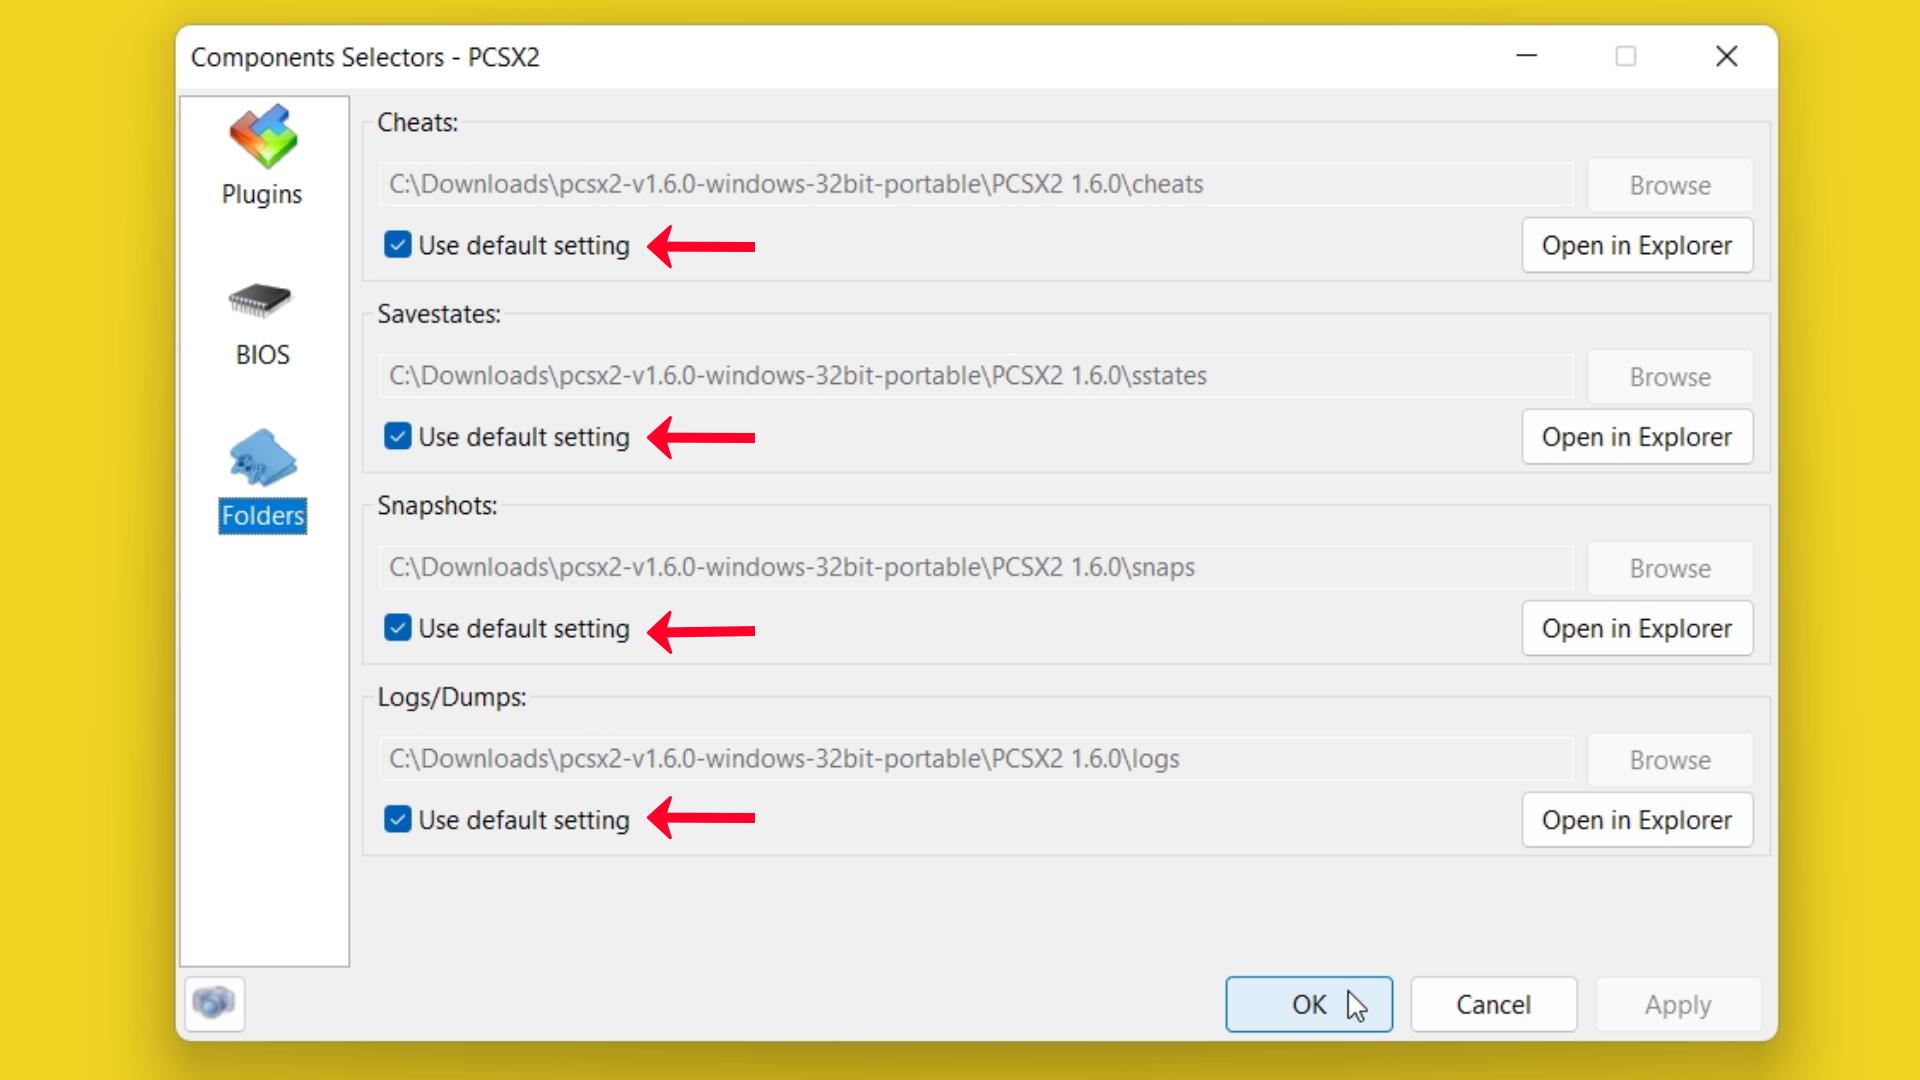
- ☑ [Check Mark] Use the default cheat setting.
- ☑ [Check Mark] Use the default Savestates setting.
- ☑ [Check Mark] Use the default Snapshots setting.
- ☑ [Check Mark] Use the default Logs/Dumps setting.
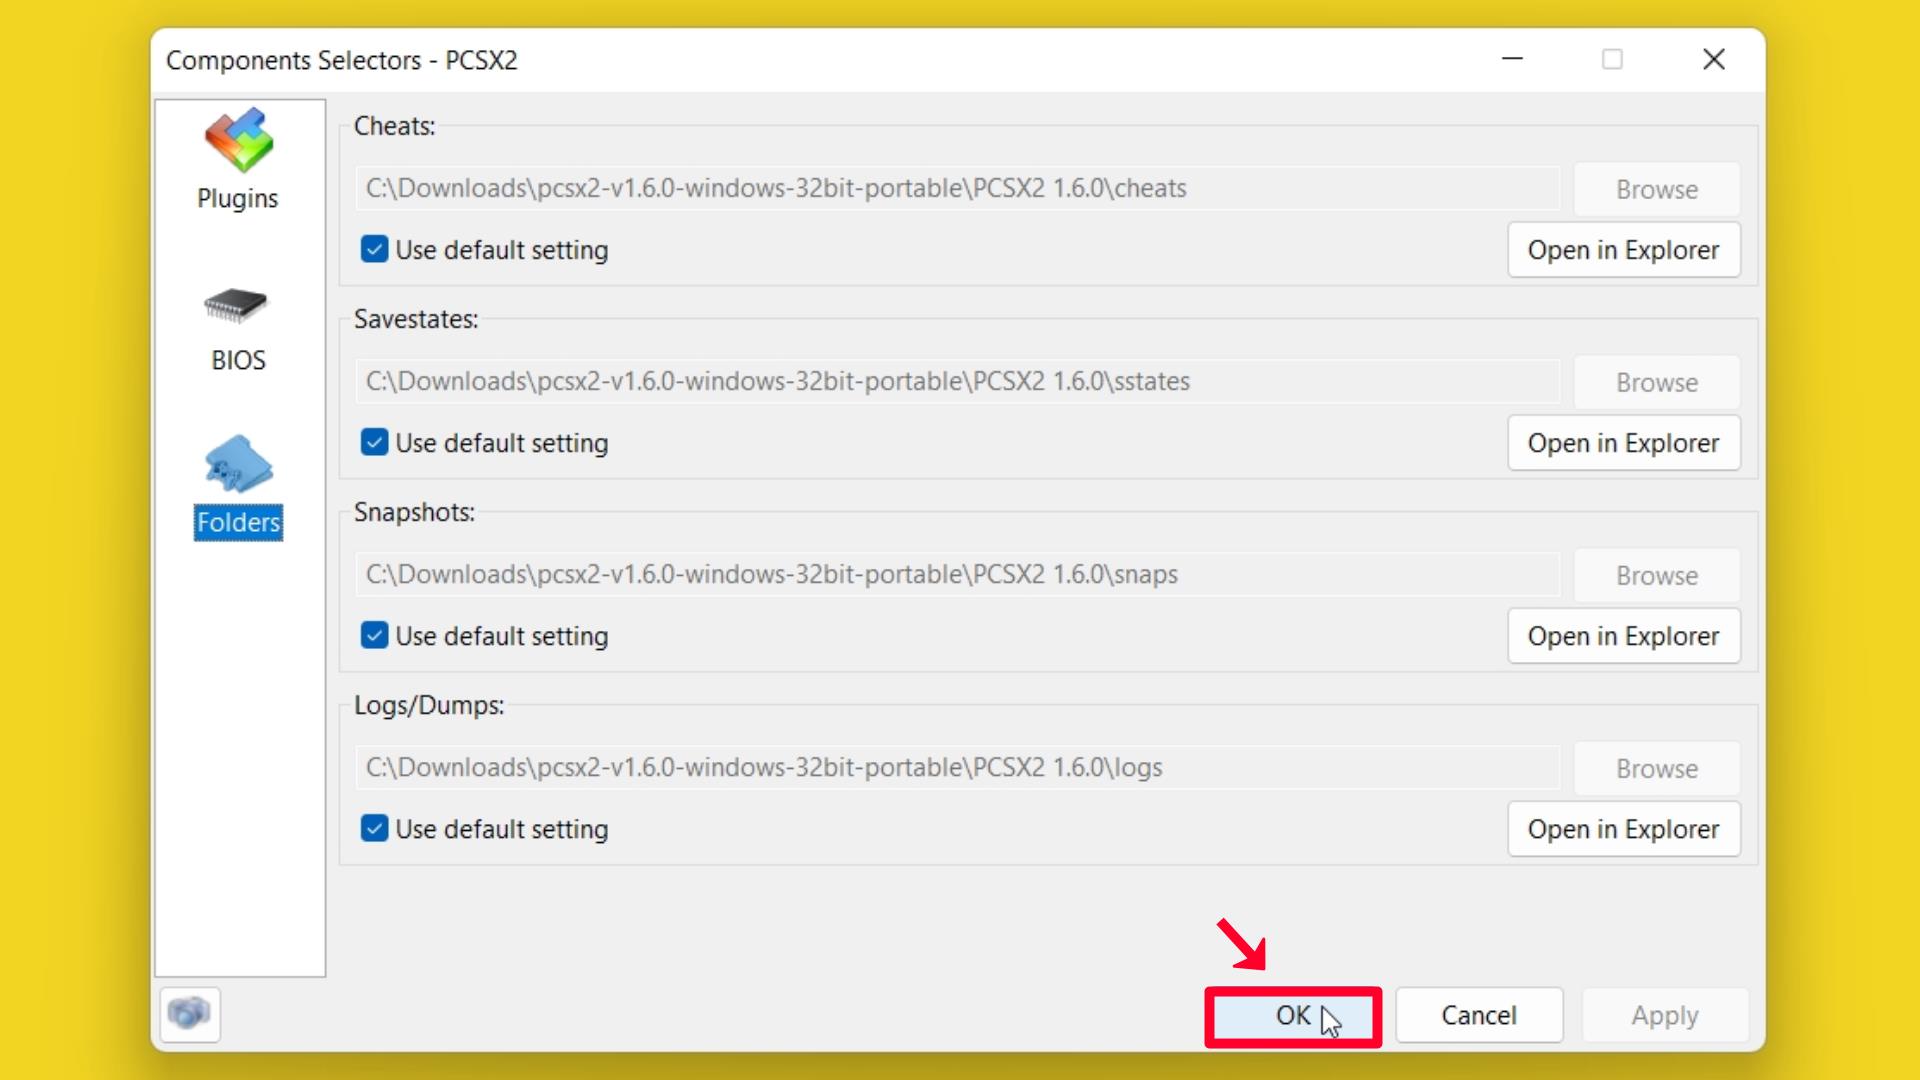
Step 4 – Click on the OK button.
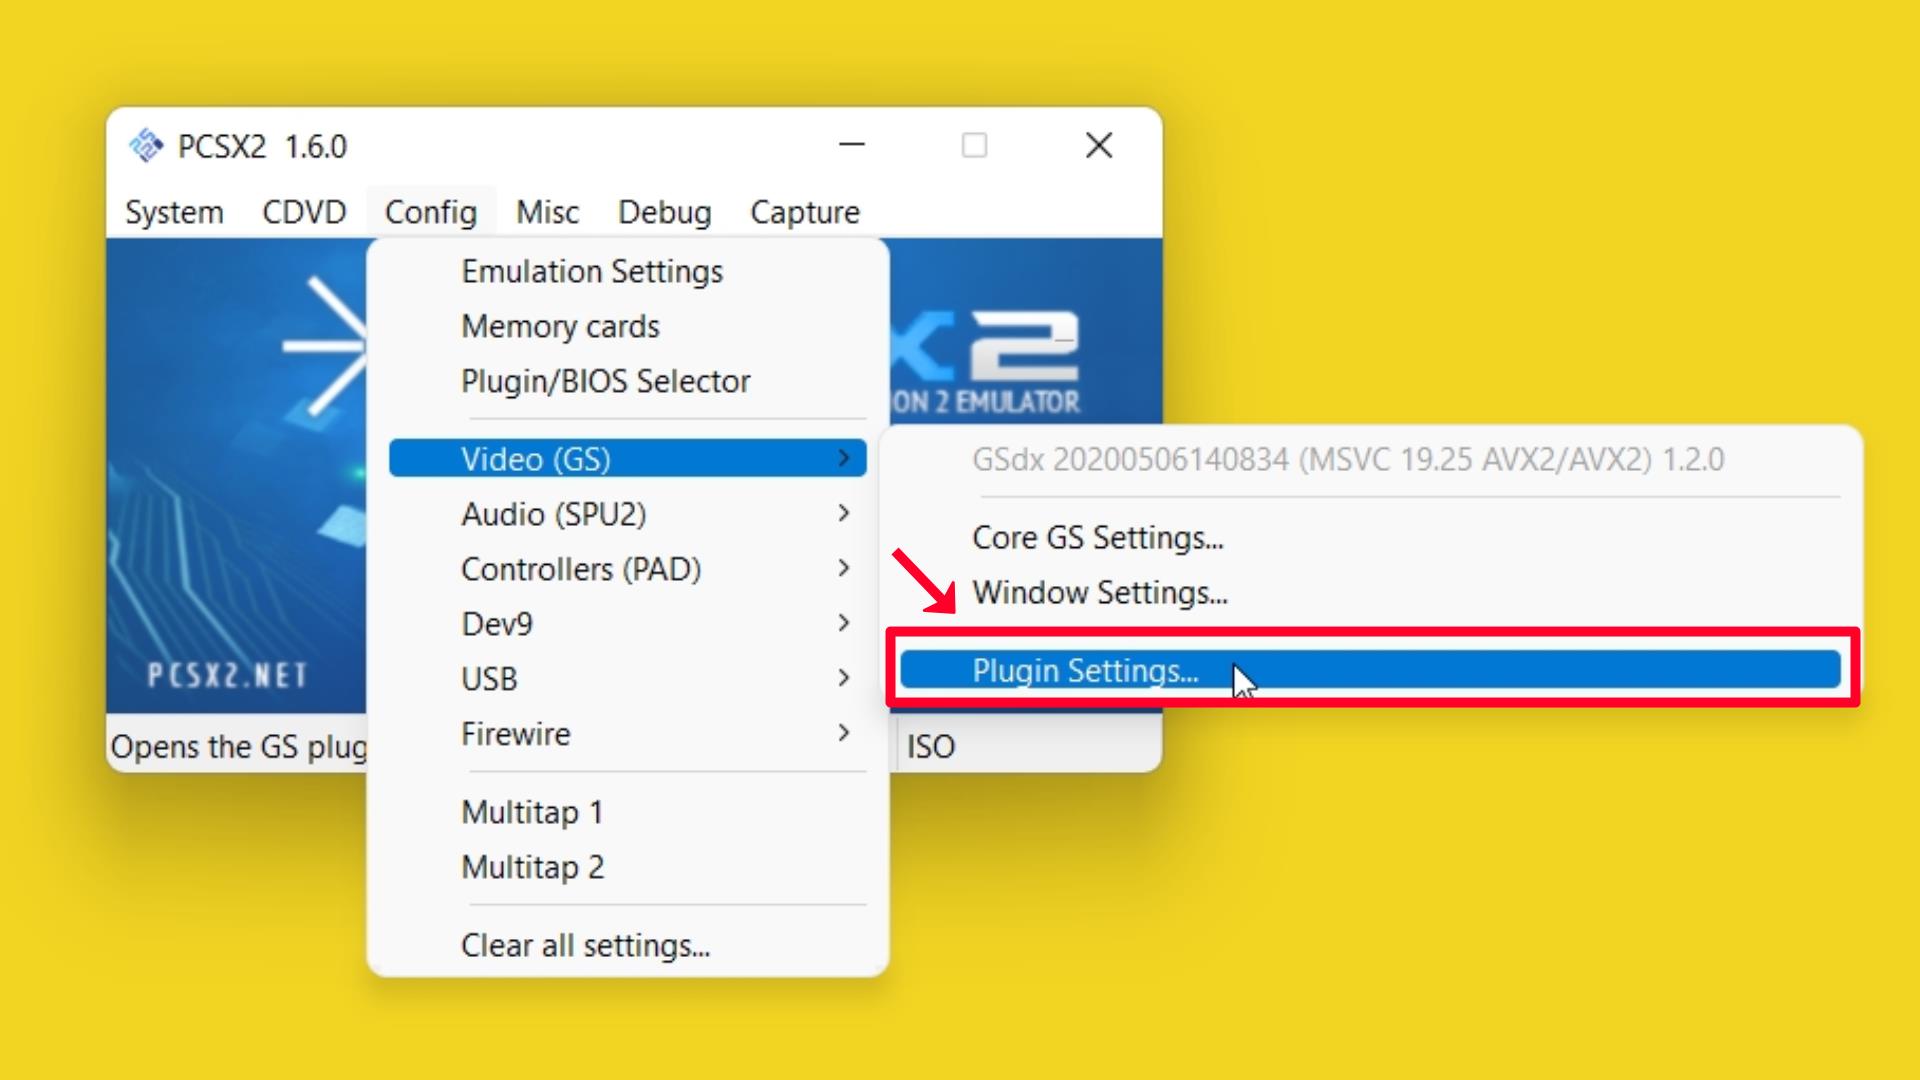
Video (GS) Plugin Settings
Step 1 – Go to Config – Video (GS) and click on Plugin Settings…
GS PLUGIN FOR PS1 & PS2 EMULATORS
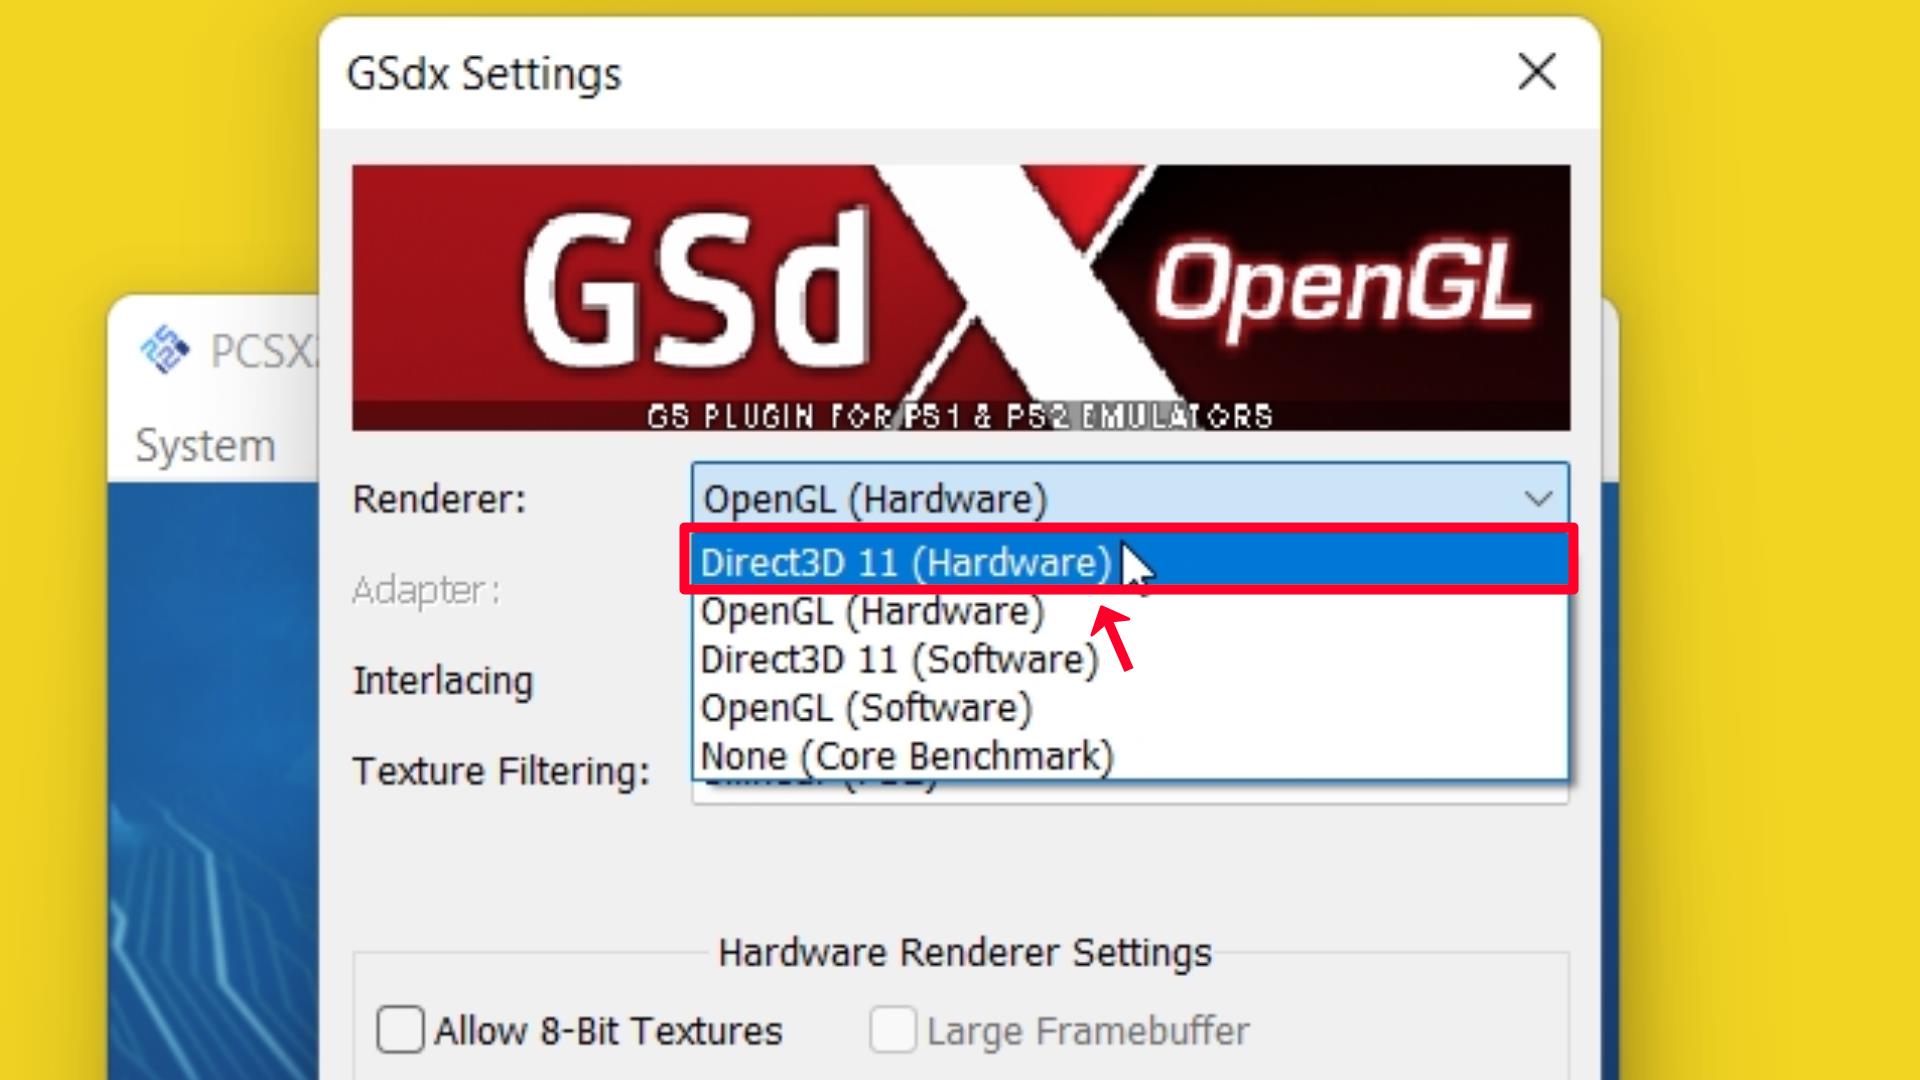
Step 2 – Click on Renderer and Select Direct3D 11 (Hardware) option (Recommended).
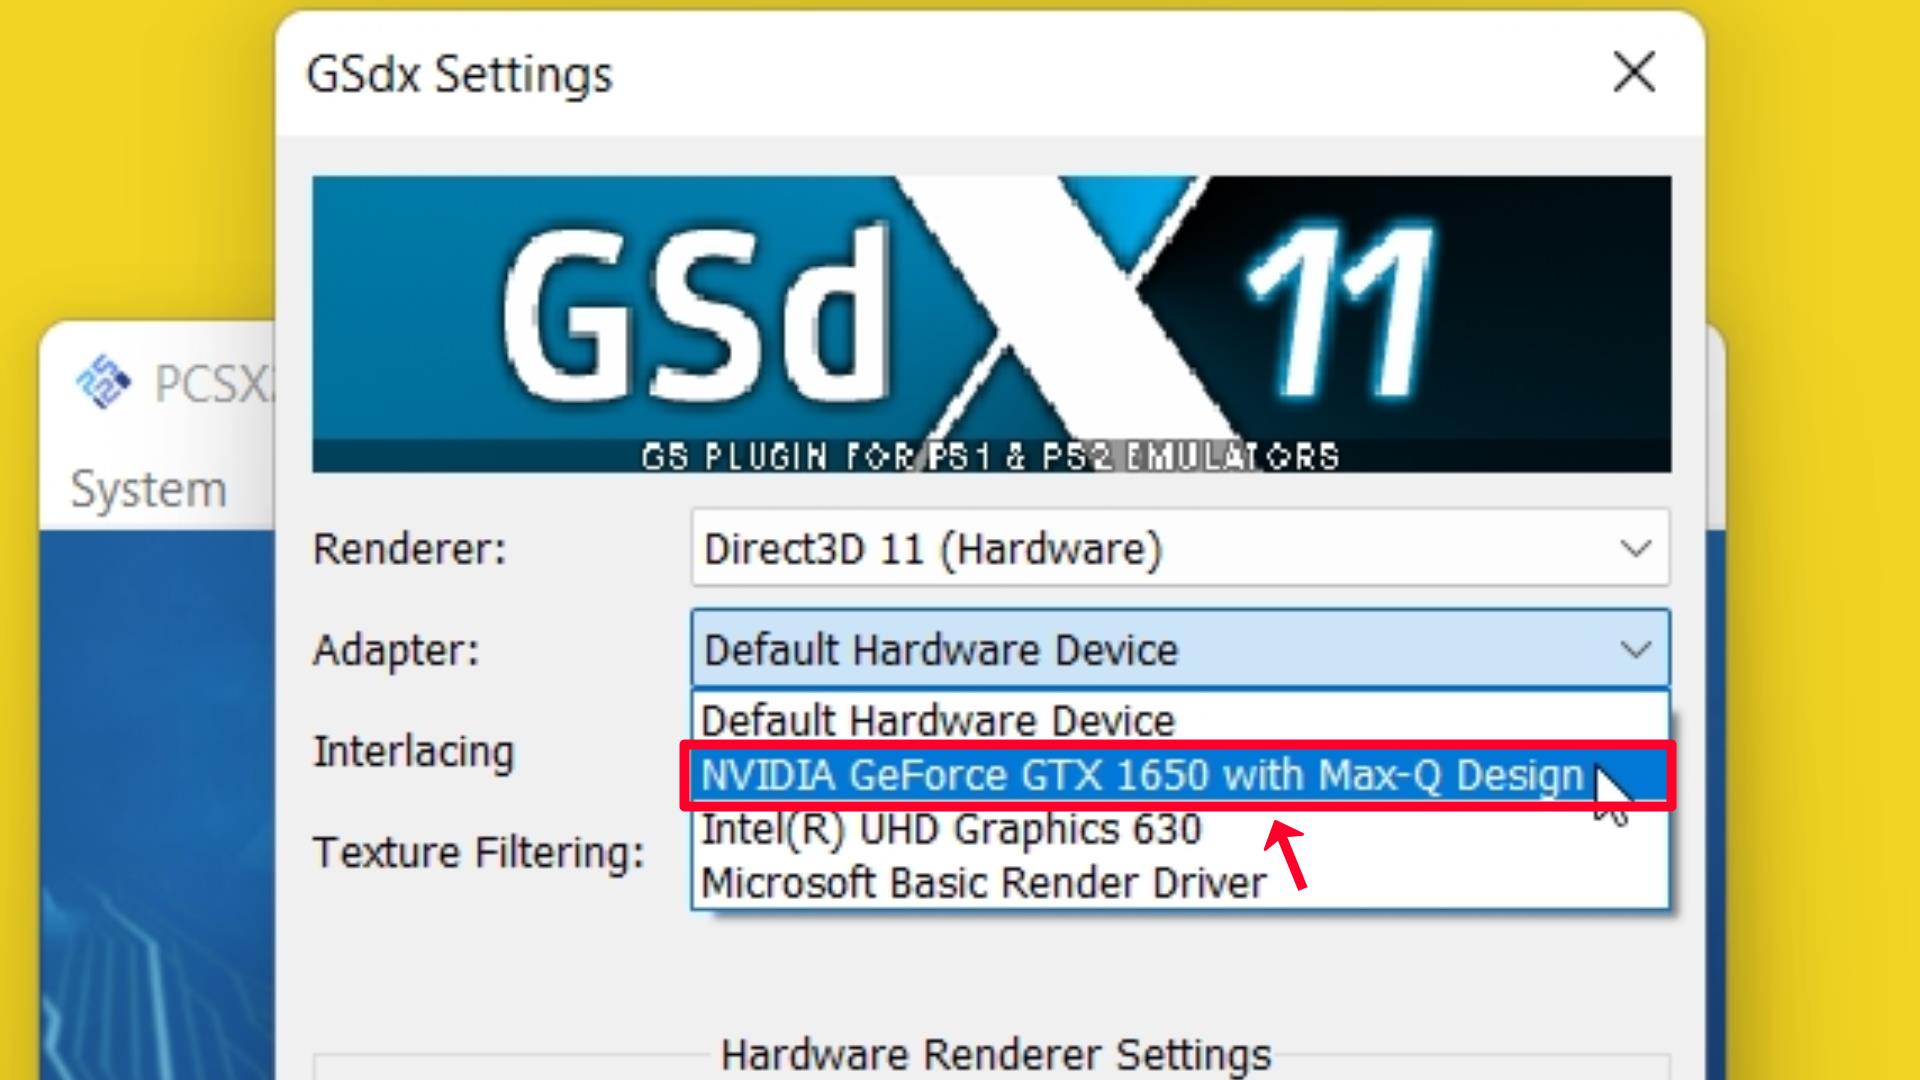
Step 3 – Click on the Adapter and Select your Graphic Card if you don’t have a graphic card on your PC, you need to select Default Hardware Device (Recommended).
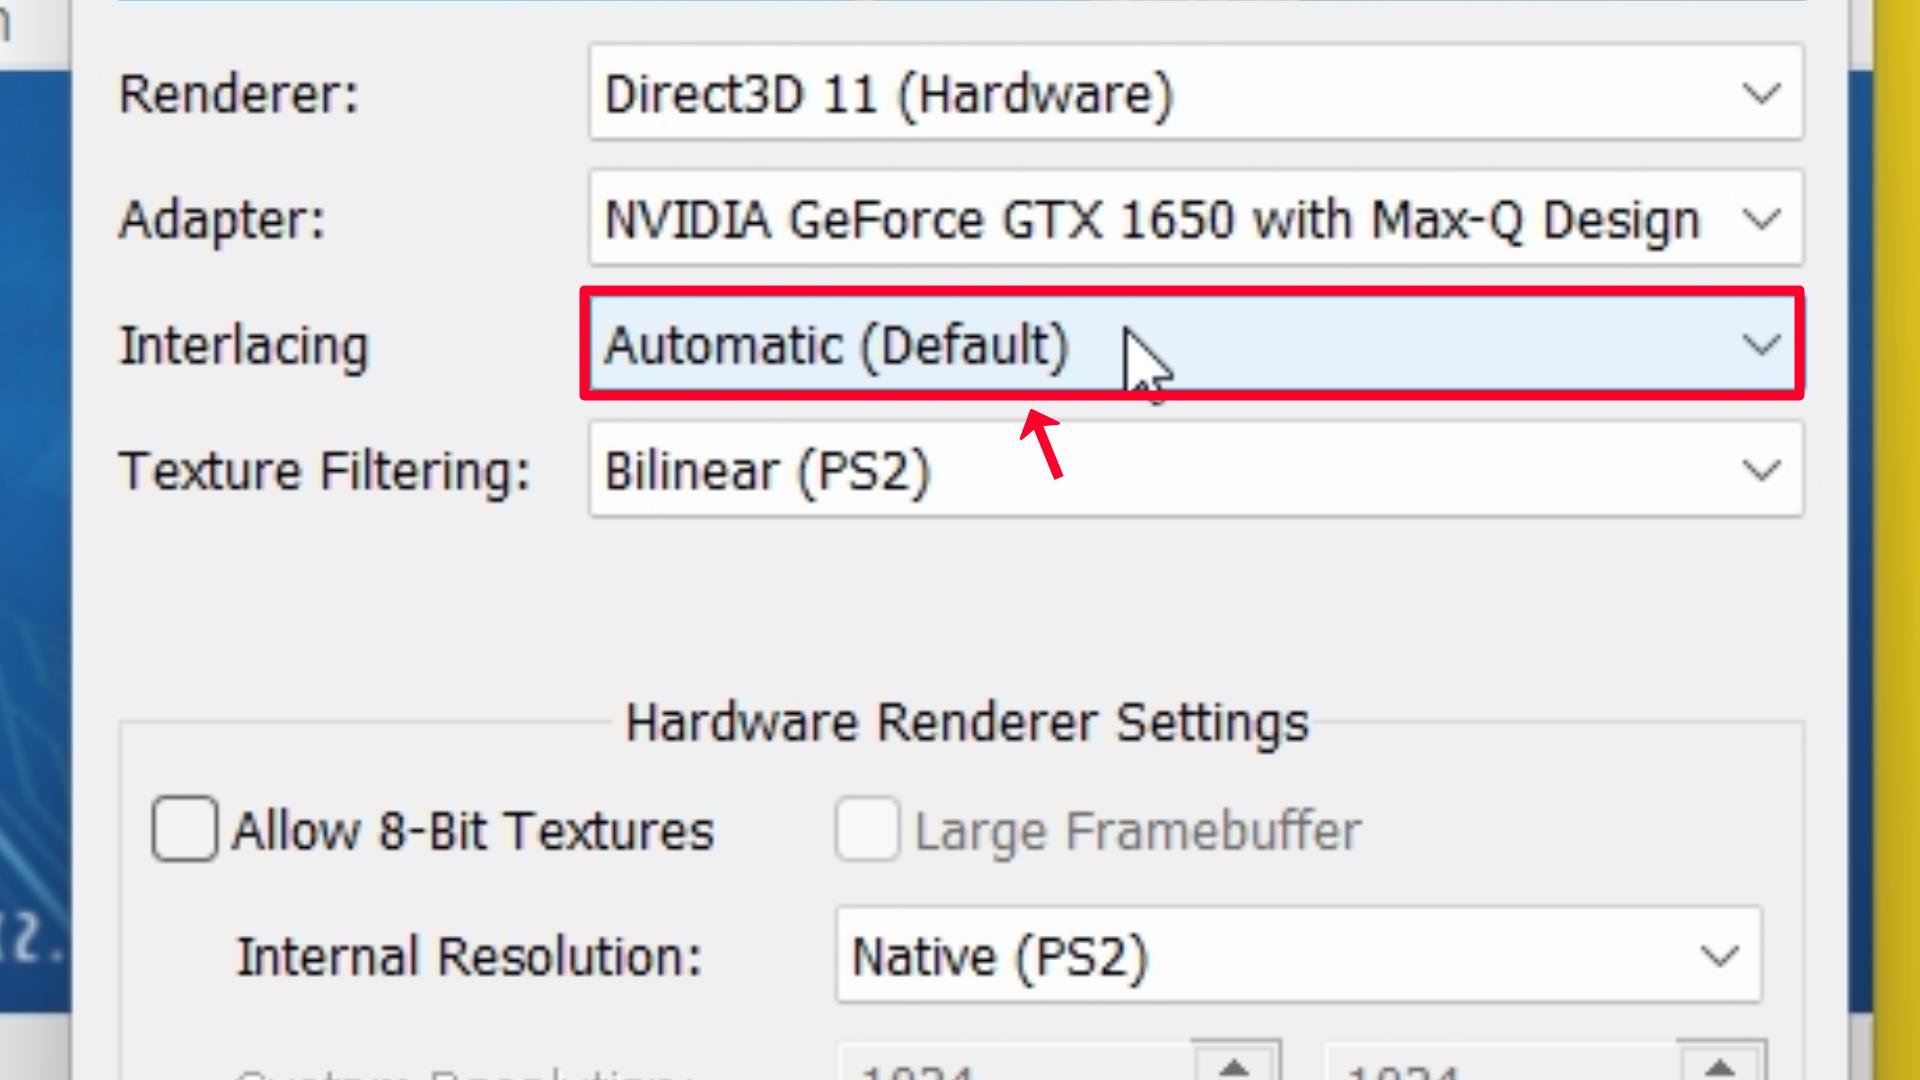
Step 4 – Select Automatic (Default) on the Interlacing option.
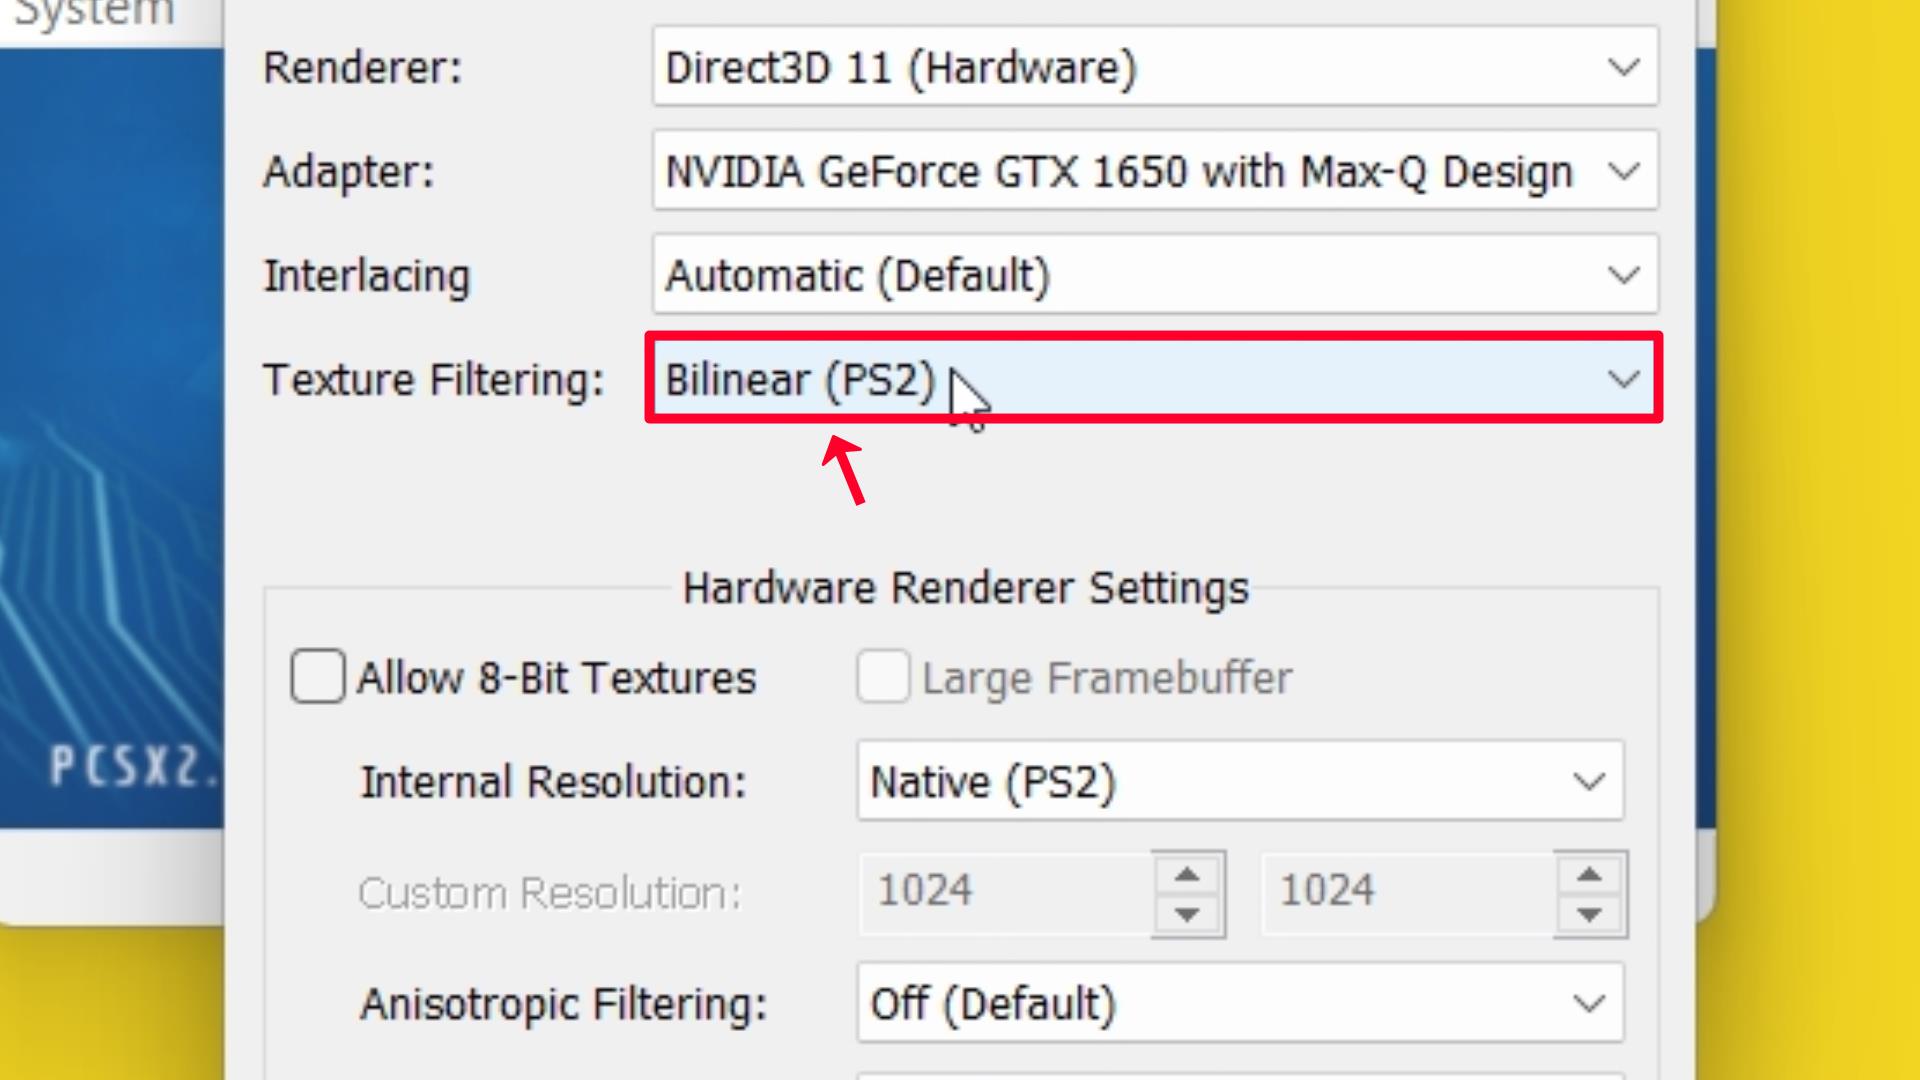
Step 5 – Click on Texture Filtering and Select Bilinear (PS2) option (Recommended).
Hardware Renderer Settings
Step 6 – If you selected your Graphics Card as Adaptor you can select Internal Resolution as 3x Native (~1080p).
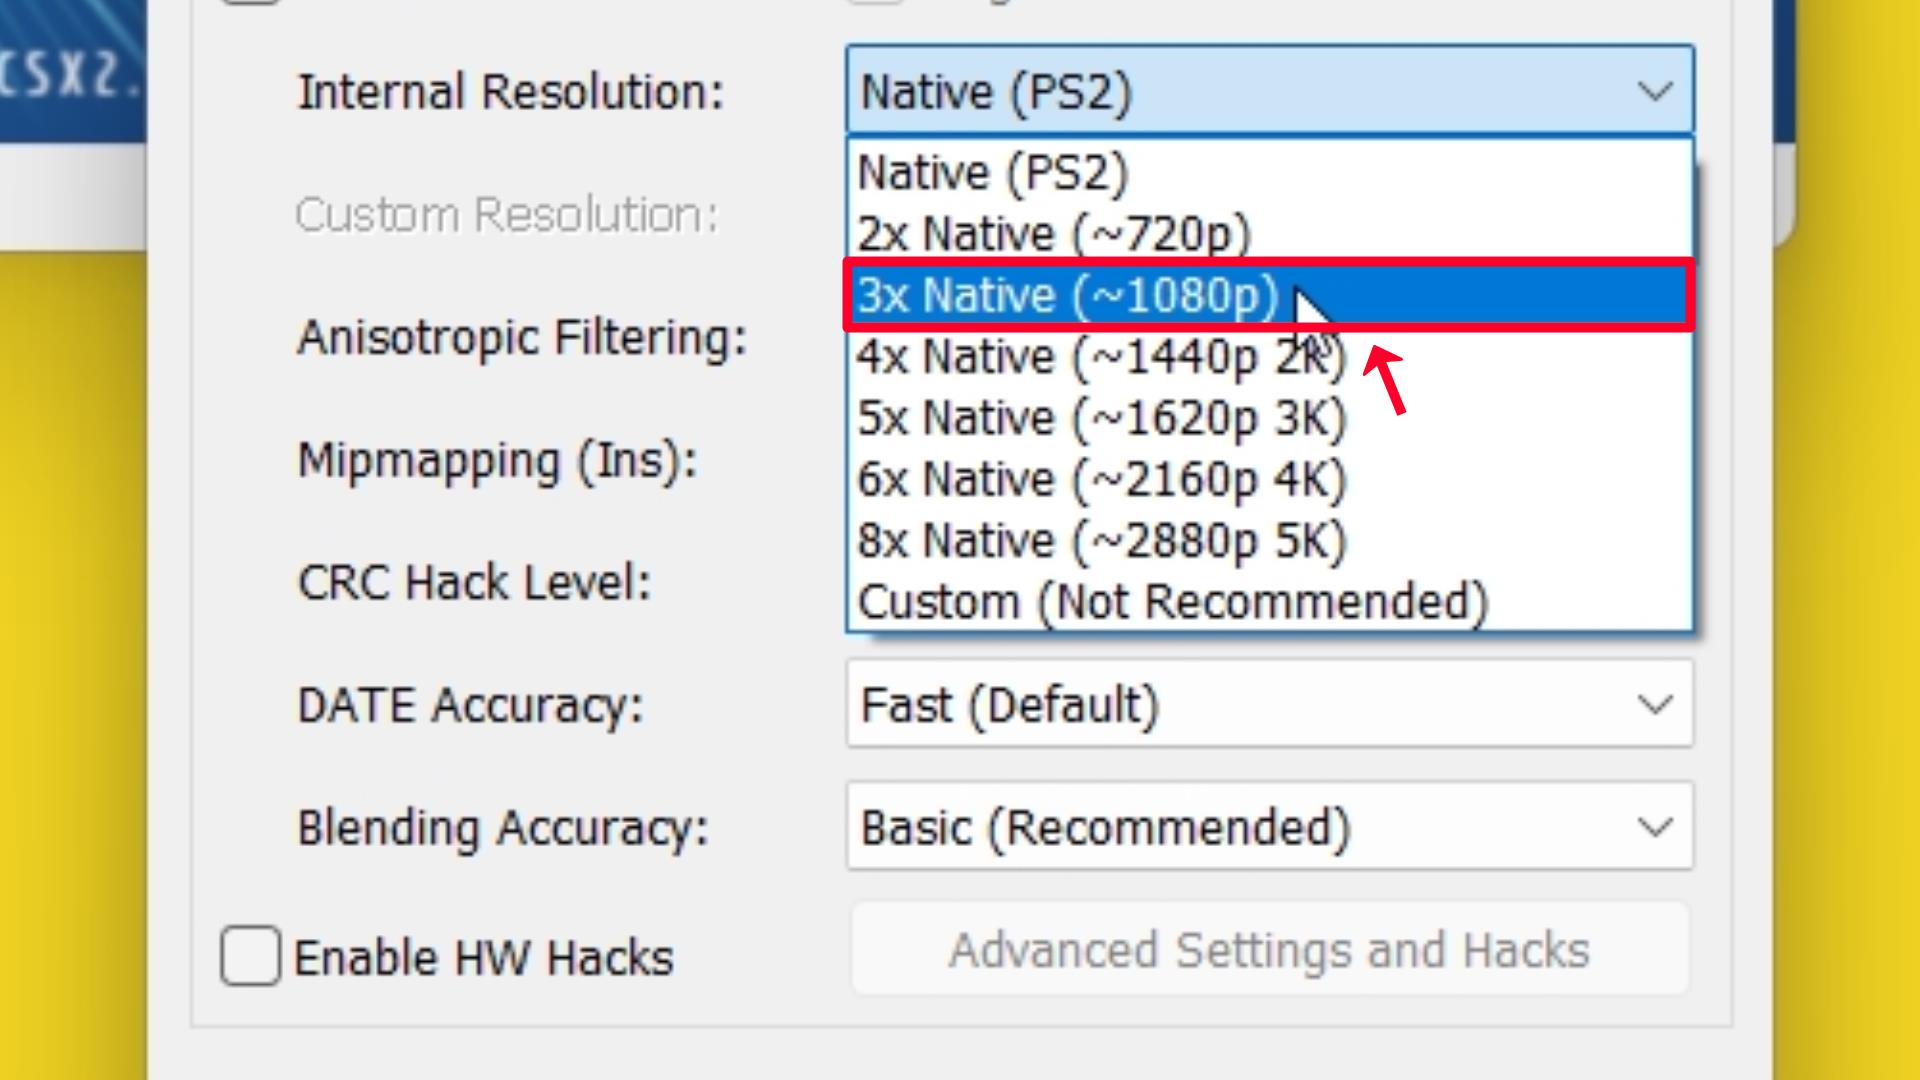
Note: If you are using the Default Hardware Device as an Adaptor you need to select the Native (PS2) option on Internal Resolution (Recommended).
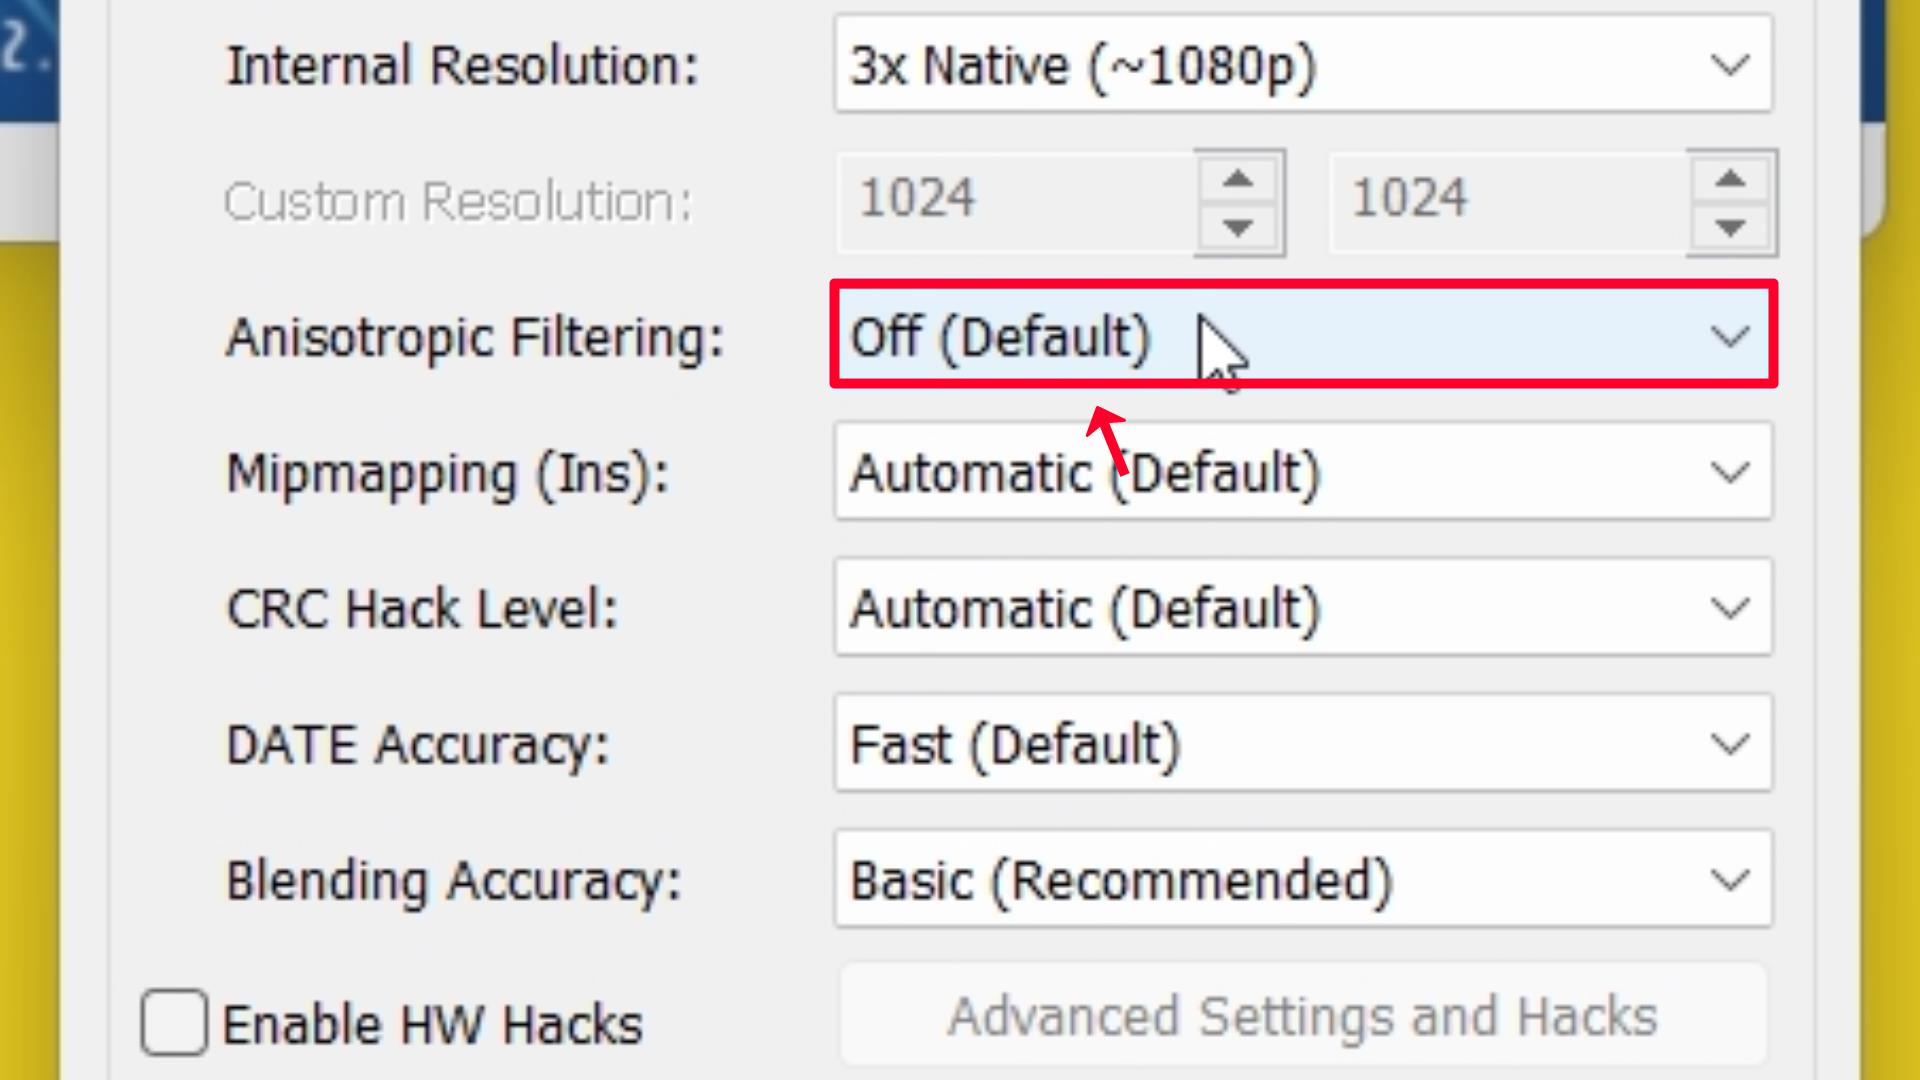
Step 7 – Select Anisotropic Filtering: Off (Default).
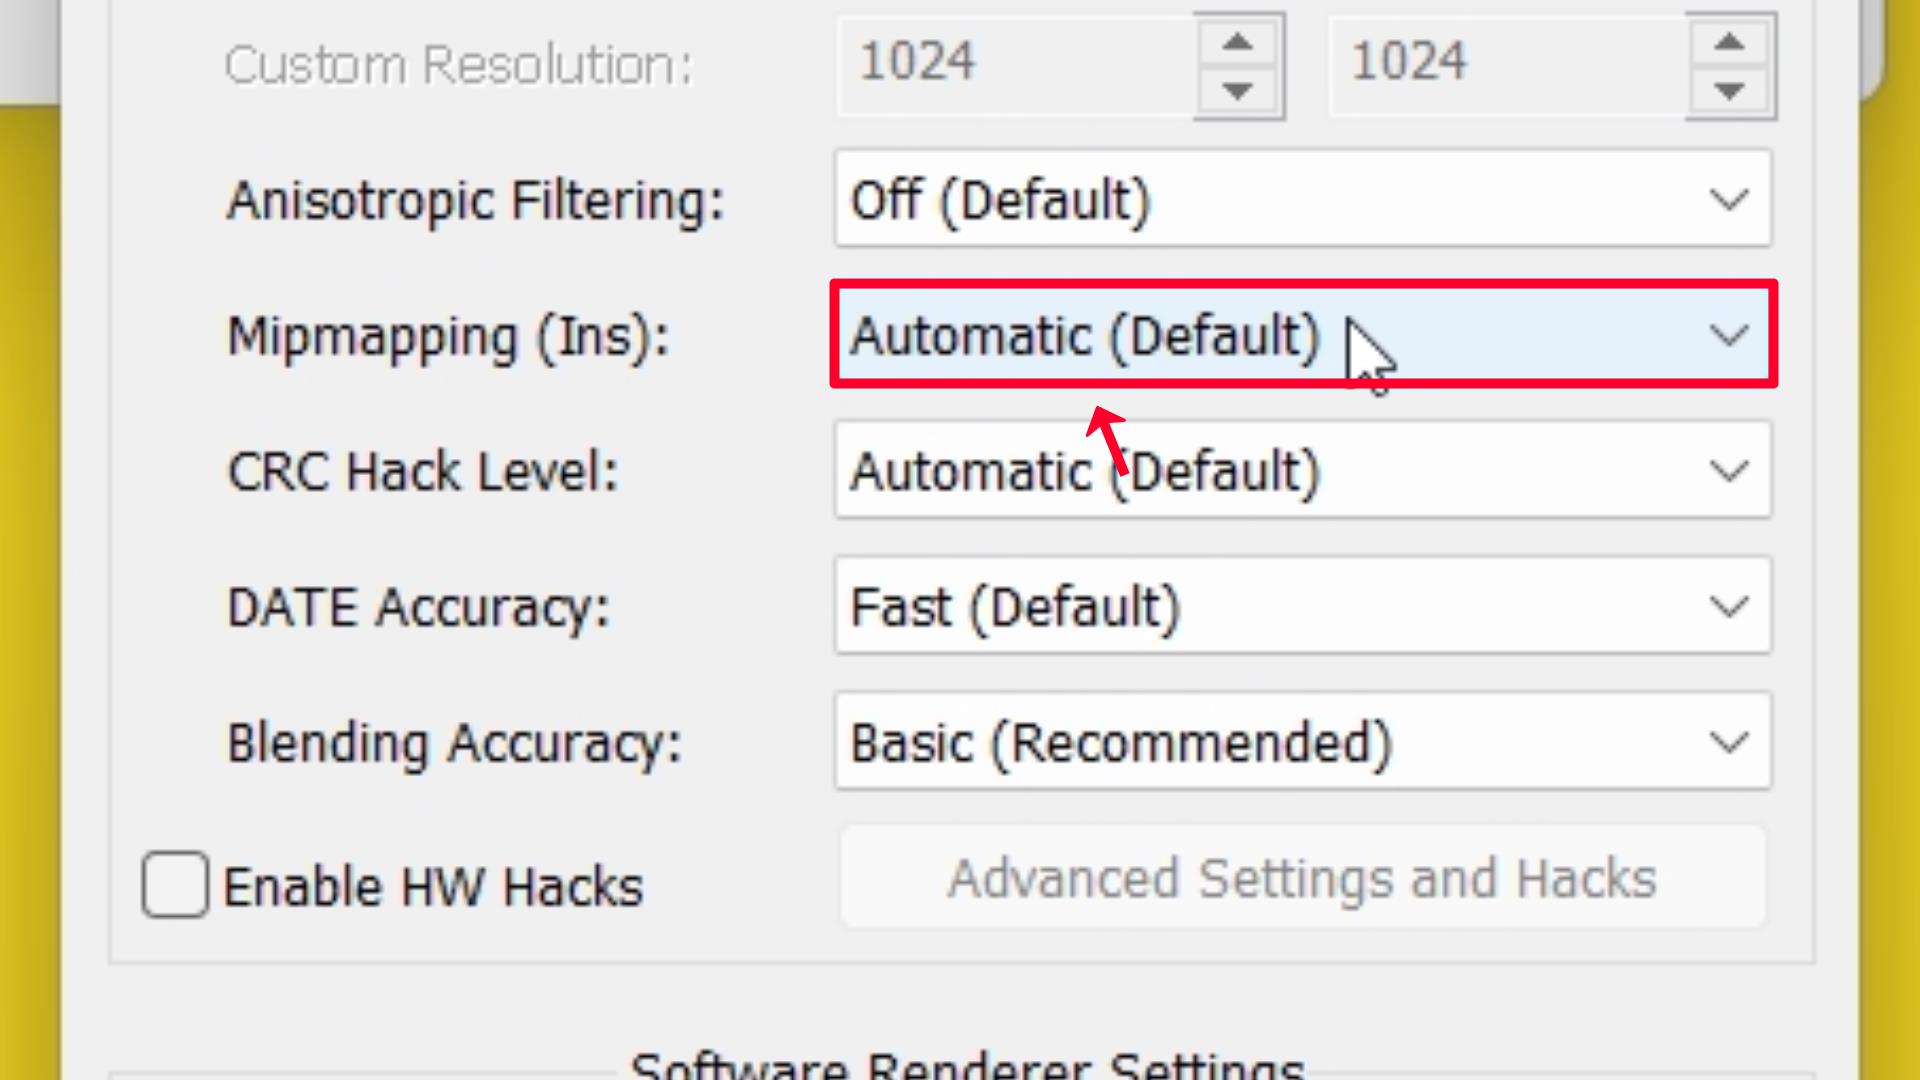
Step 8 – Select Mipmapping (Ins): Automatic (Default).
Step 9 – Select CRC Hack Level: Automatic (Default).
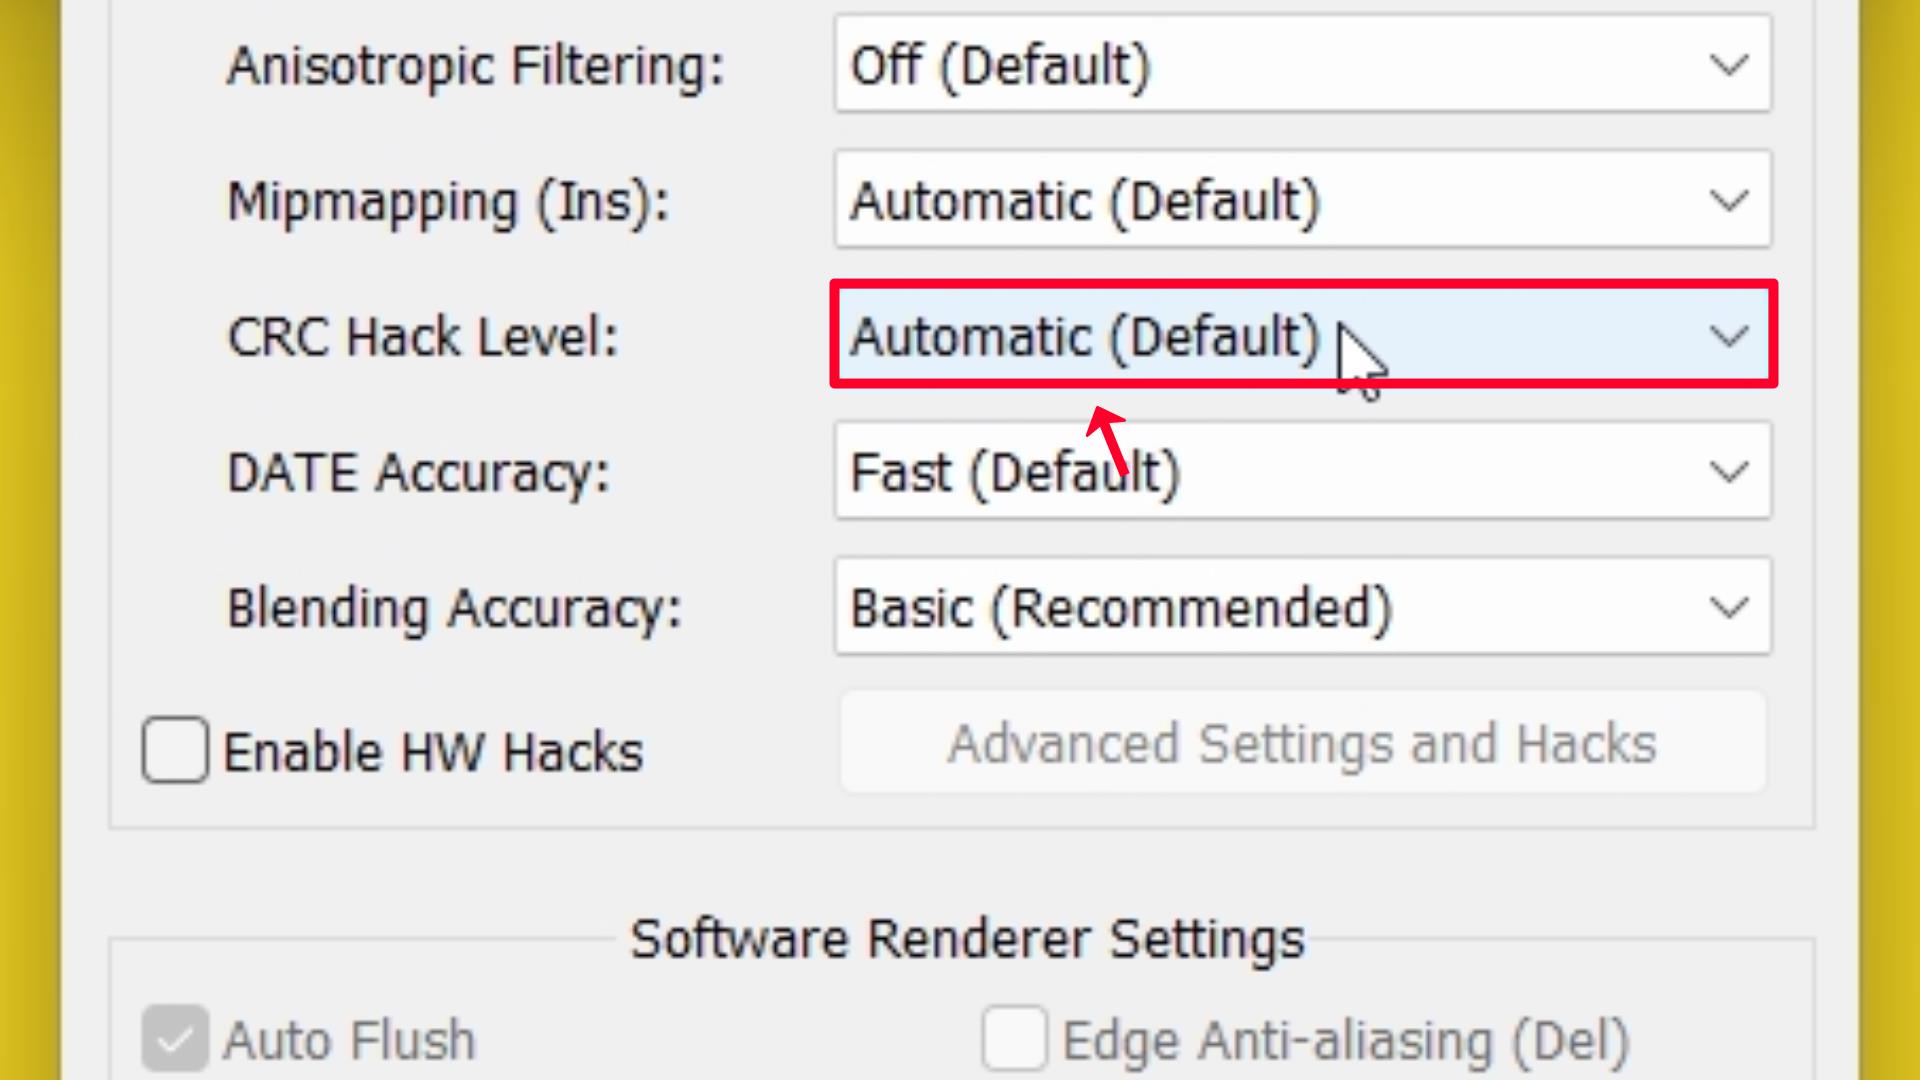
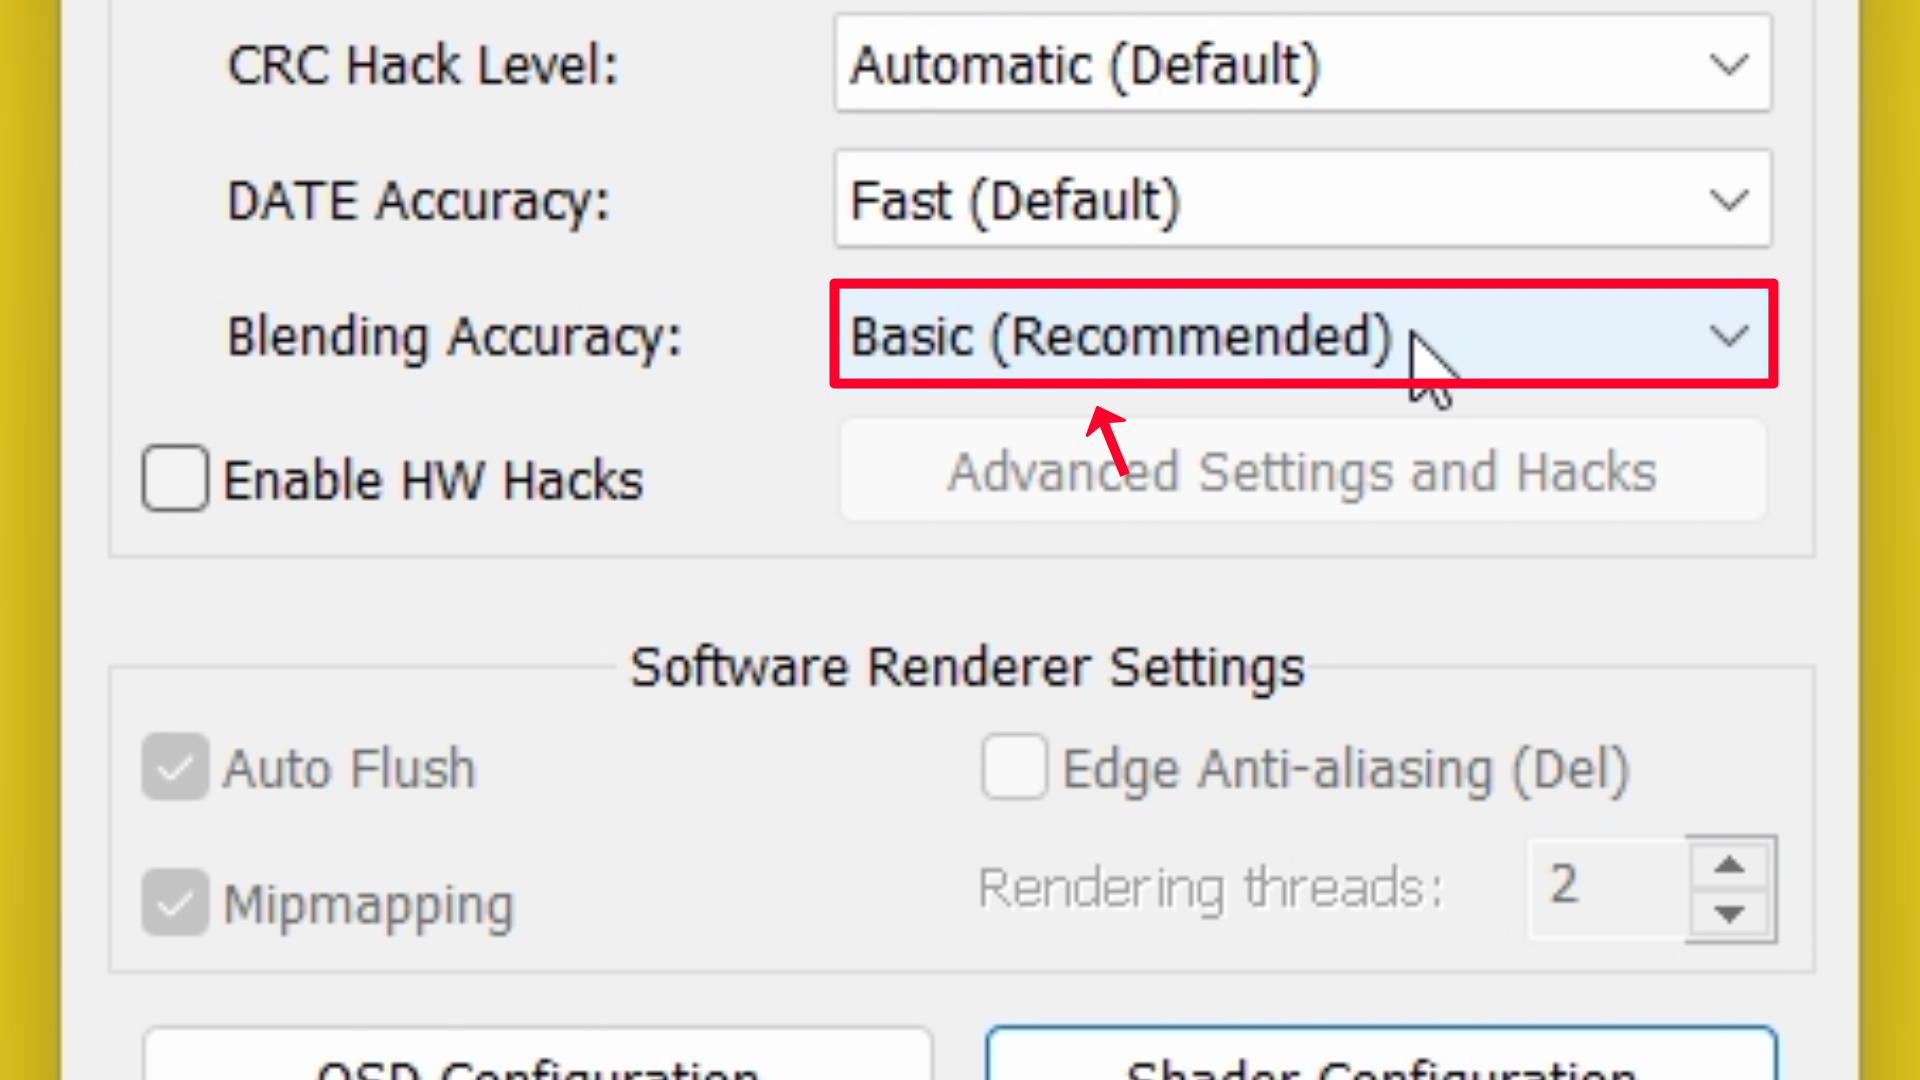
Step 10 – Select DATE Accuracy: Fast (Default).
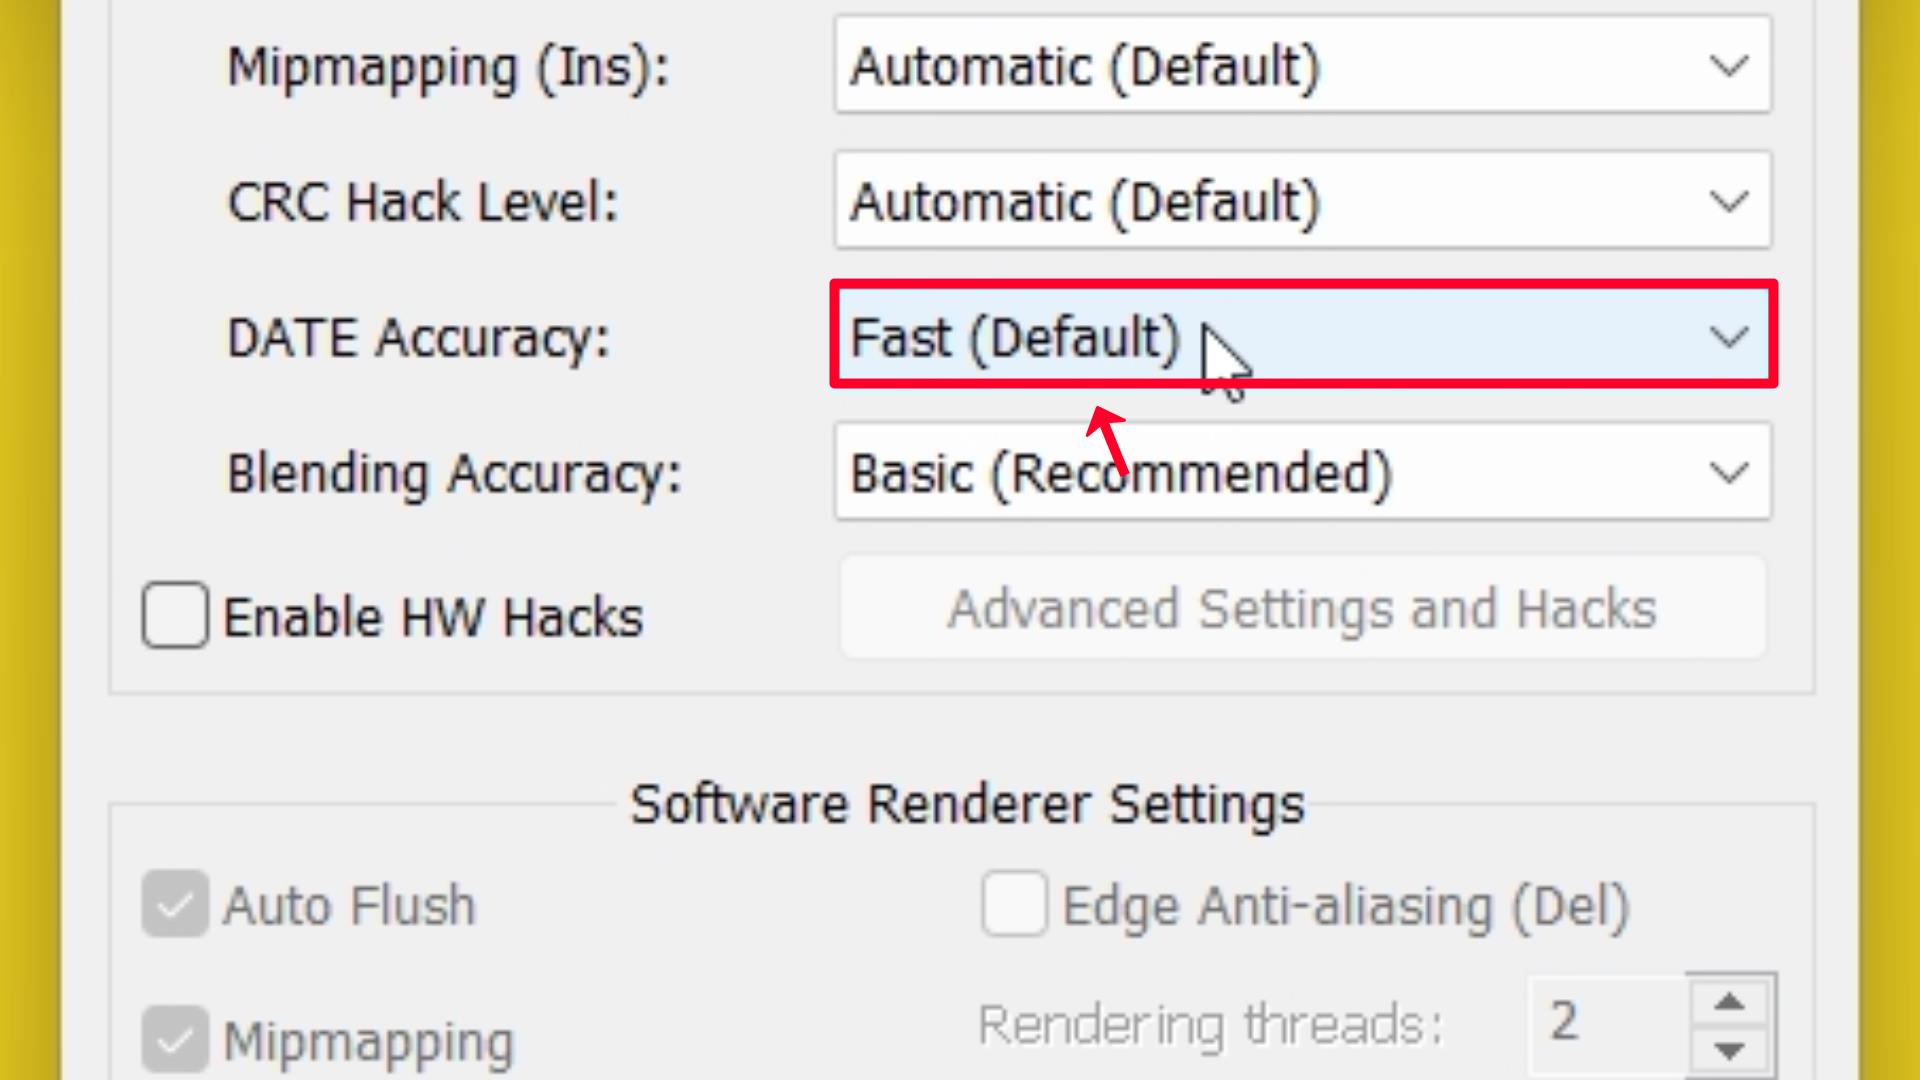
Step 11 – Select Blending Accuracy: Basic (Recommended).
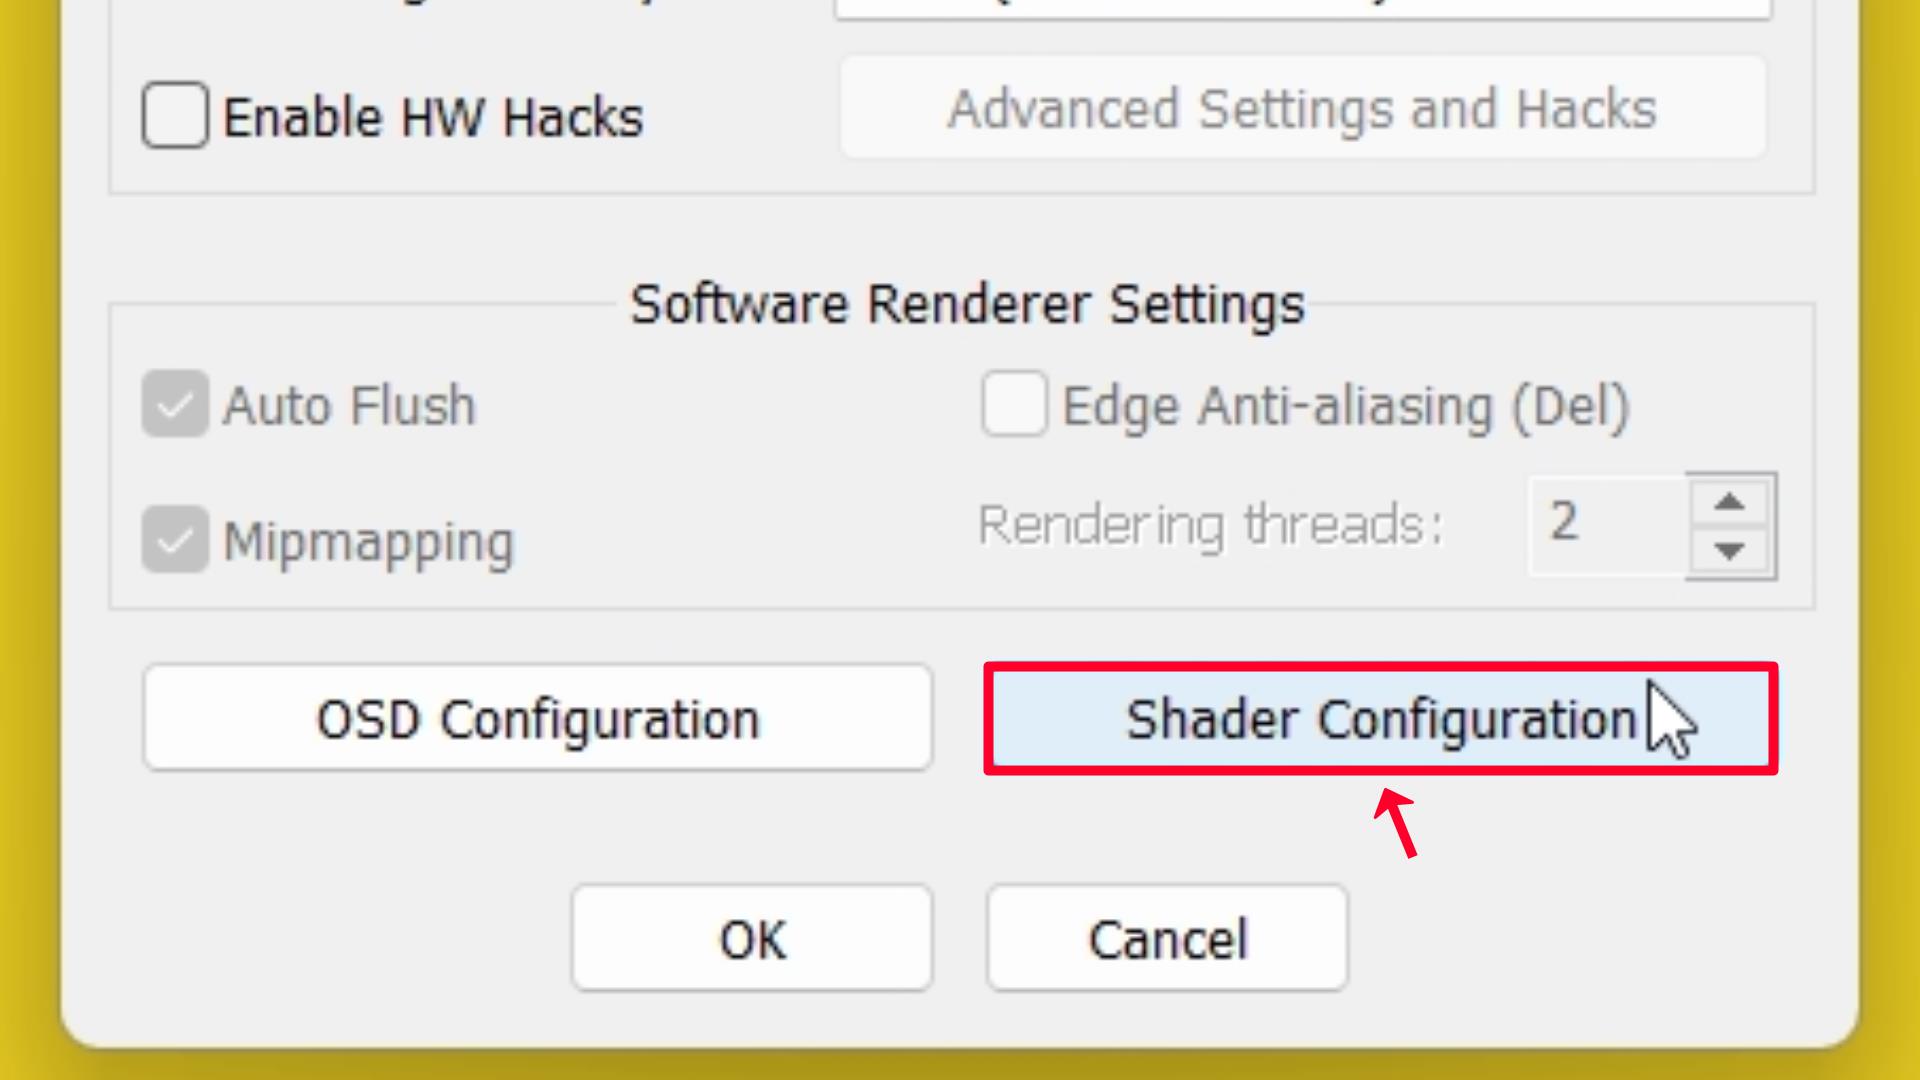
Shader Configuration
Step 1 – Click on the Shader Configuration Option.
Step 2 – ☑ [Check Mark] Texture Filtering of Display option.

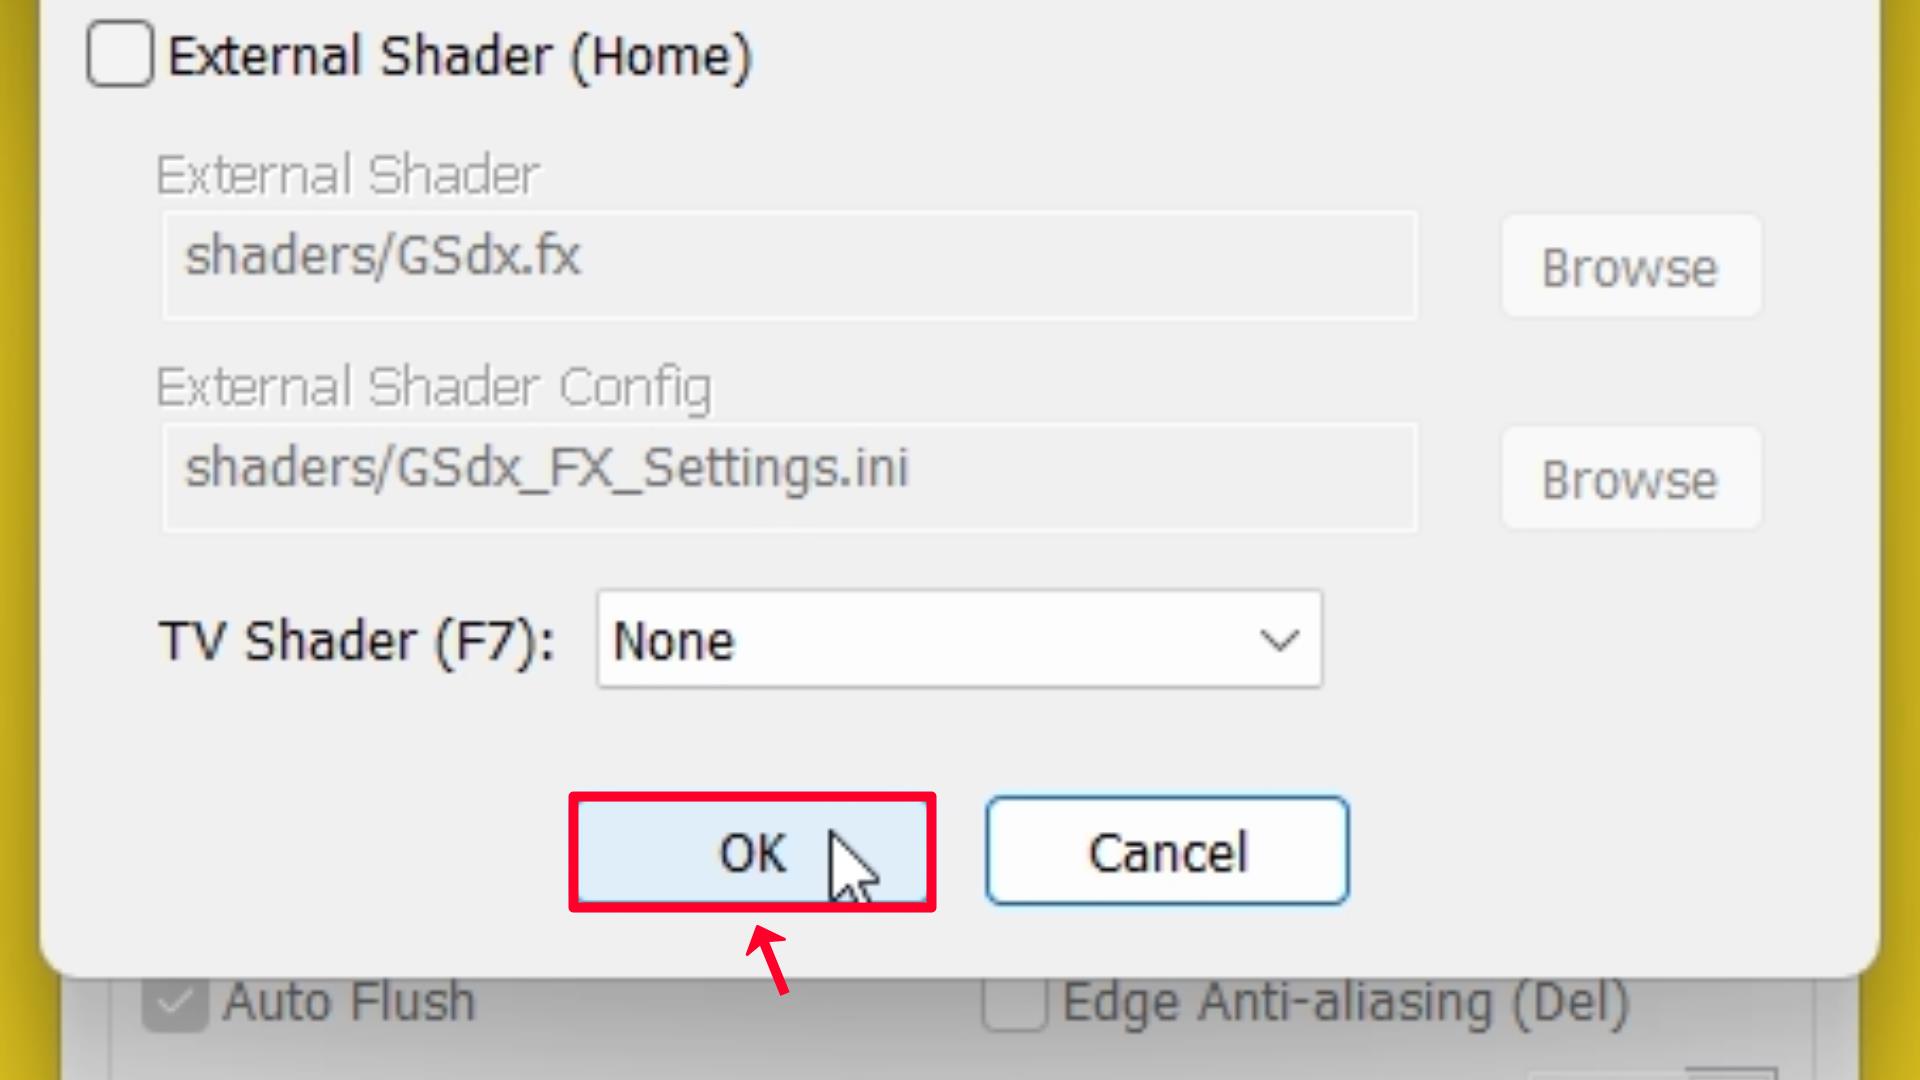
Step 3 – Click and Select TV Shader (F7): None option.
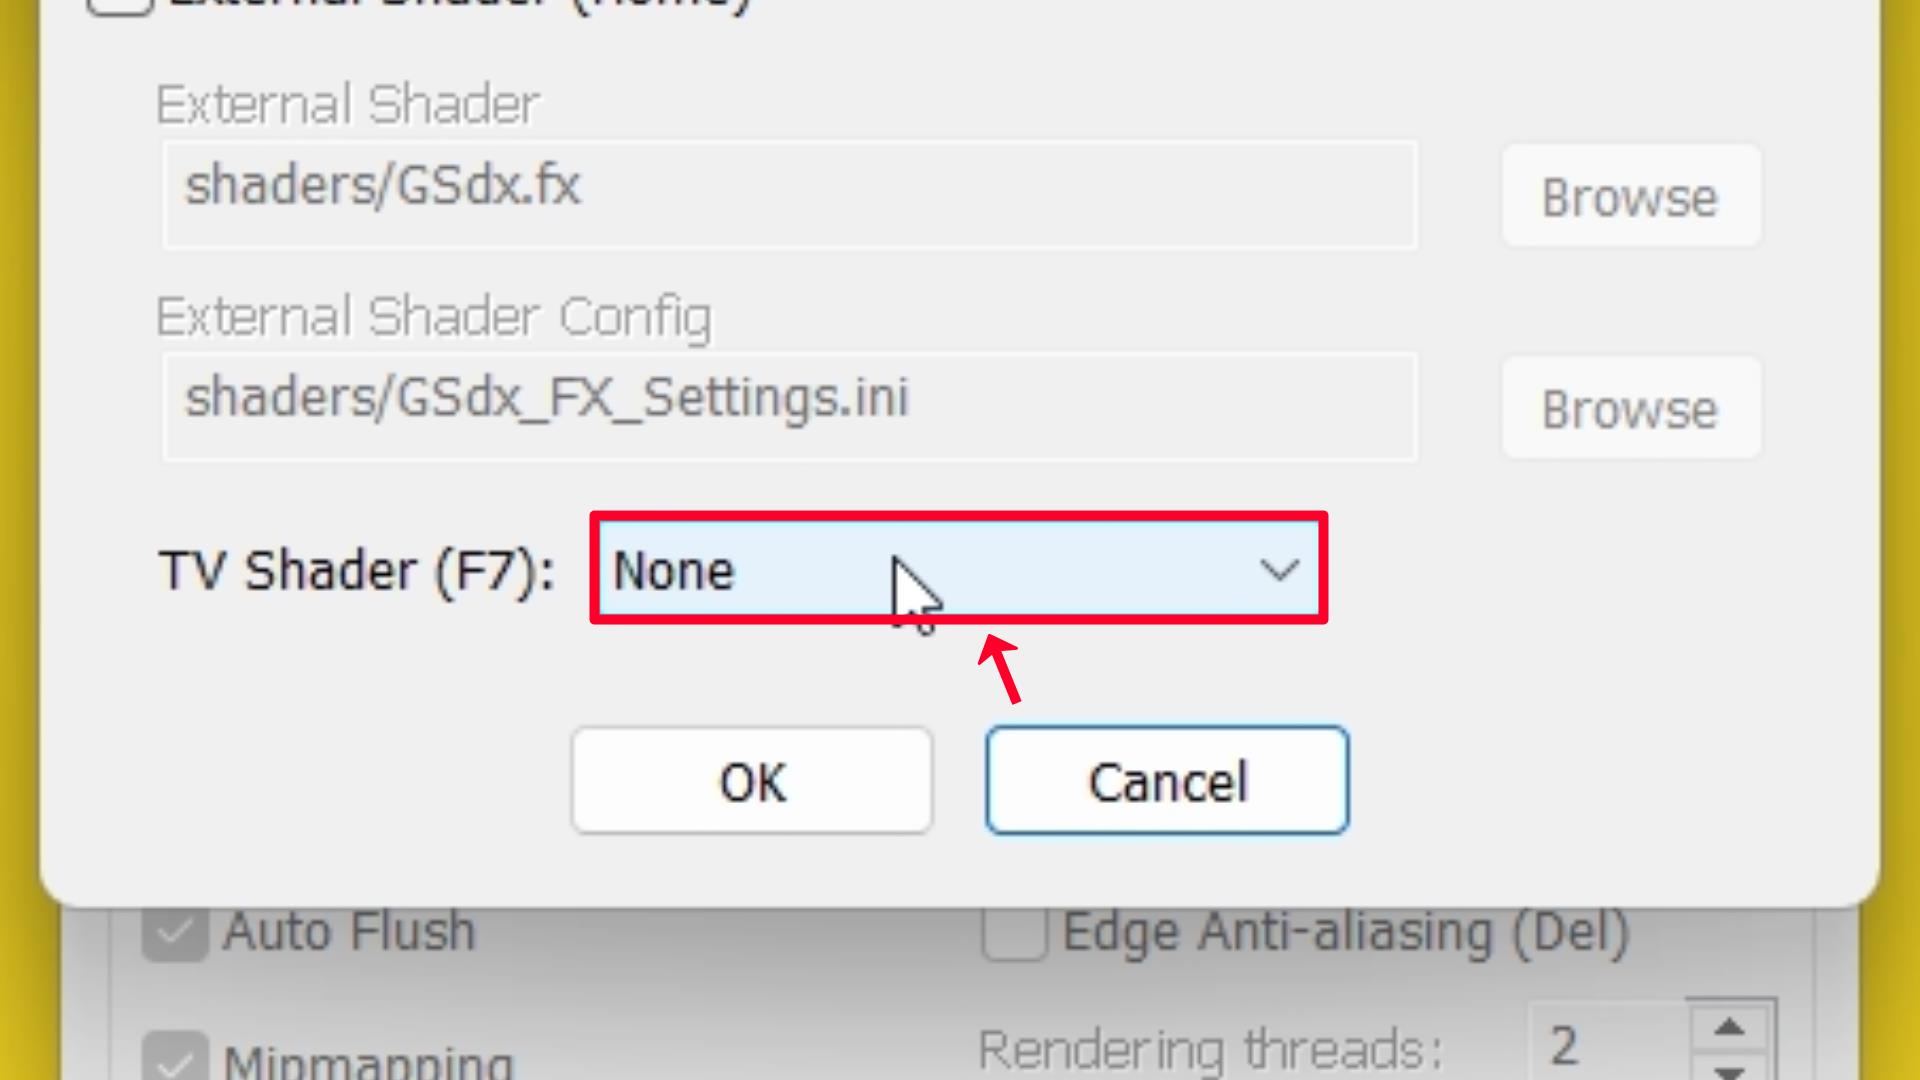
Step 4 – Click on the OK button.
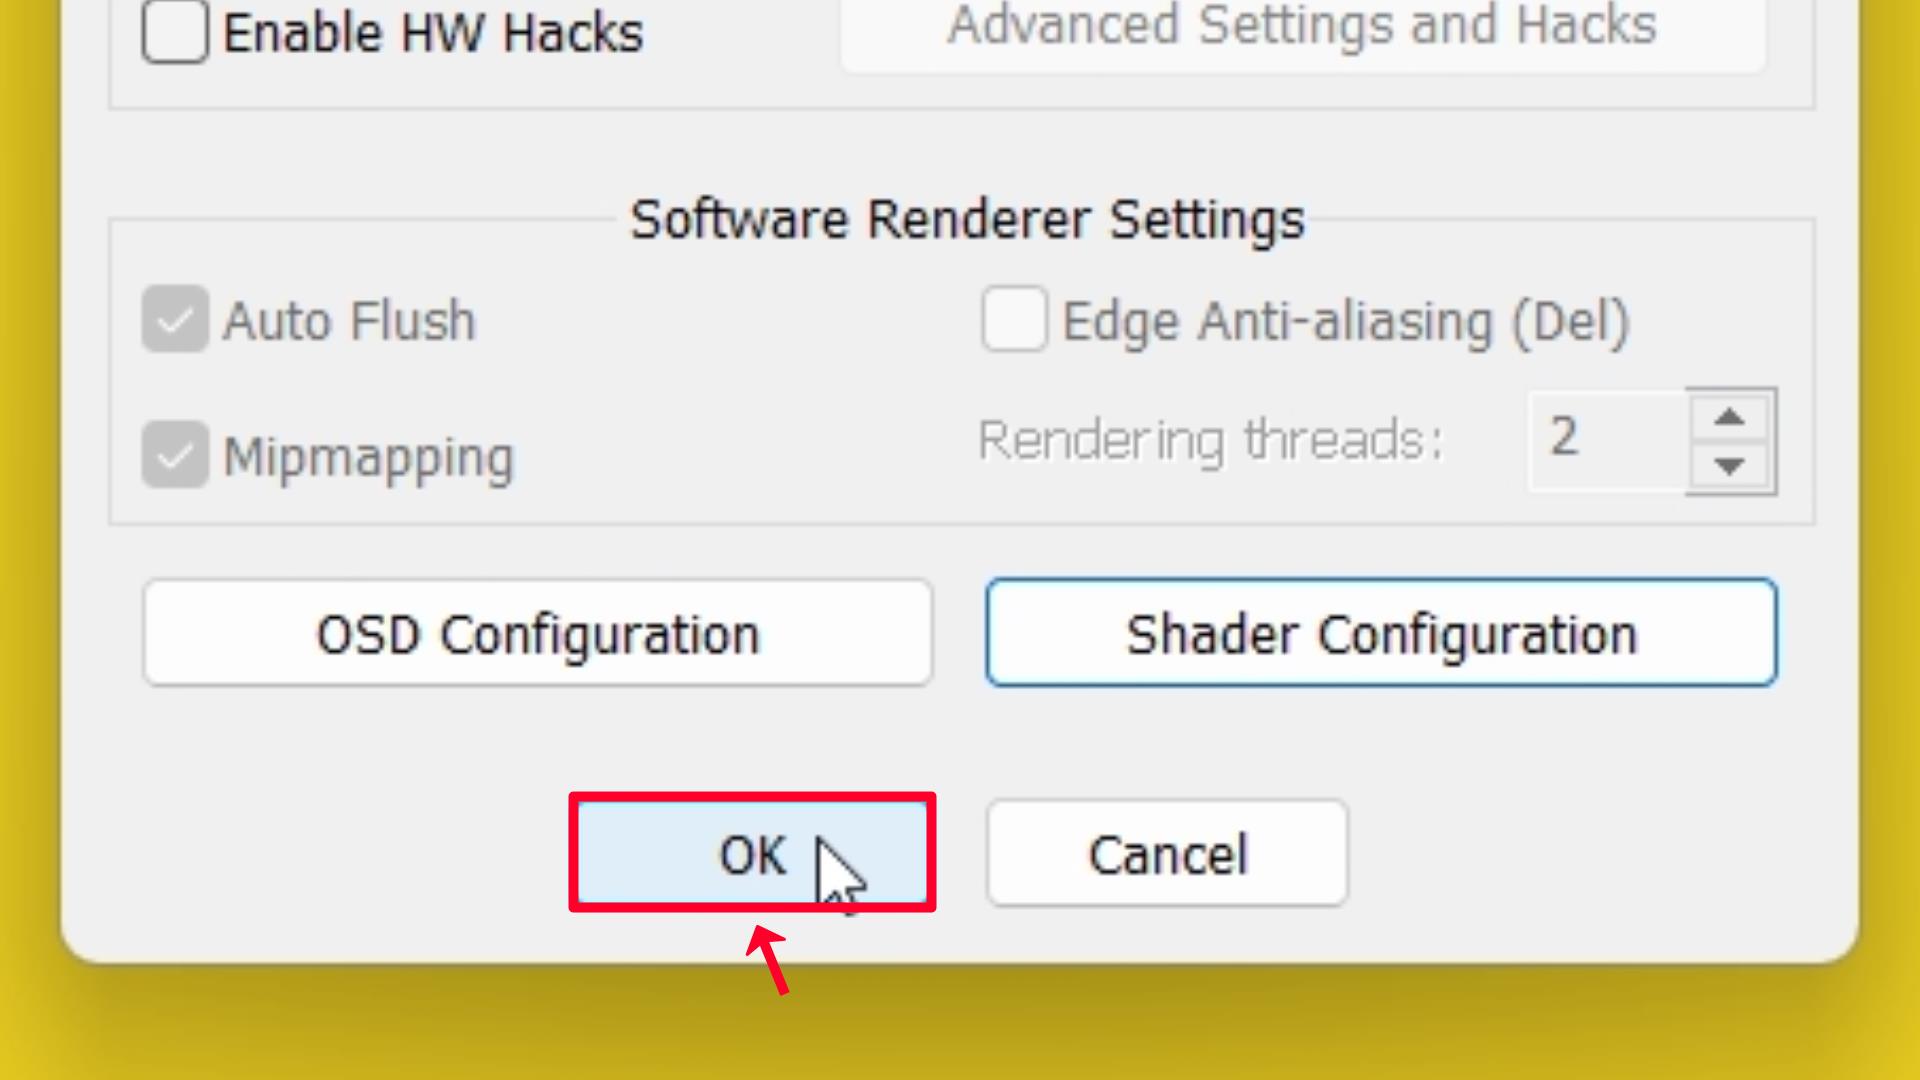
Step 5 – And again Click on the OK button.
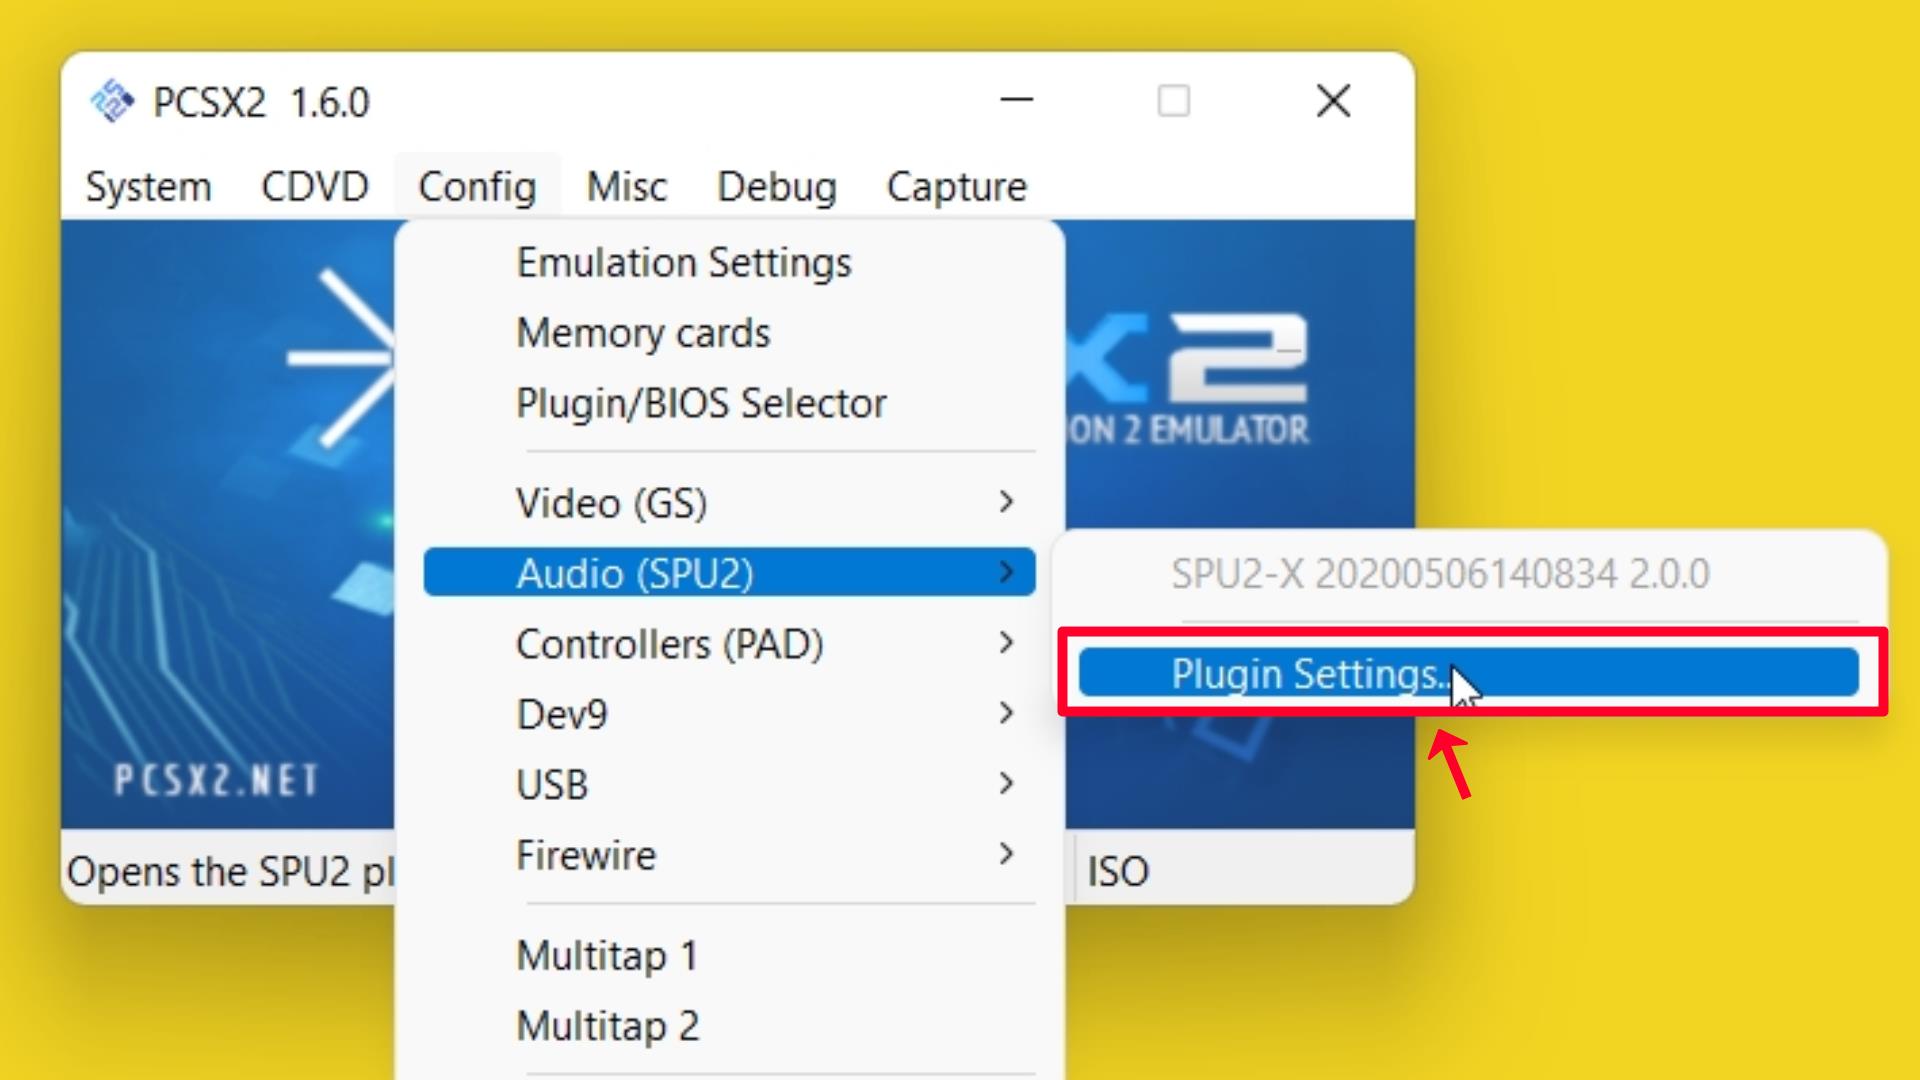
SPU2-X Settings
Step 1 – Go to Config → Audio (SPU2) and click on Plugin Settings…
Mixing Settings
Step 2 – Click and Select Interpolation: 4 – Catmull-Rom (PS2-like/slow) option.
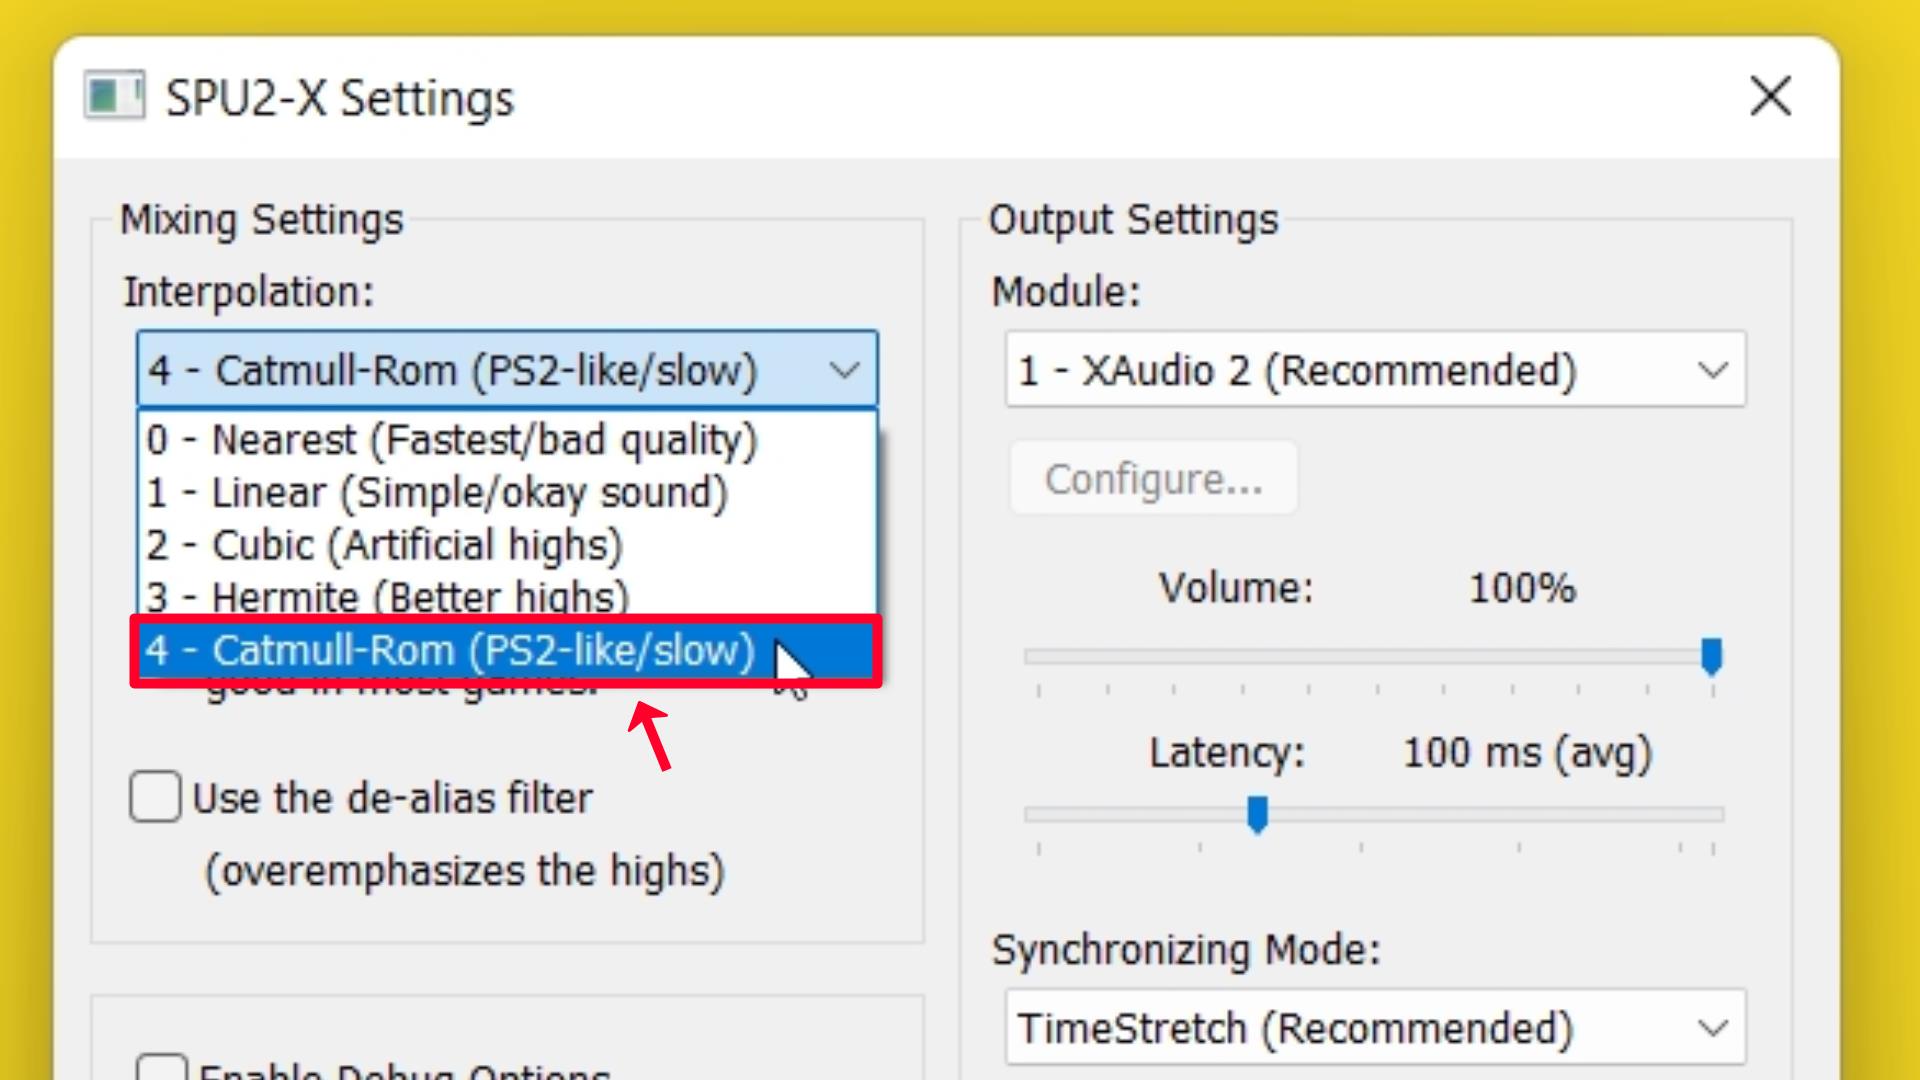
Output Settings
Step 3 – Module: 1 – XAudio 2 (Recommended).

Step 4 – Increase Volume to 100%.
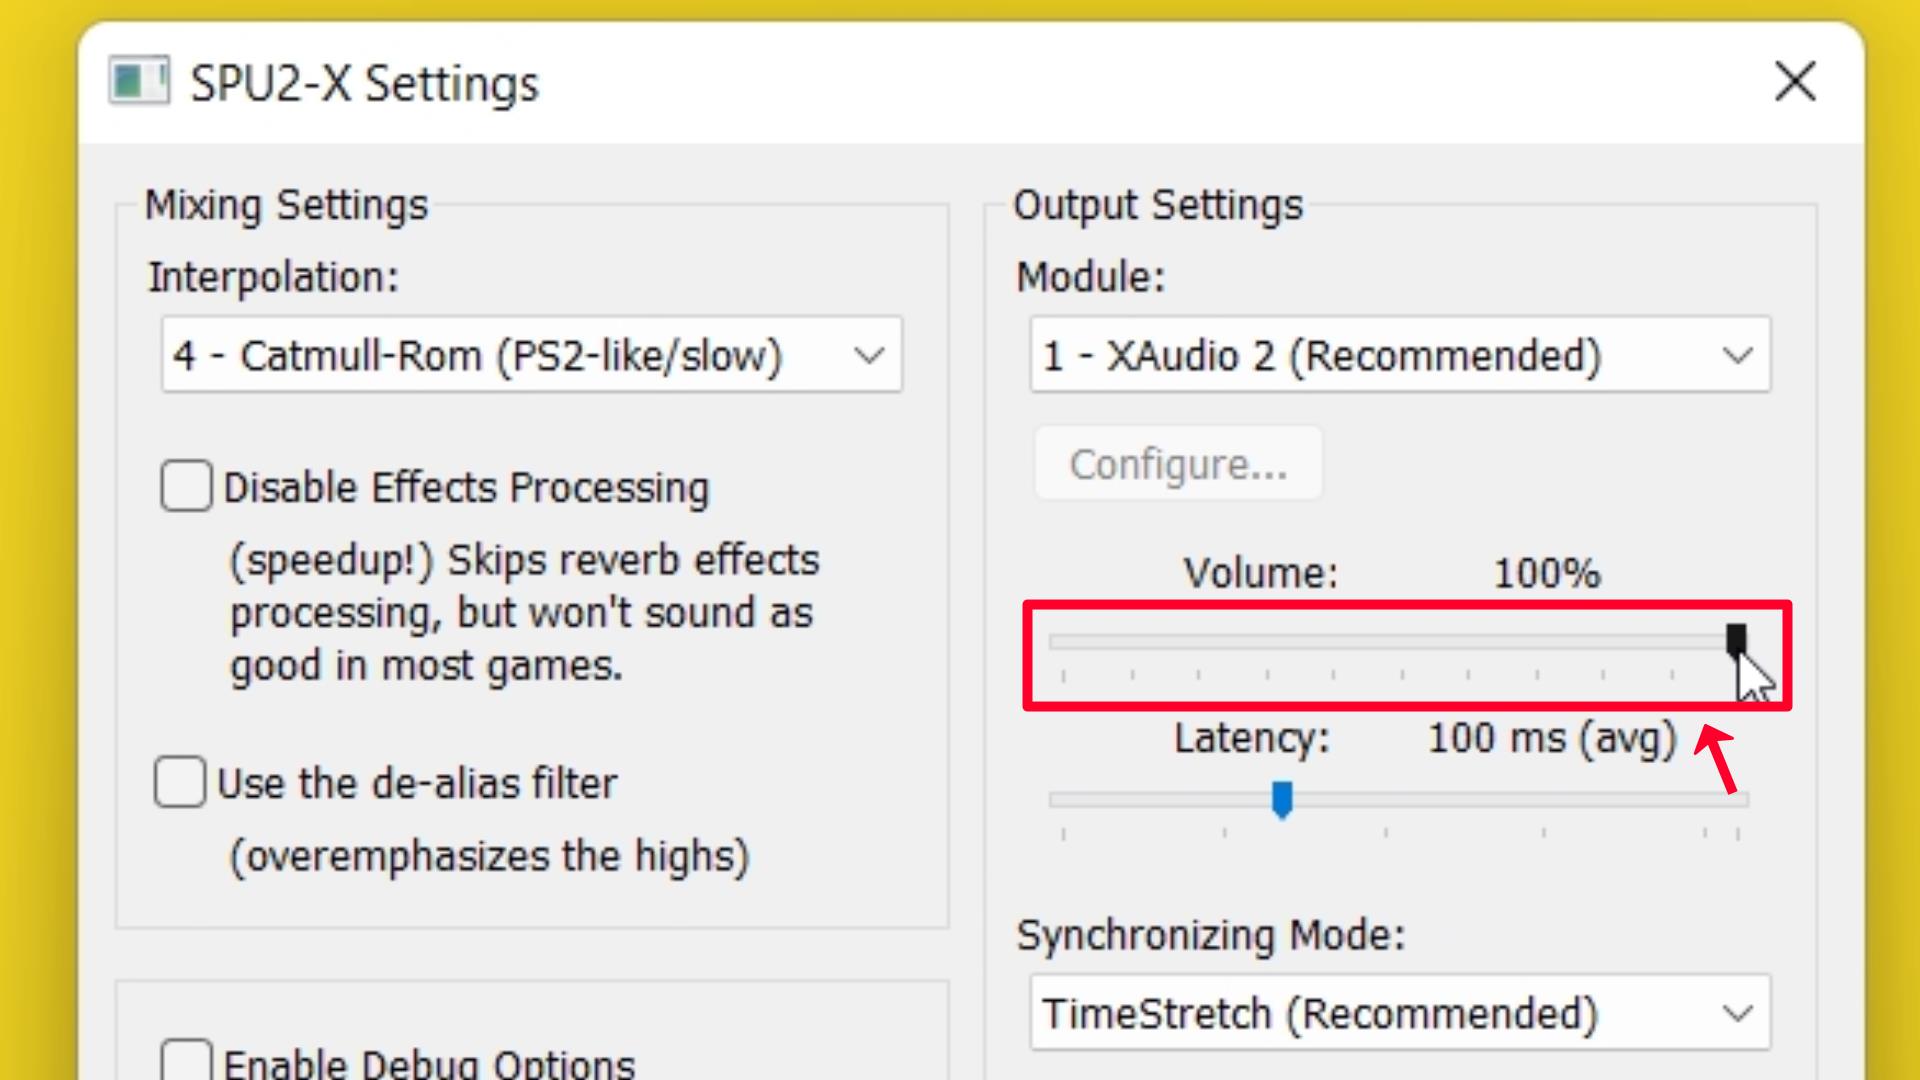
Step 5 – Increase Latency to 100 ms (avg).
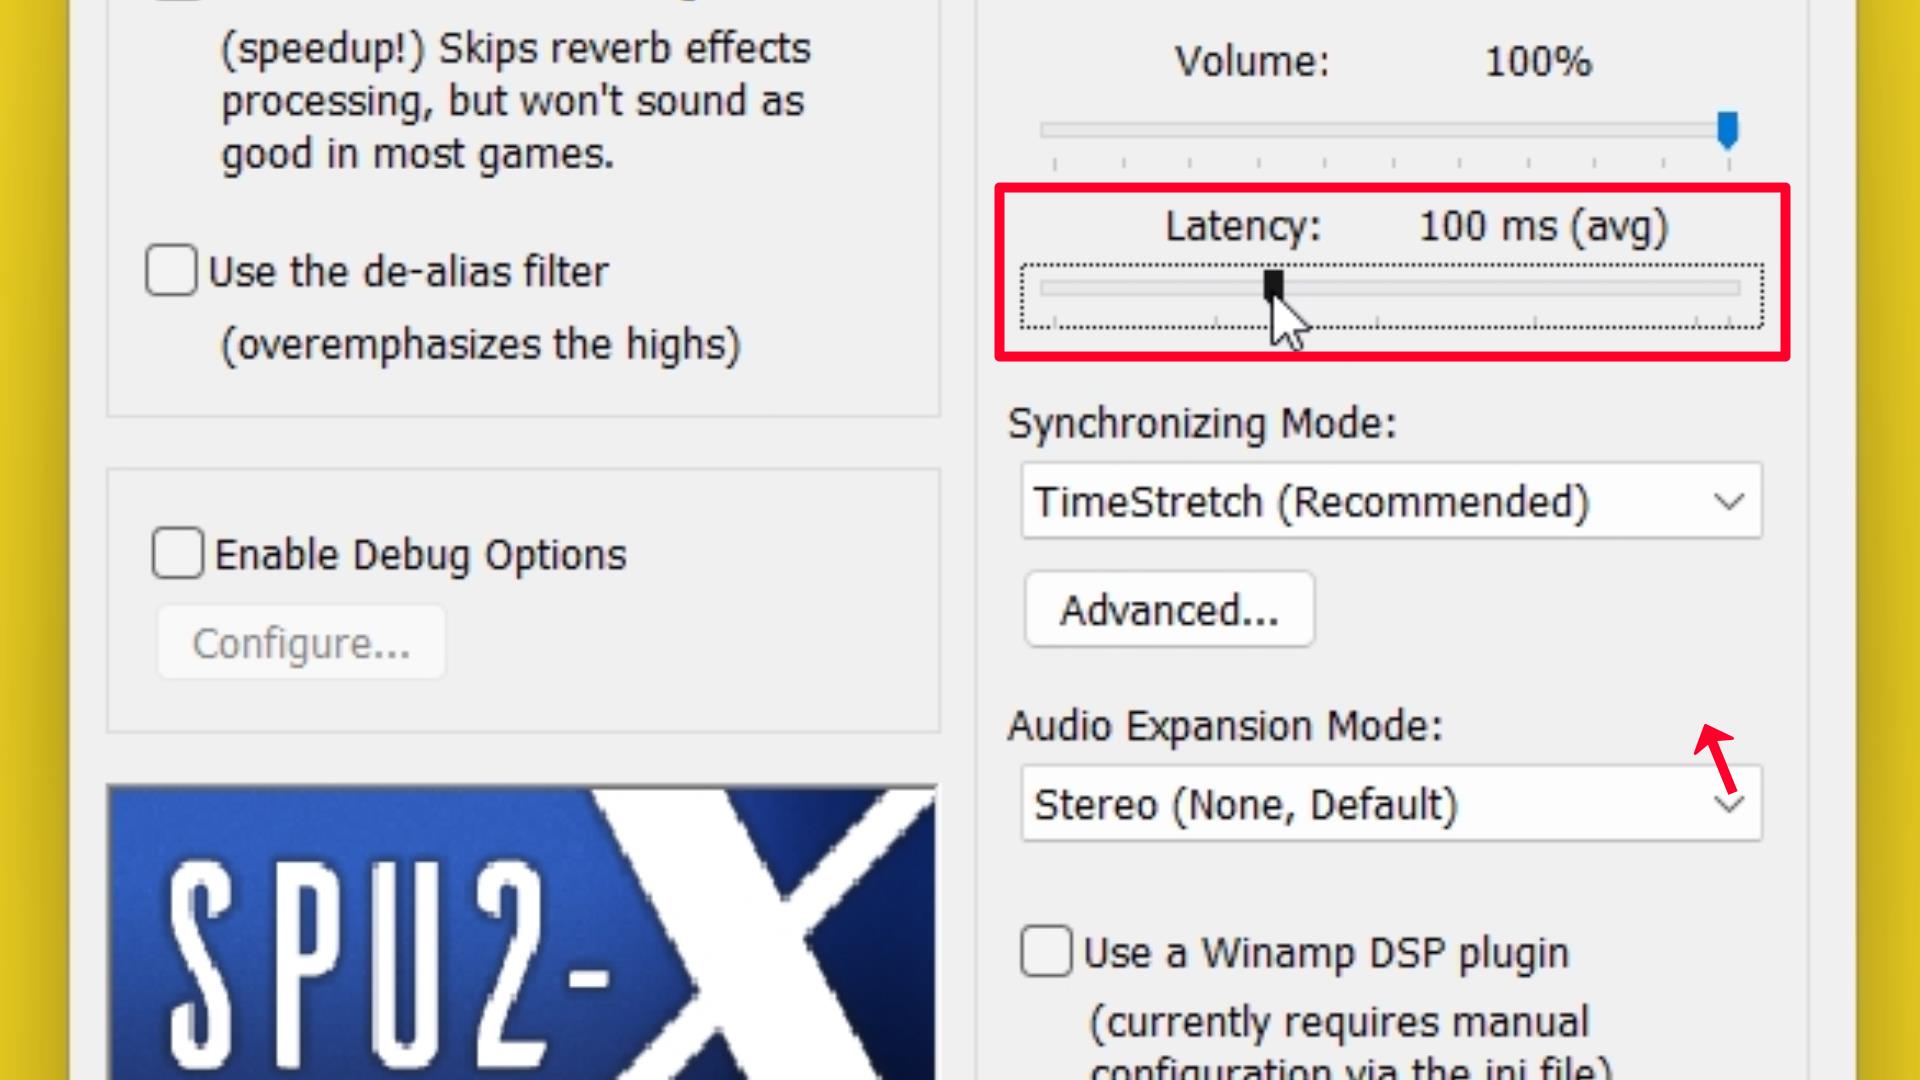
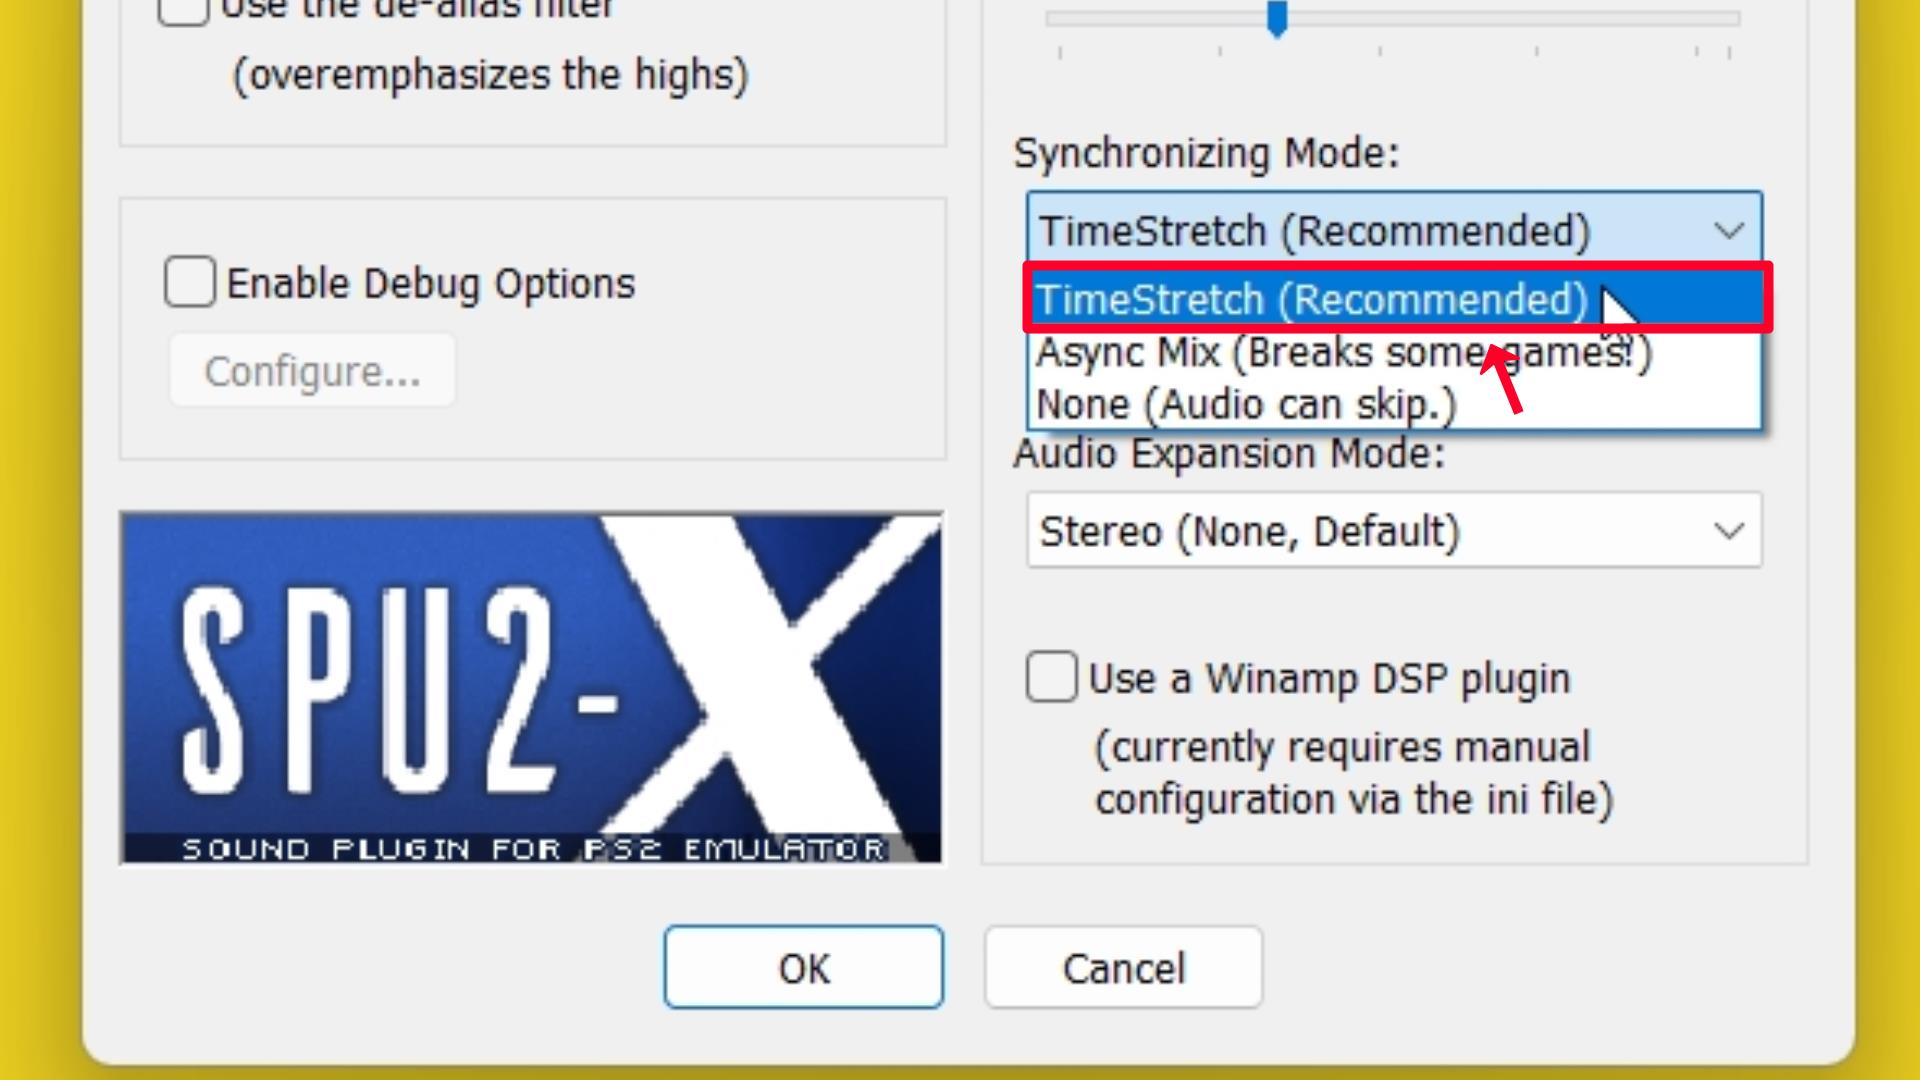
Step 6 – Select the Synchronizing Mode: TimeStretch (Recommended) option.
Step 7 – Select Audio Expansion Mode: Stereo (None, Default) option.

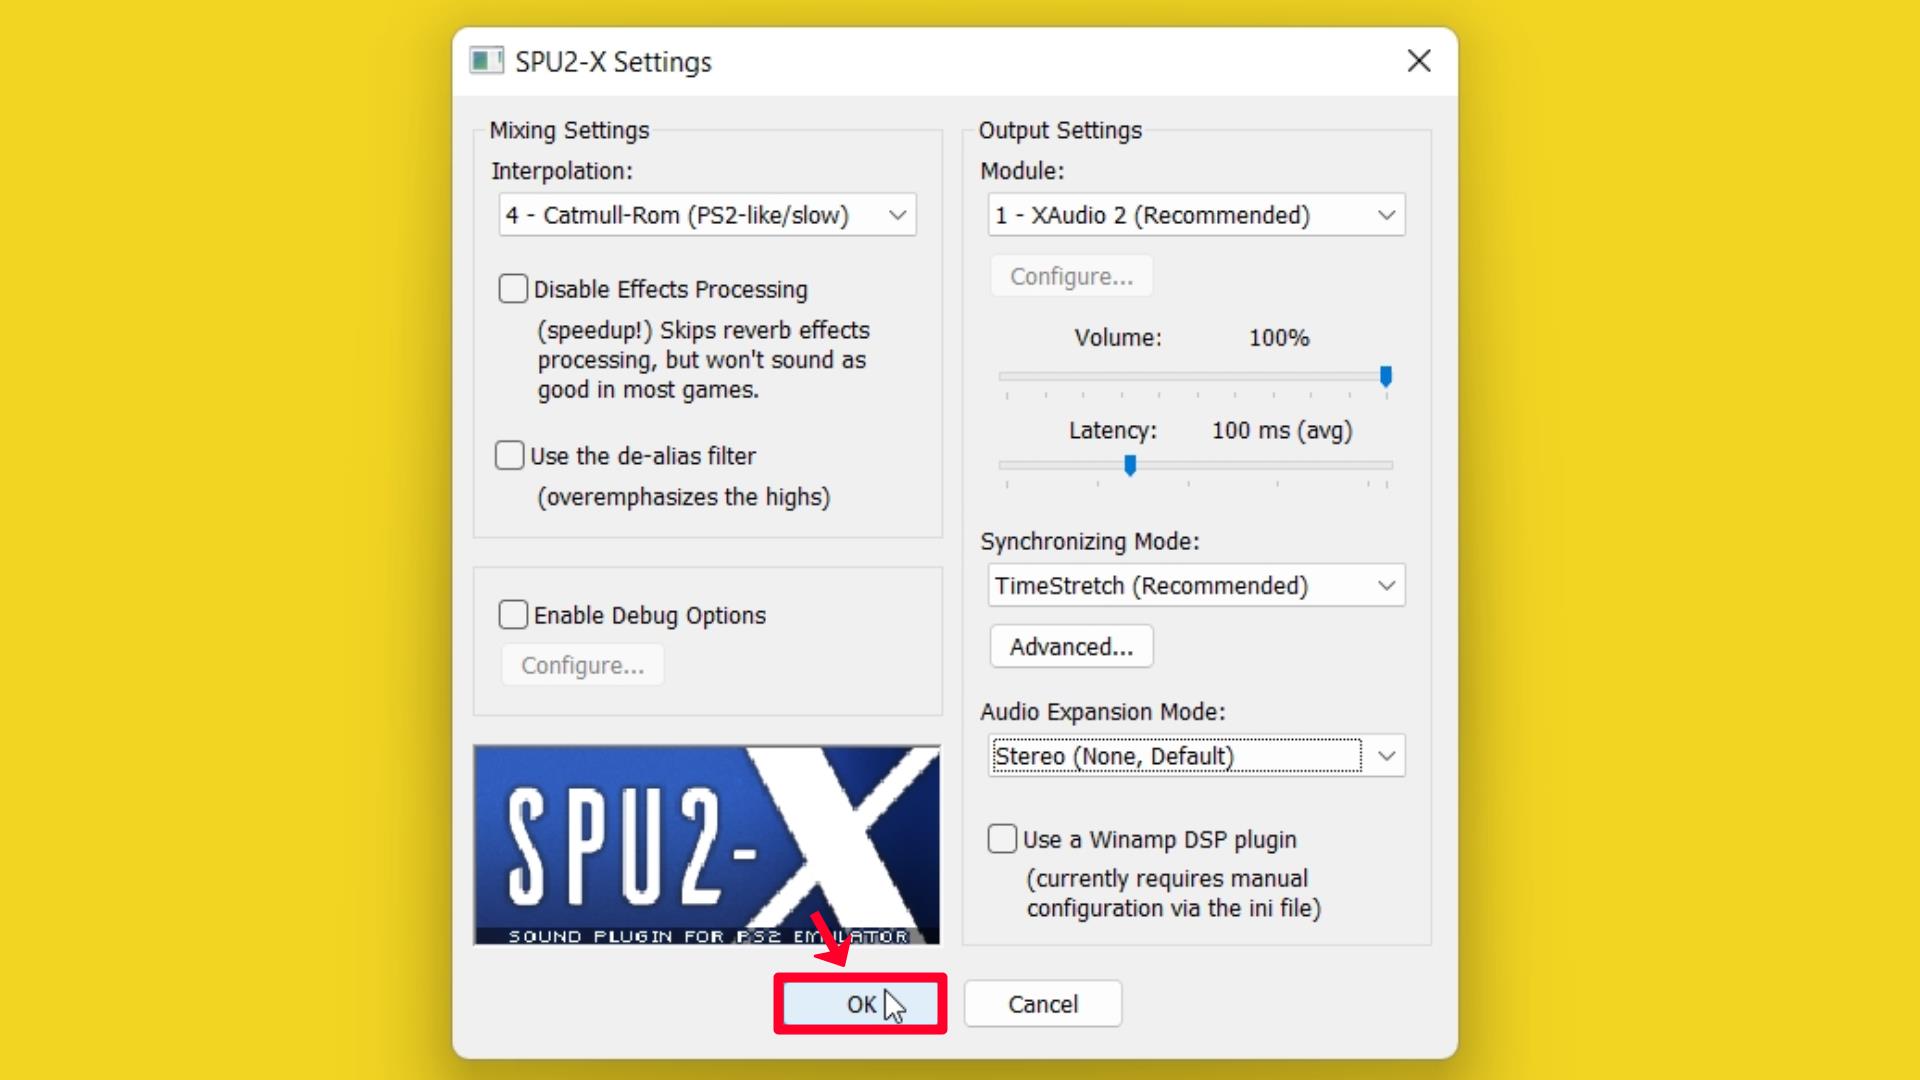
Step 8 – Click on the OK button.
Controllers (PAD) Plugin Settings
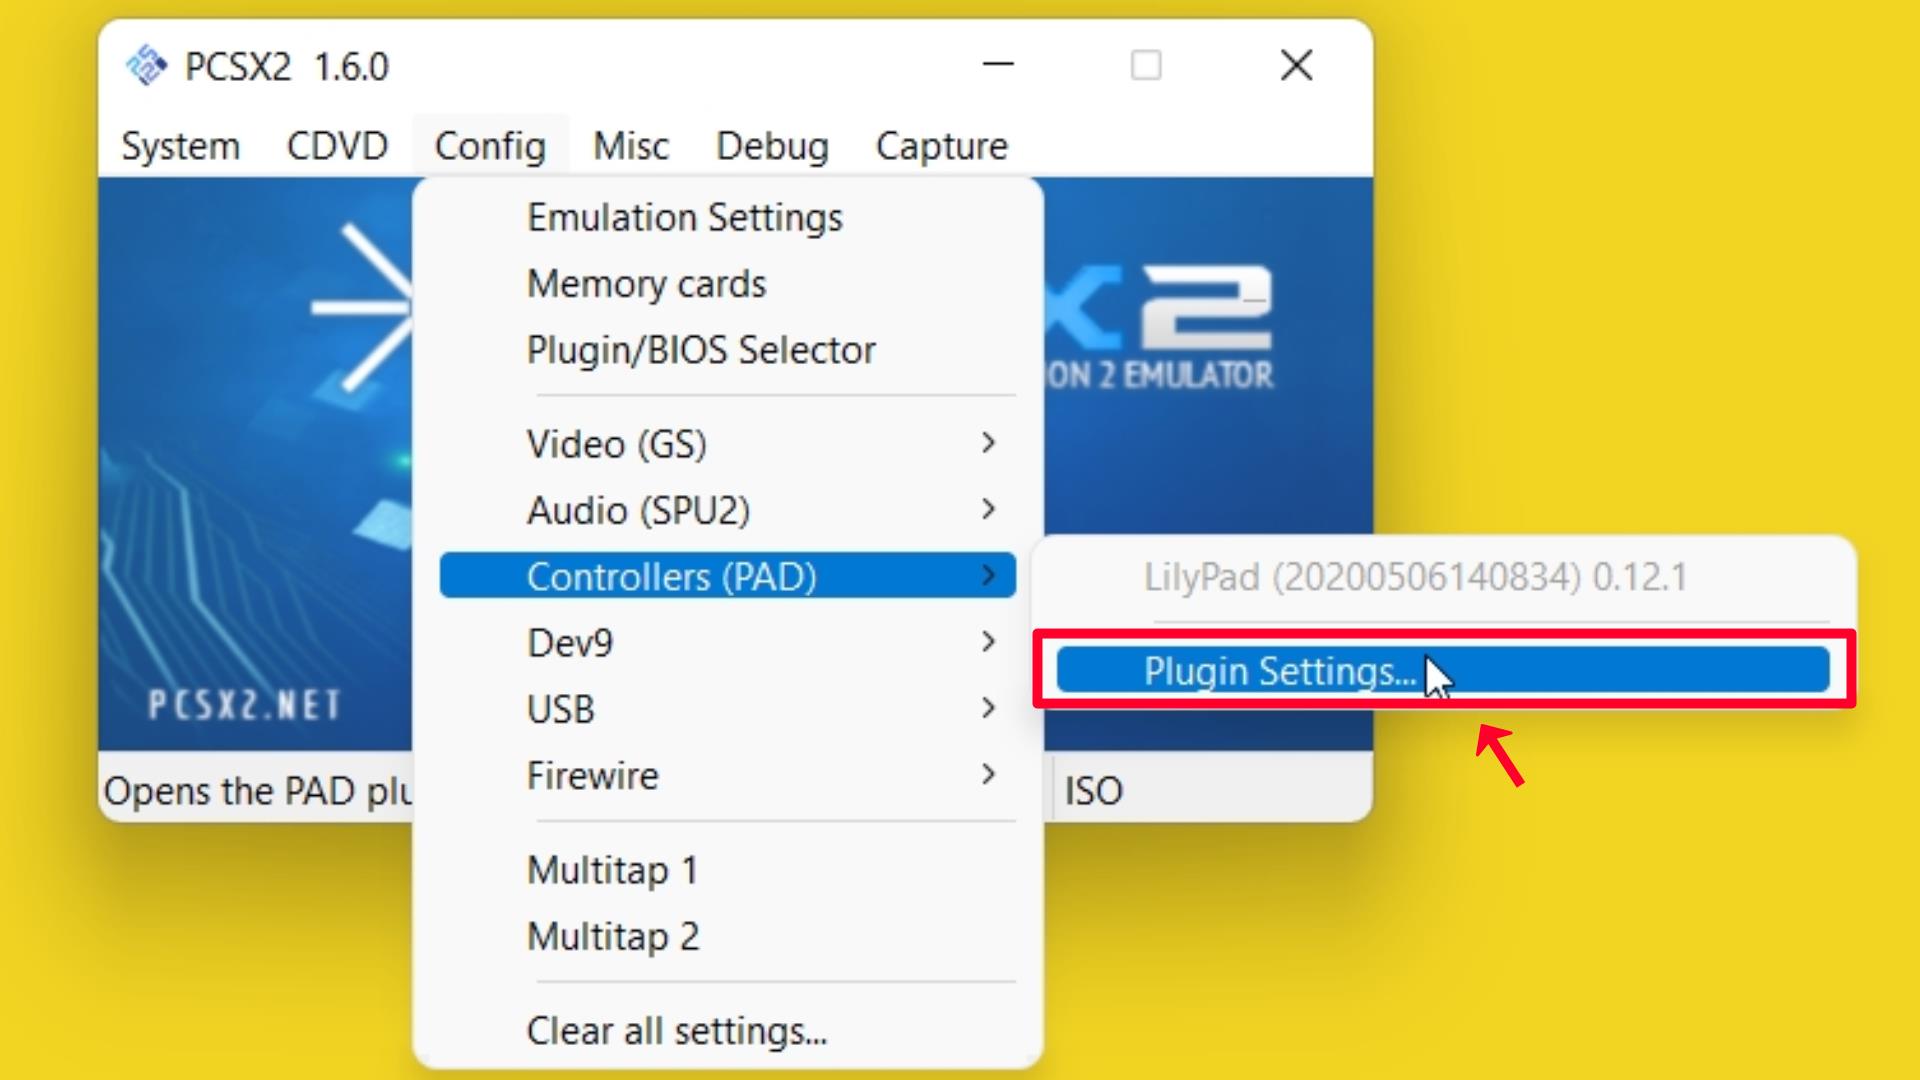
Step 1 – Go to Config → Controllers (PAD) and click on Plugin Settings…
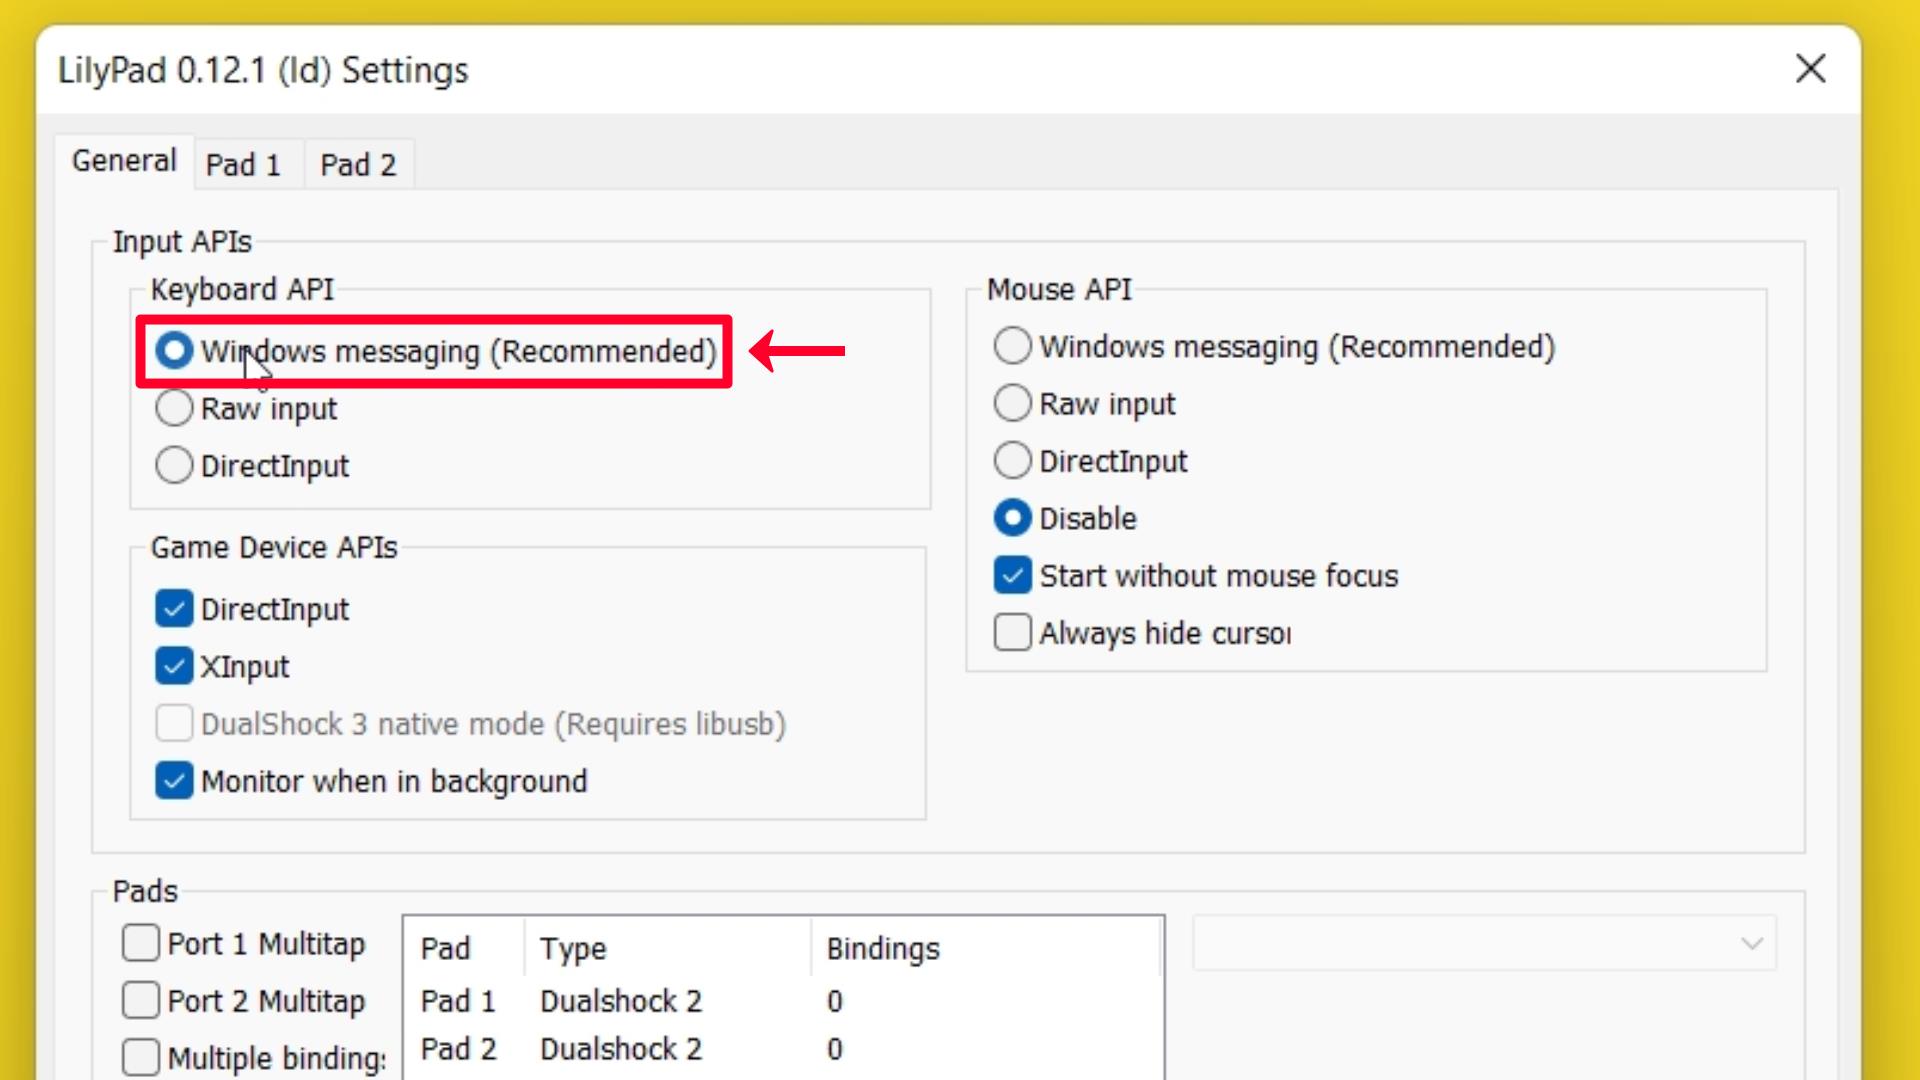
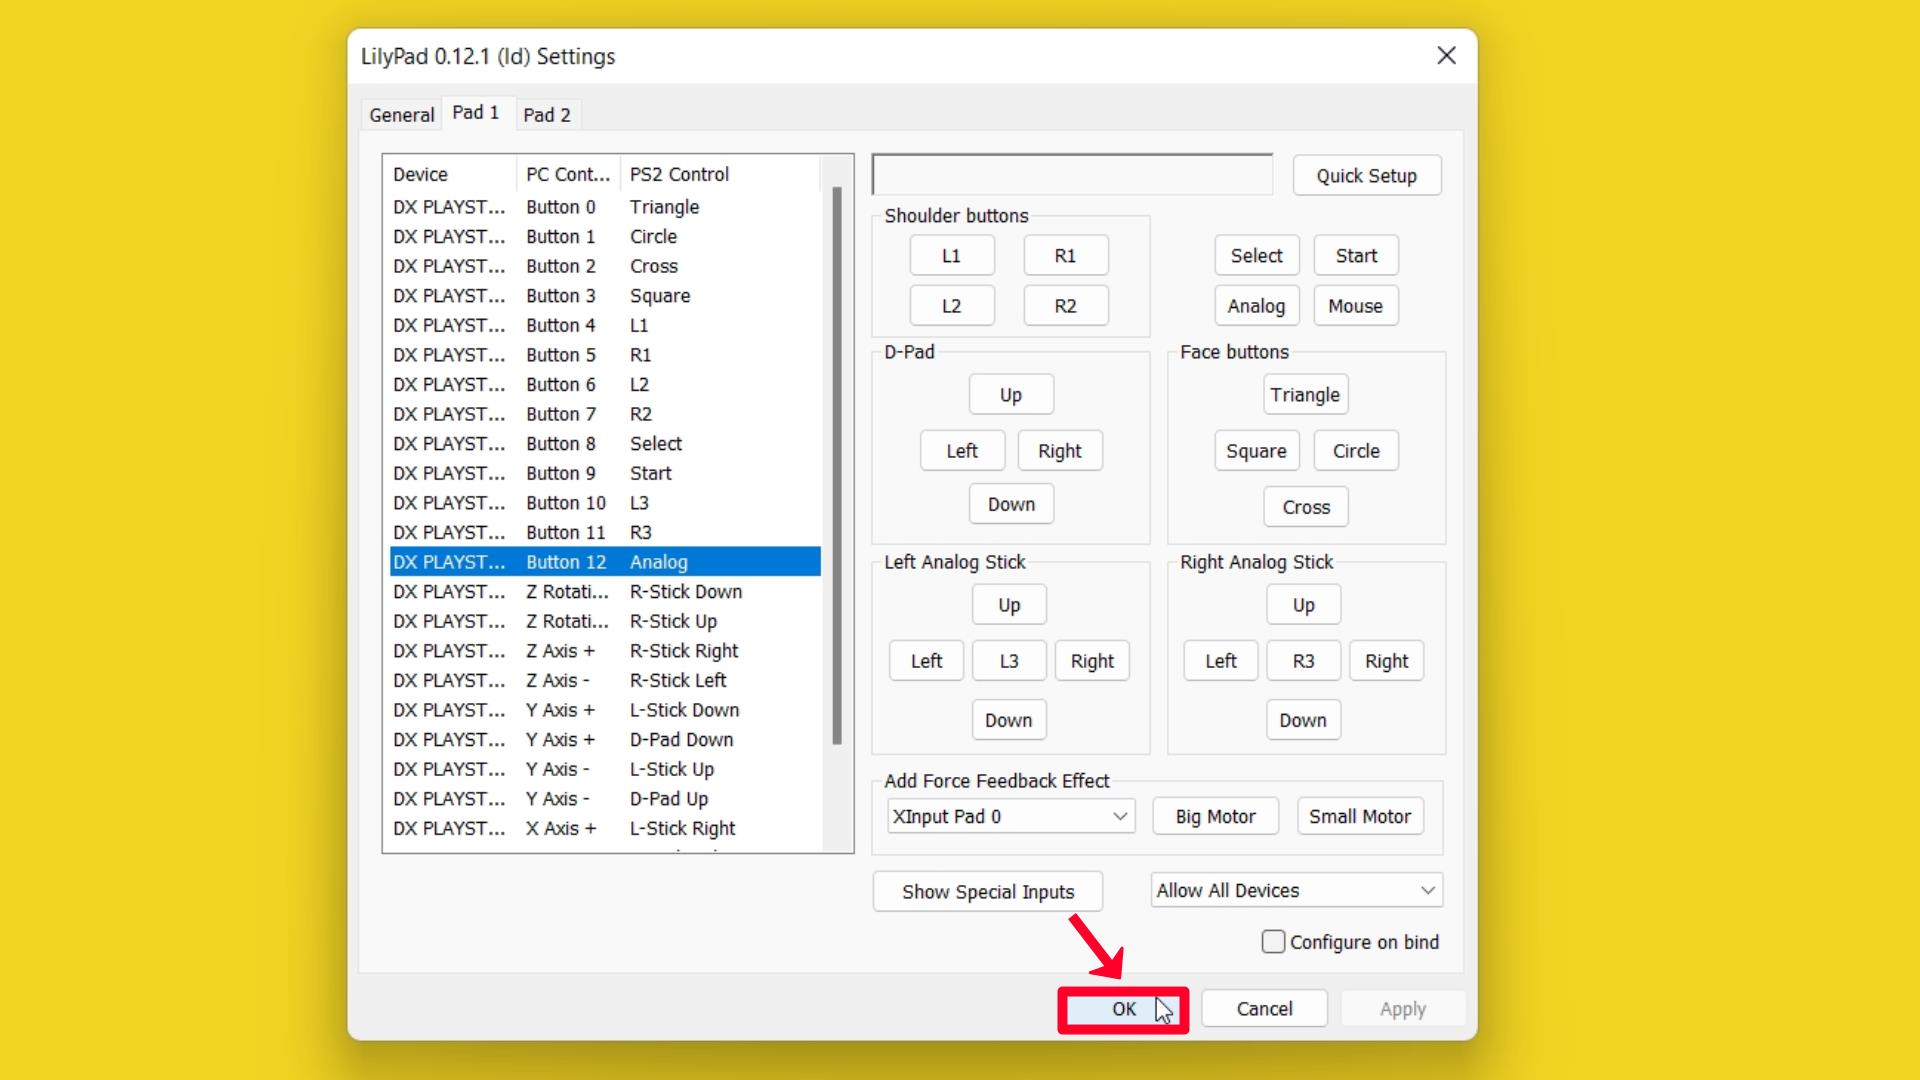
LilyPad 0.12.1 (Id) Settings
Step 2 – Click and select Windows messaging for Keyboard API (Recommended).
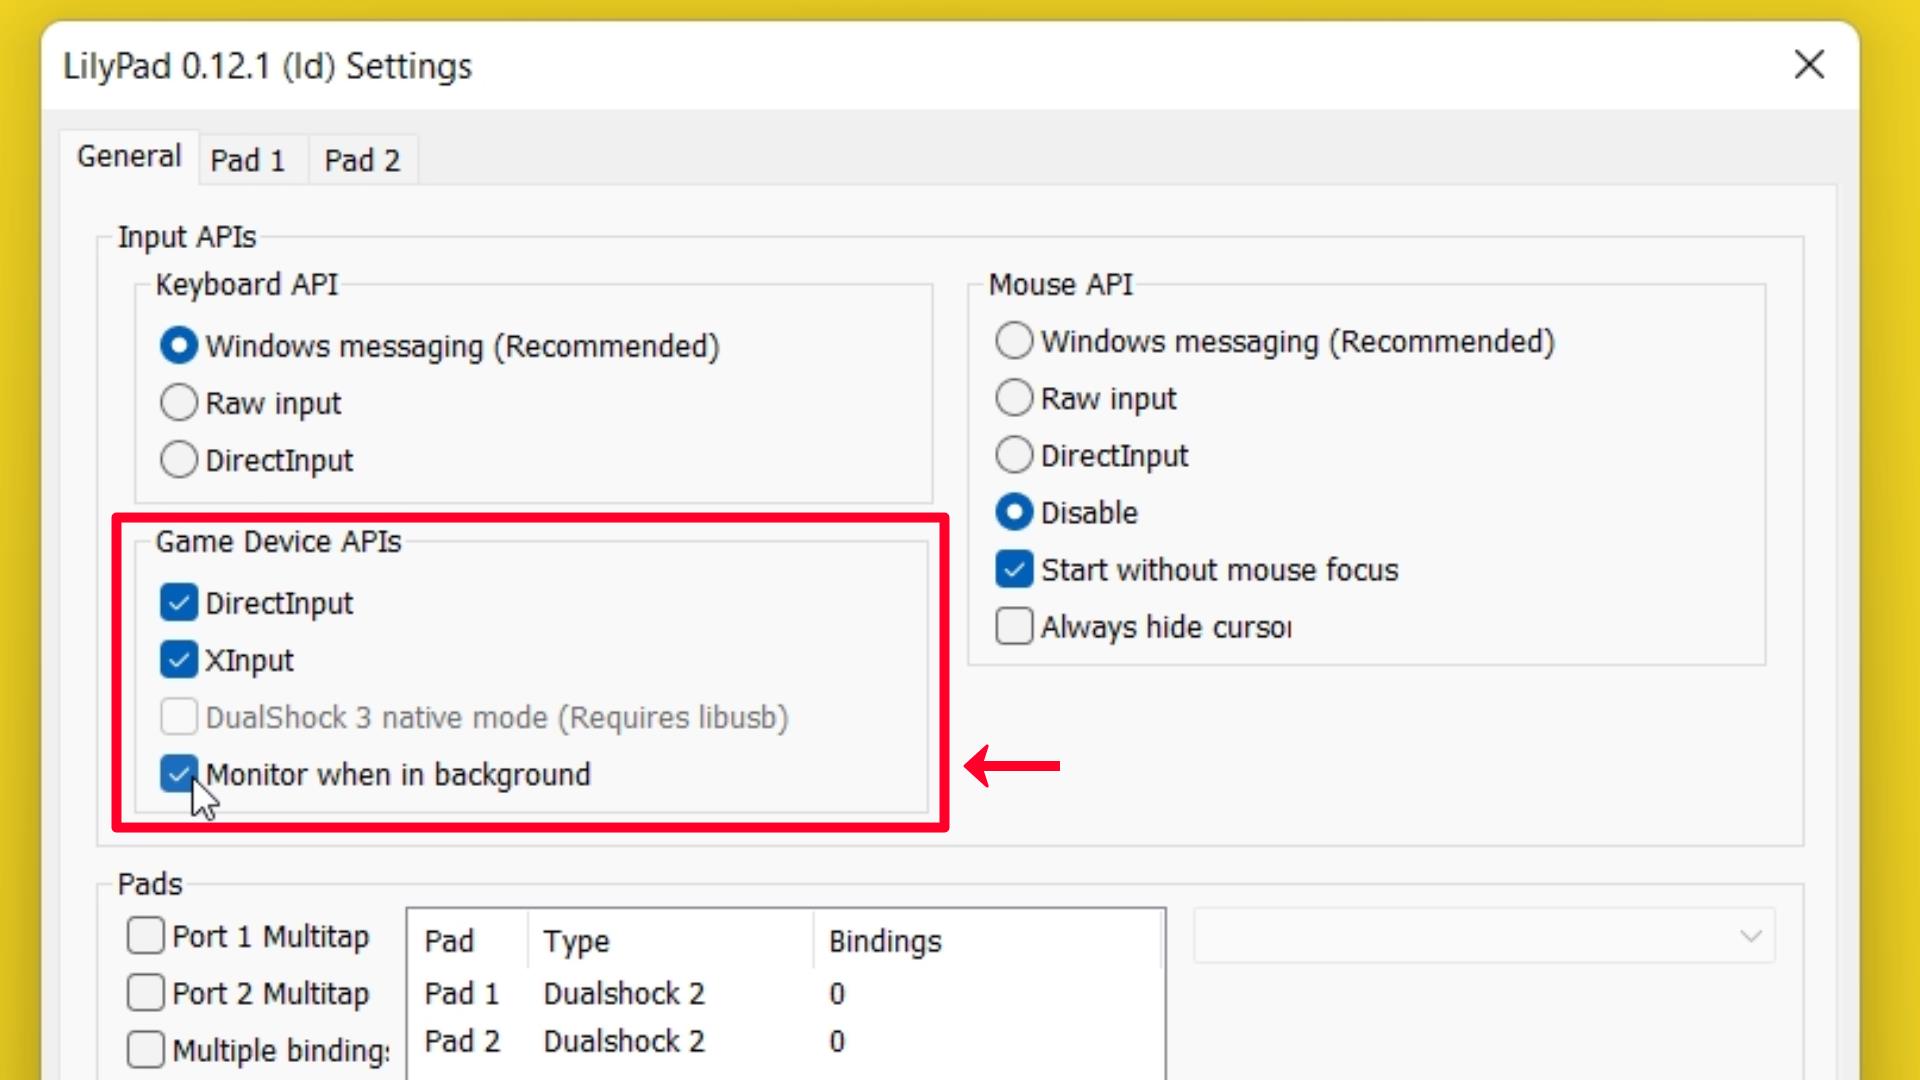
Step 3 – ☑ [Check Mark] DirectInput, XInput and Monitor when in the background on the Game Device APIs option.
Step 4 – Disable Mouse API and ☑ [Check Mark] Start without mouse focus option only if you have a PC Gamepad to use on the PCSX2 emulator.

Note: In this tutorial, I am going to use my PC gamepad as a PCSX2 Video Game Controller, So this setting is only for those who want to use their gamepad on PCSX2.
Step 5 – ☑ [Check Mark] and enable the Multiple Binds option.
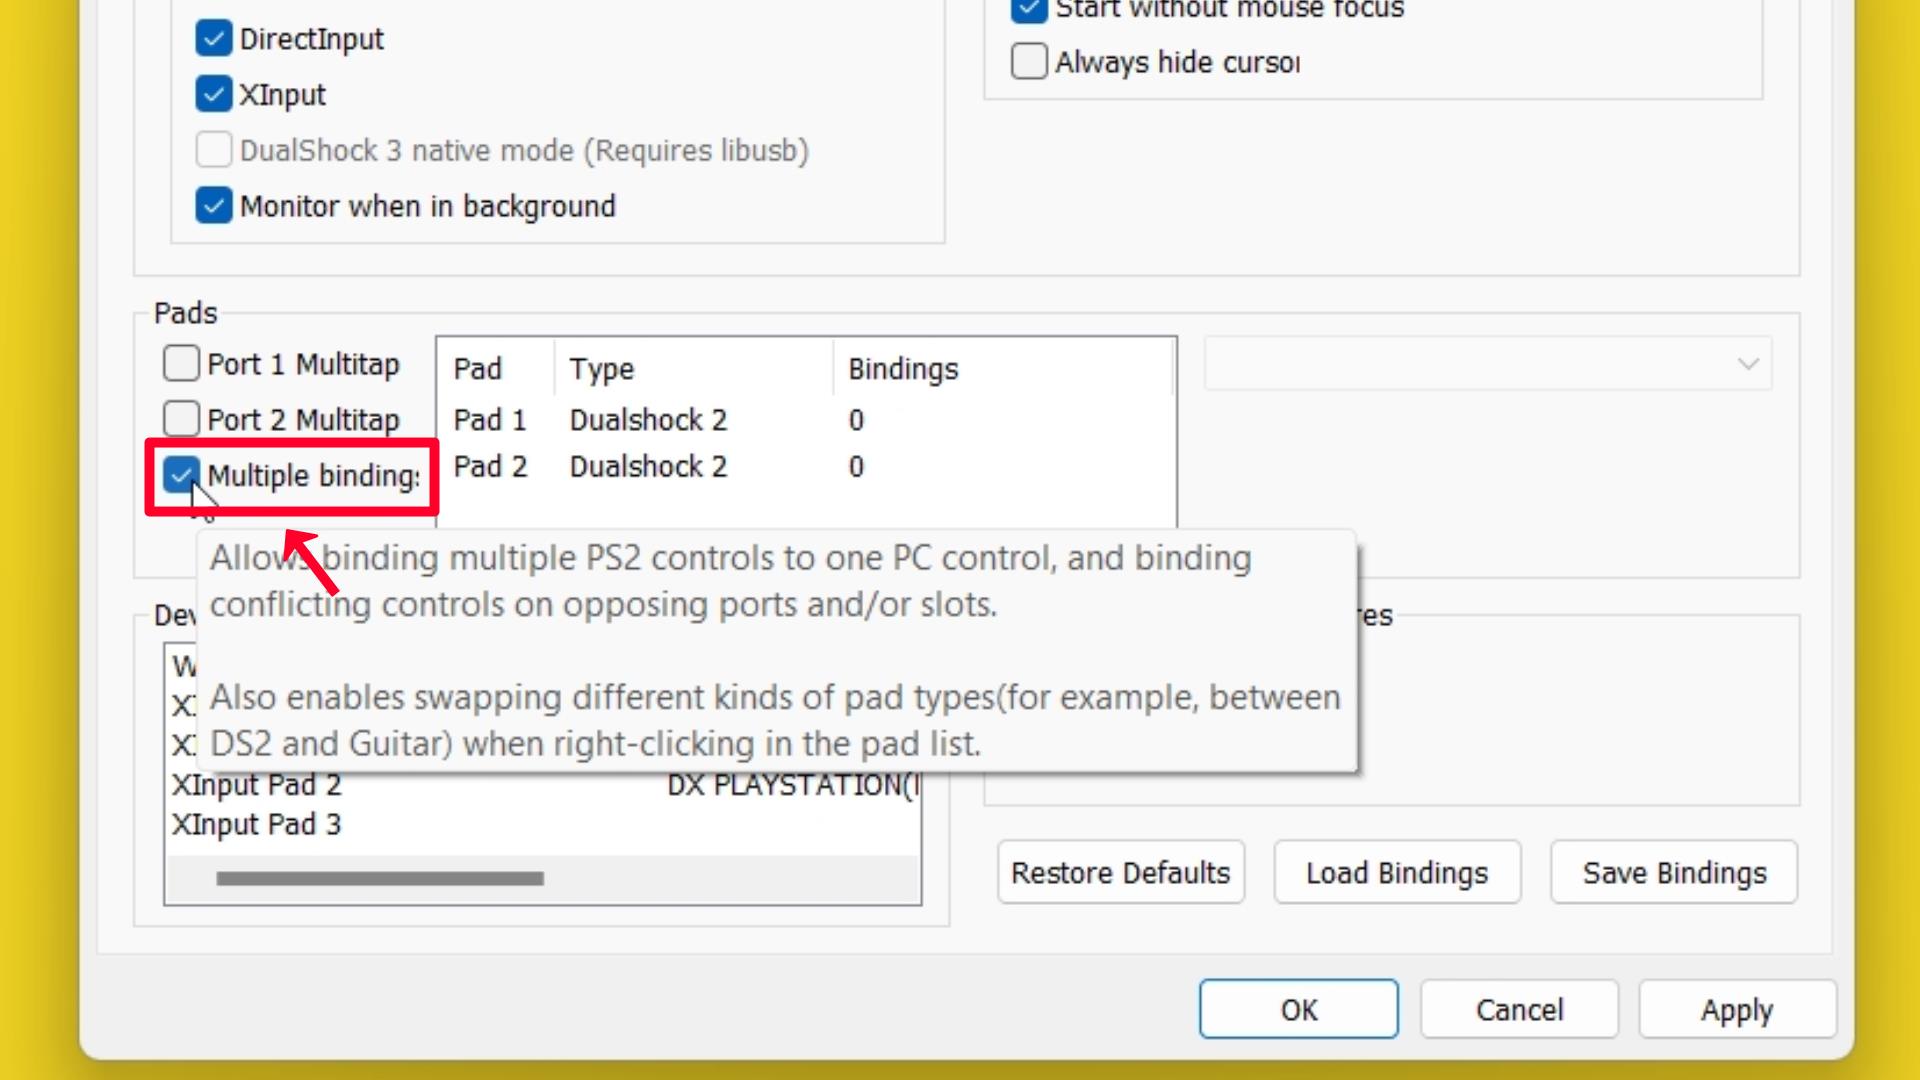
- Enables the binding of multiple PS2 controls to a single PC control as well as the binding of controls that are in conflict with ports and/or slots.
- When right-clicking in the pad list, it also lets you switch between different types of pads, like DS2 and Guitar.
Step 6 – Click on the Pad 1 option and connect your Gamepad to your PC.
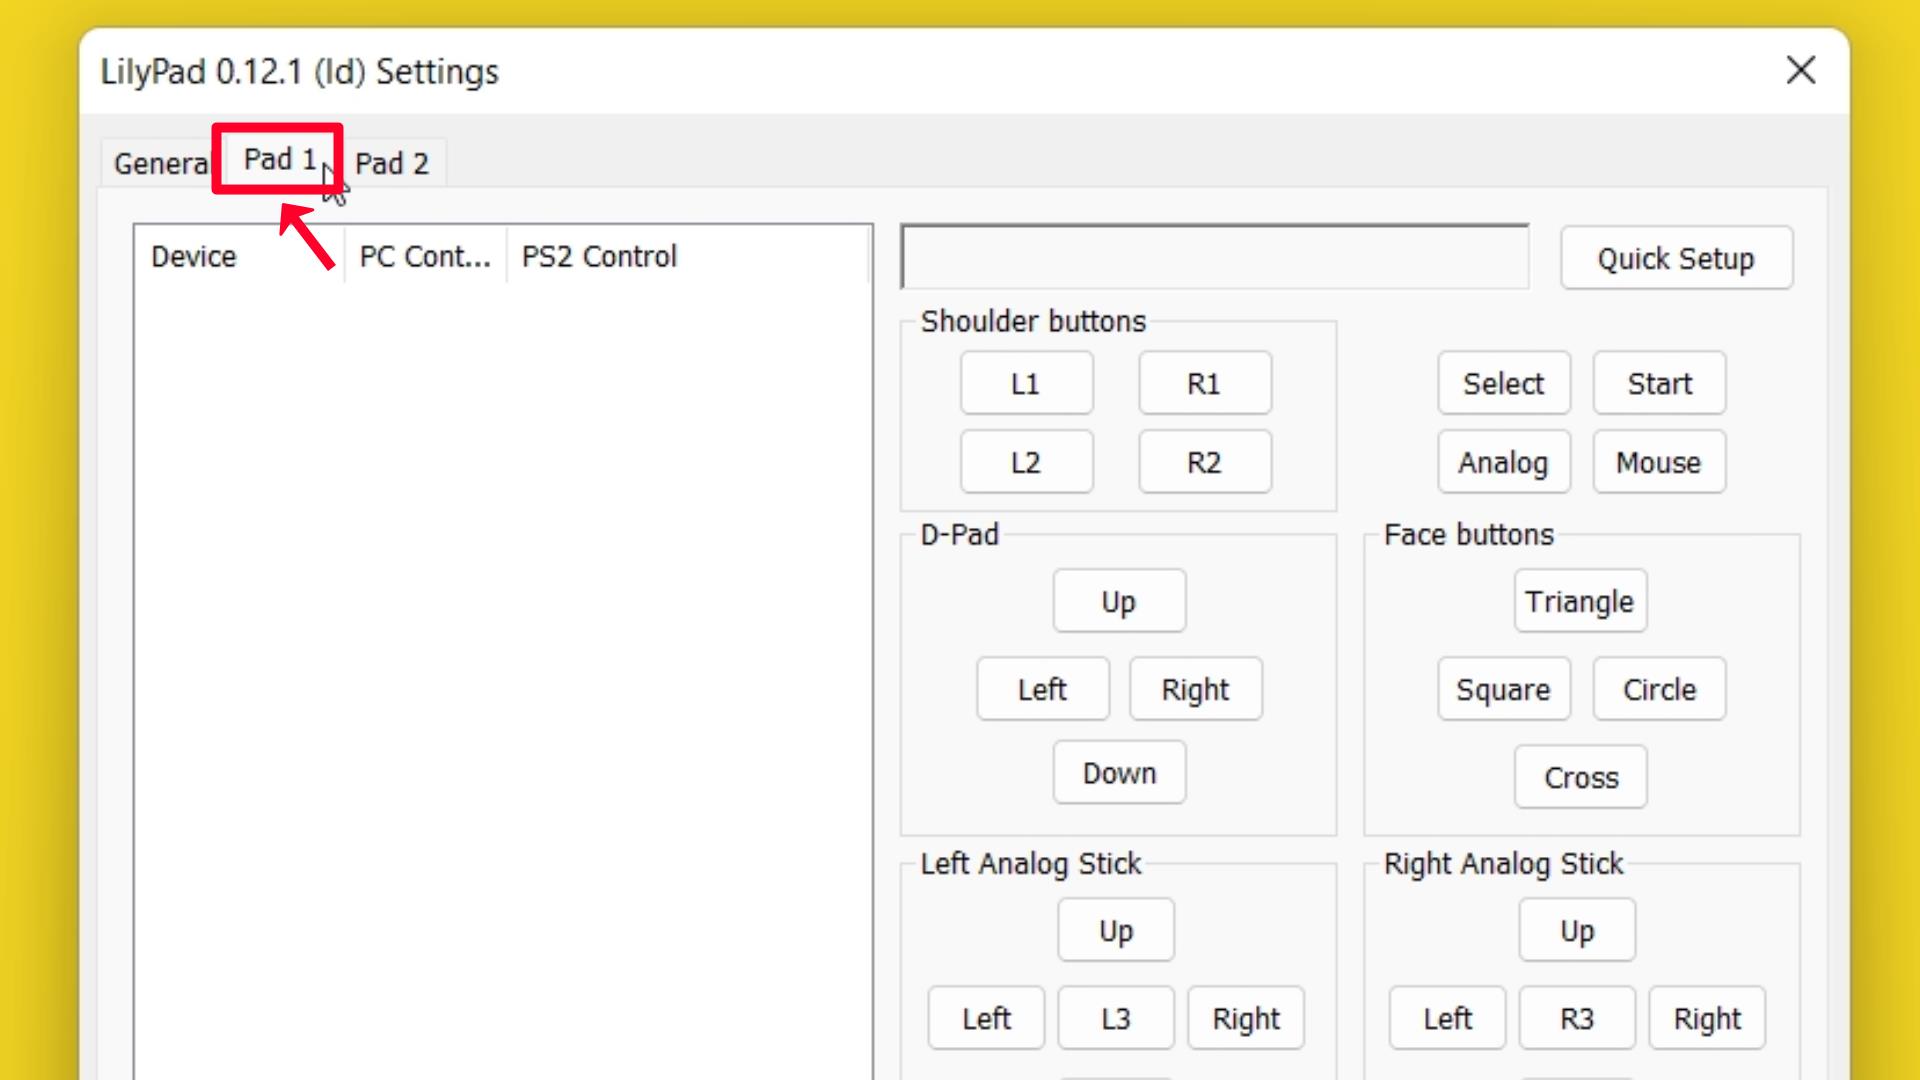
Step 7 – Click on Quick Setup.
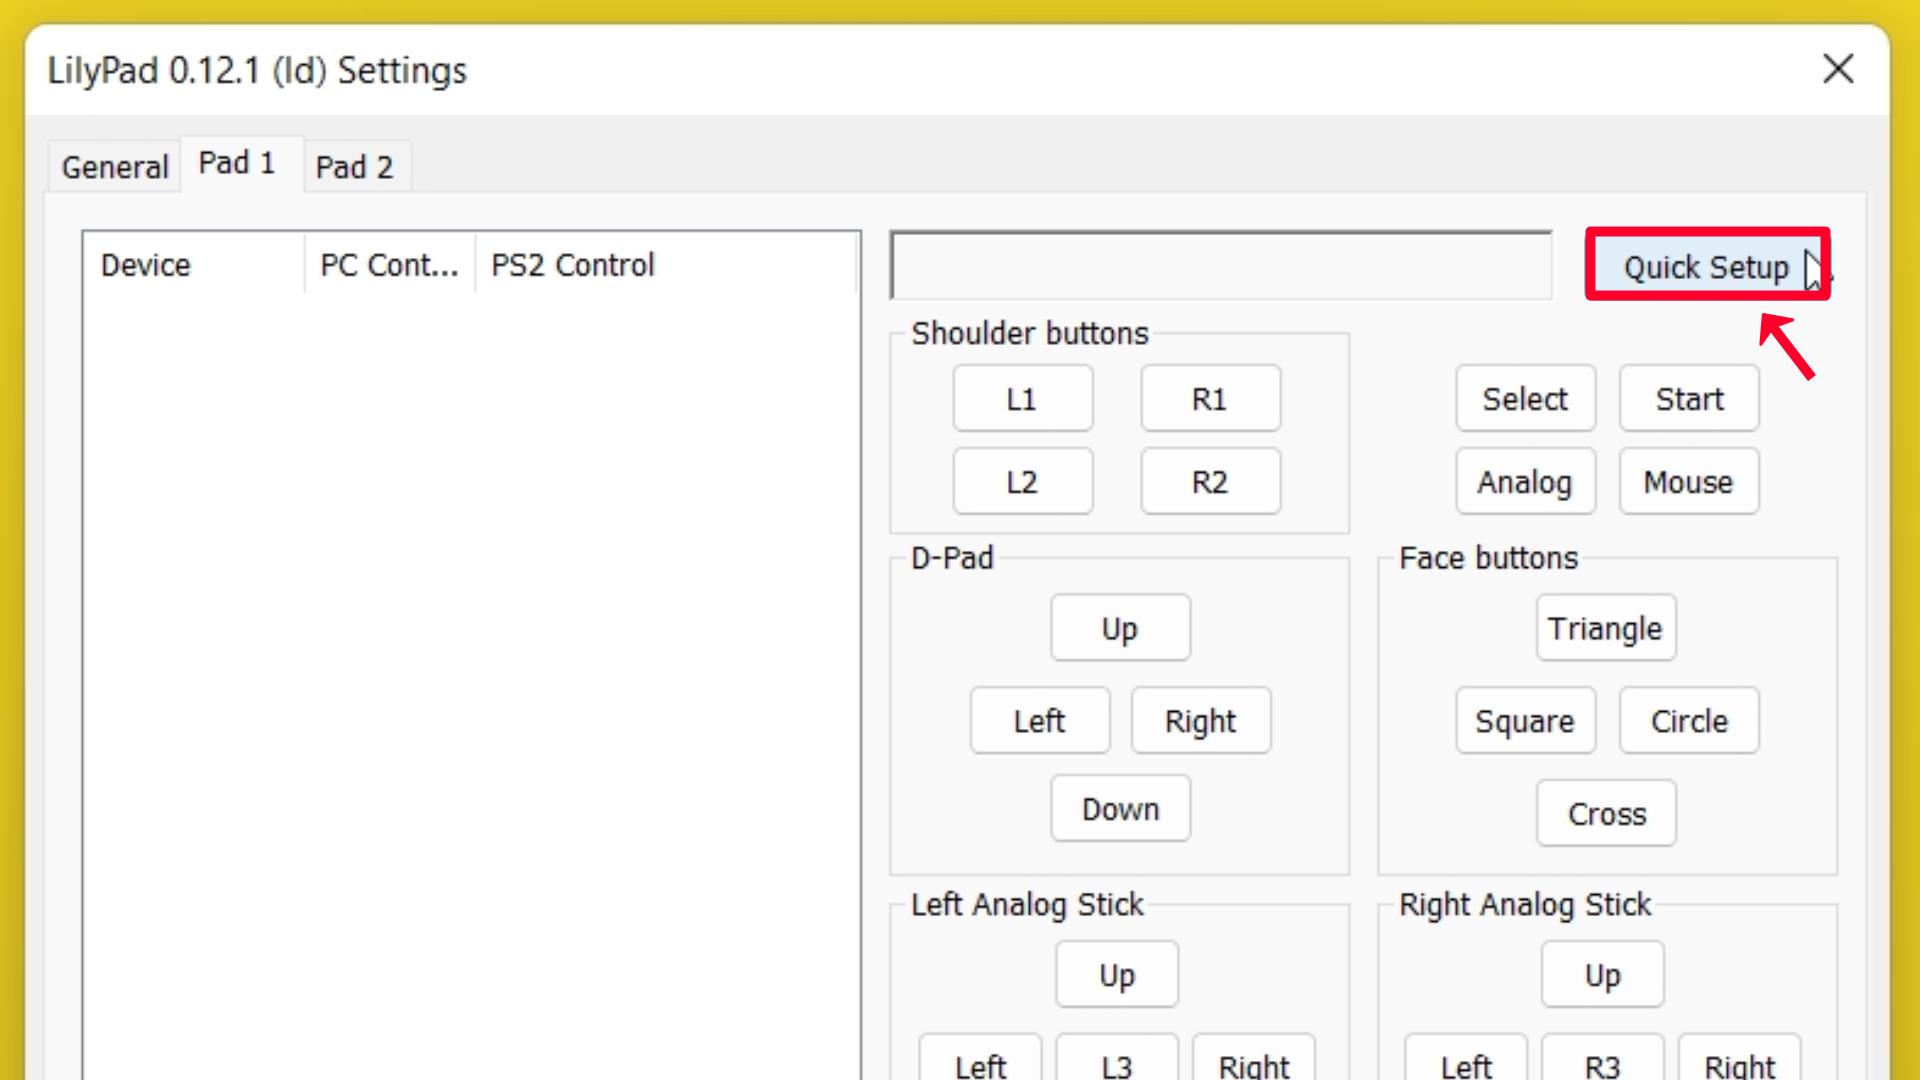
Step 8 – Add and set your Gamepad PC Control to PS2 Control for your PCSX2 emulator.
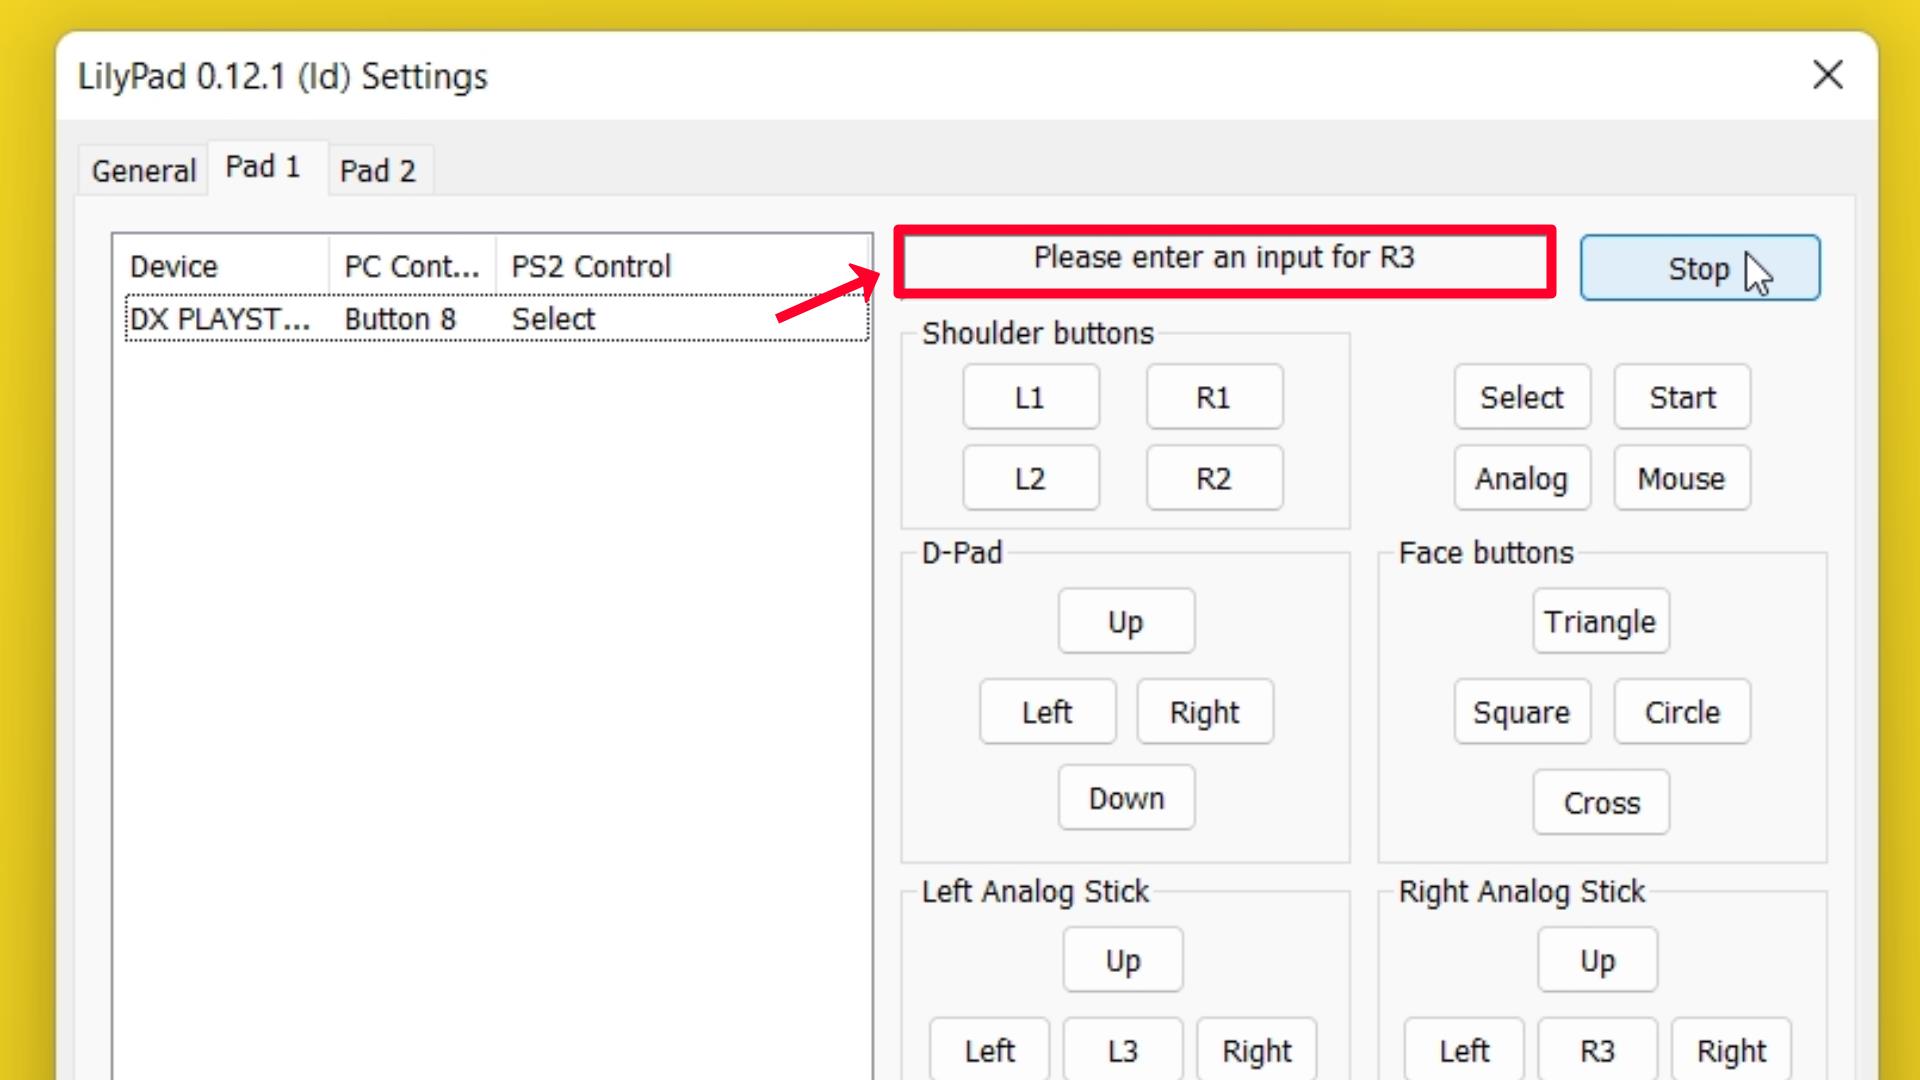
Note: You need to just press one by one your Gamepad buttons to set up your PC Gamepad as a PCSX2 Gamepad.
Step 9 – Click and Apply This Settings.
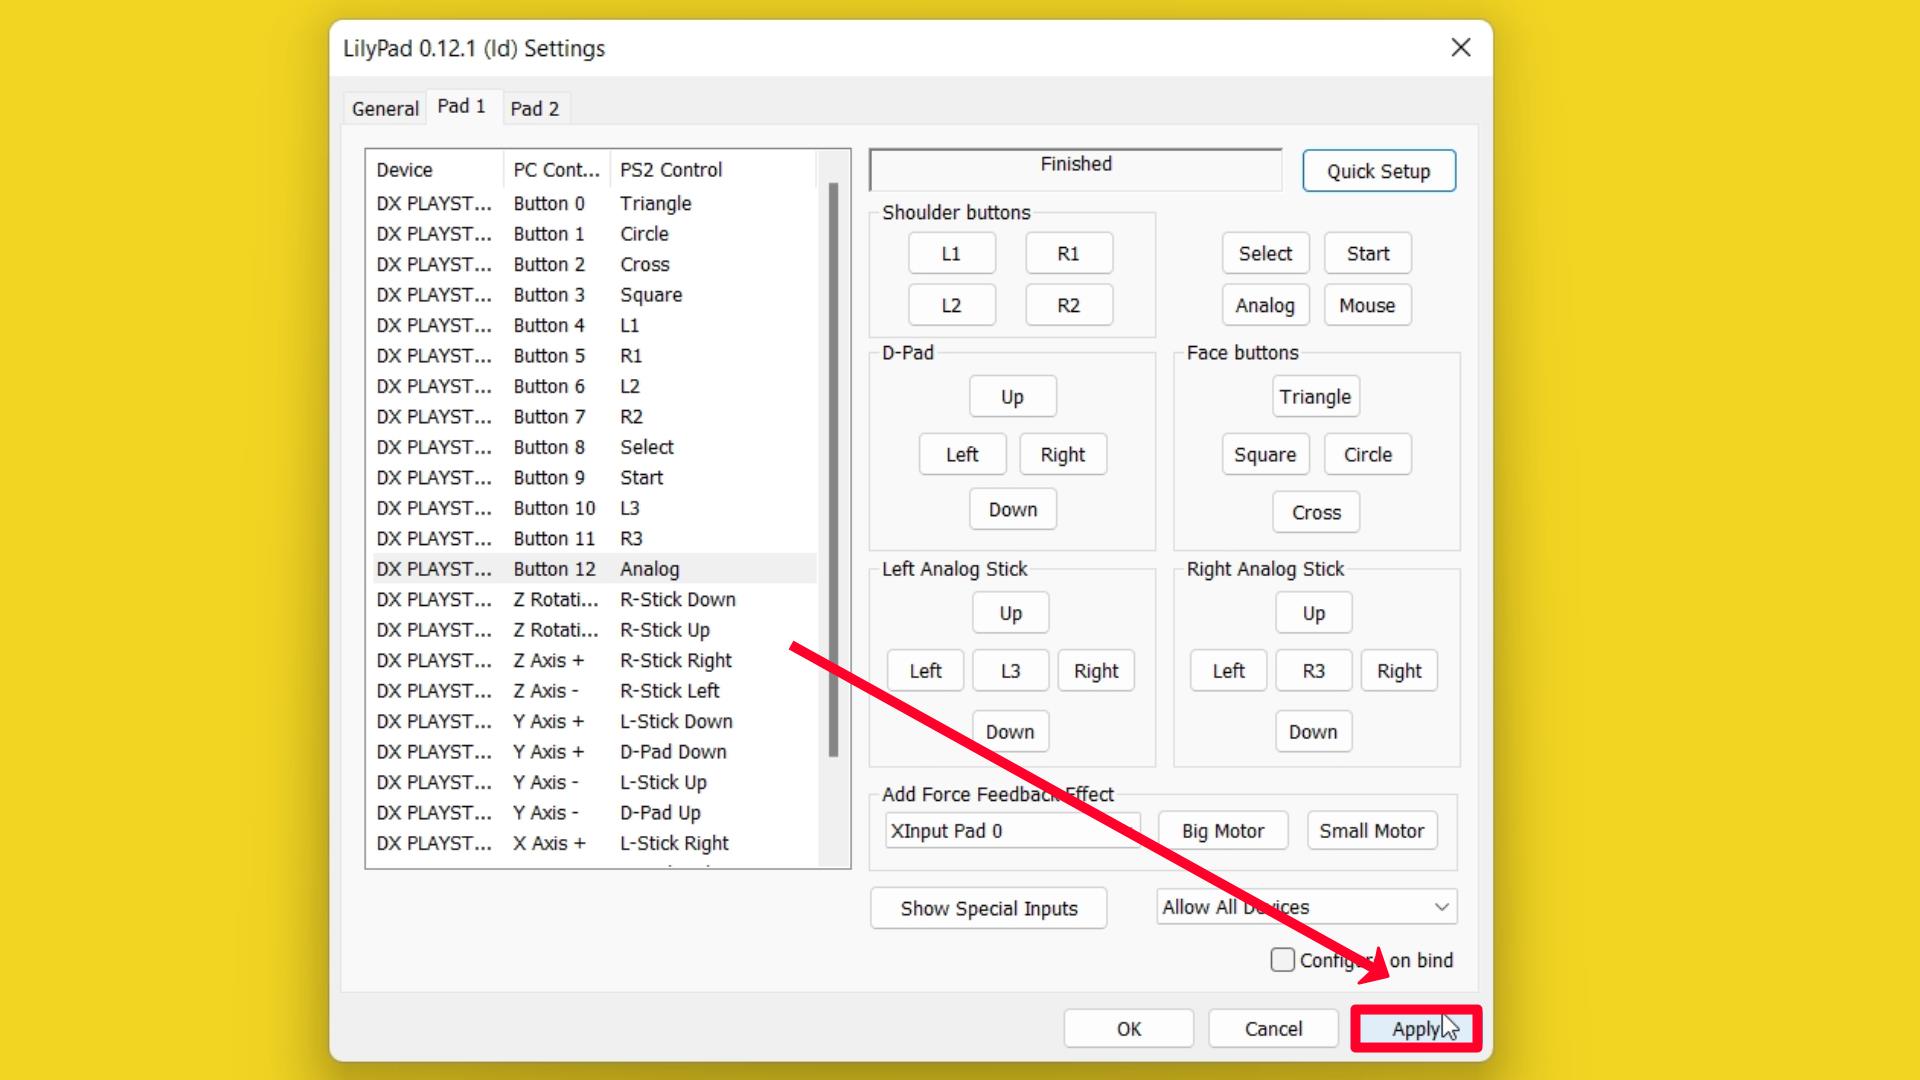
Step 10 – Click on the OK Button.
How To Run PCSX2 ?
Step 1 – Go to CDVD → ISO Selector and Click on the Browse… option.
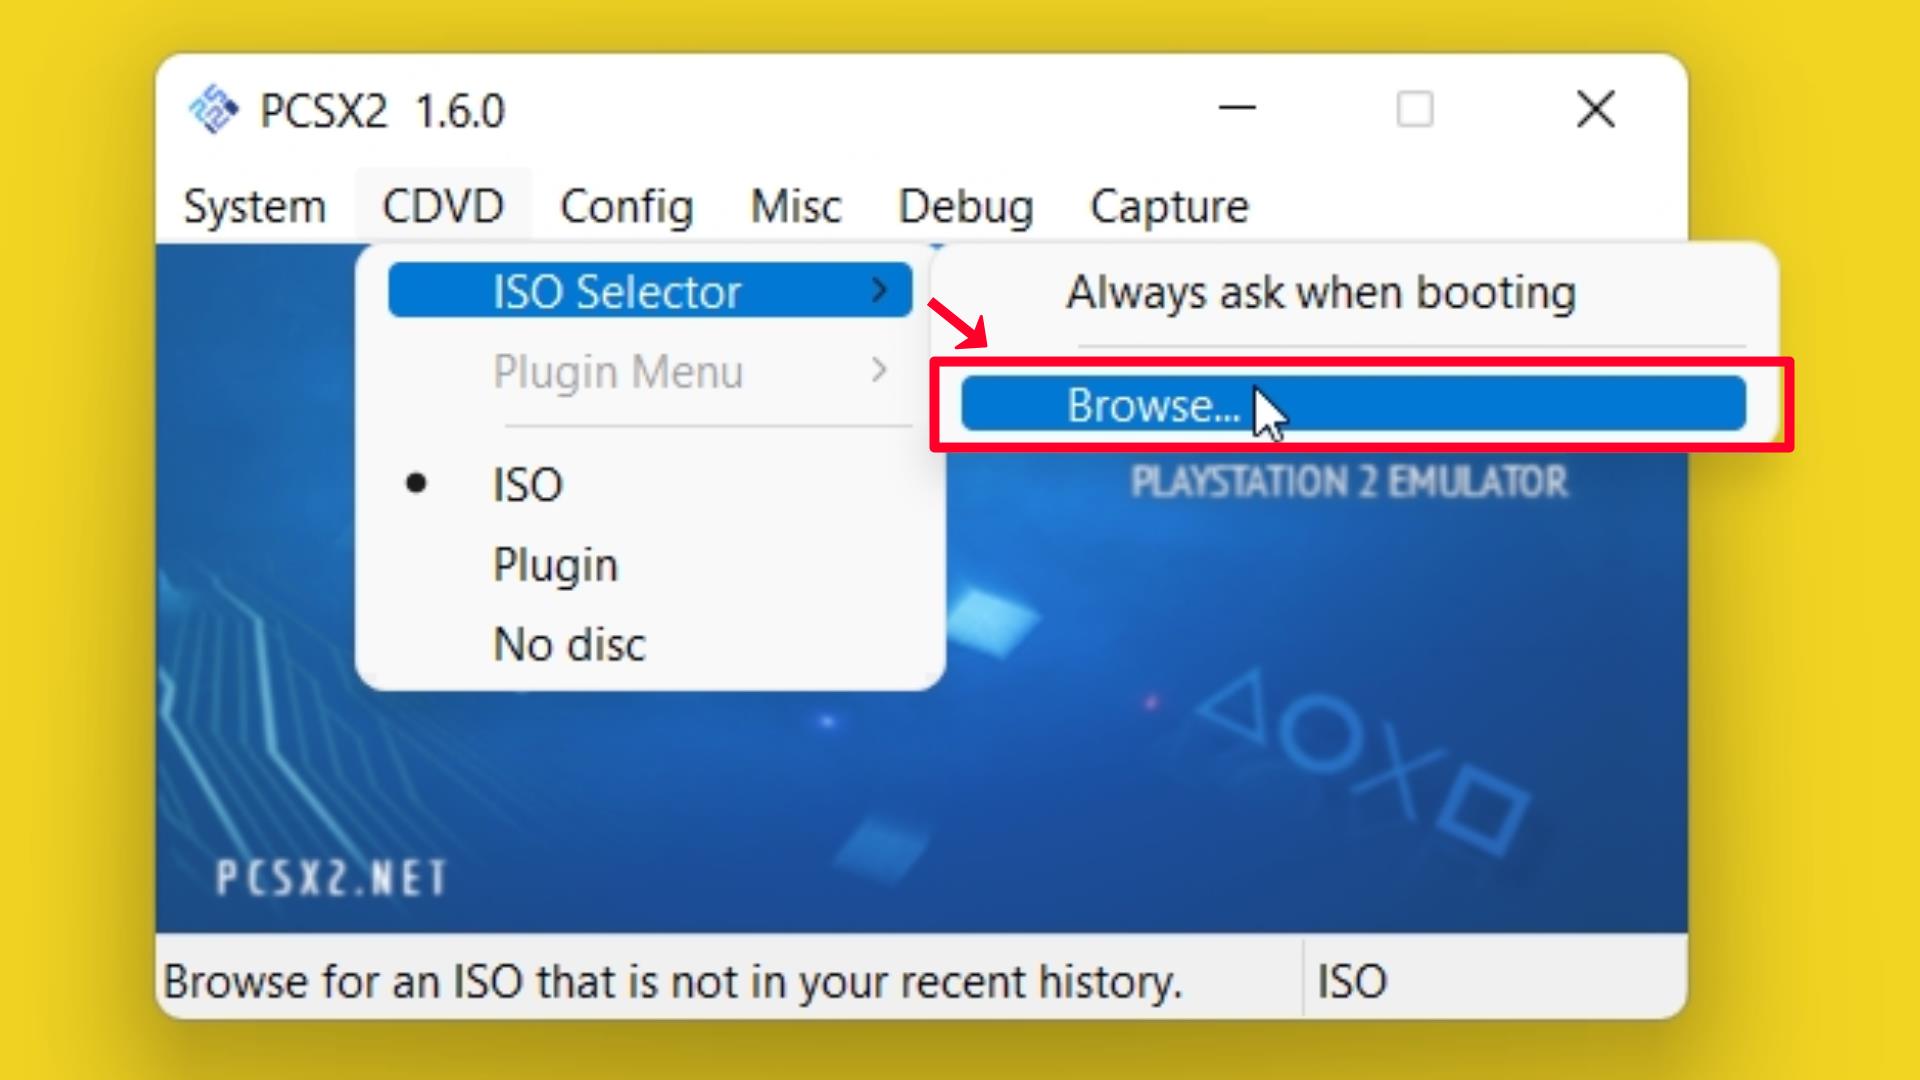
Note: You need to have a PS2 ISO game file on your PC to emulate PS2 ISO on the PCSX2 emulator, If you don’t have a PS2 ISO game file download it from any PS2 ROM downloading website.
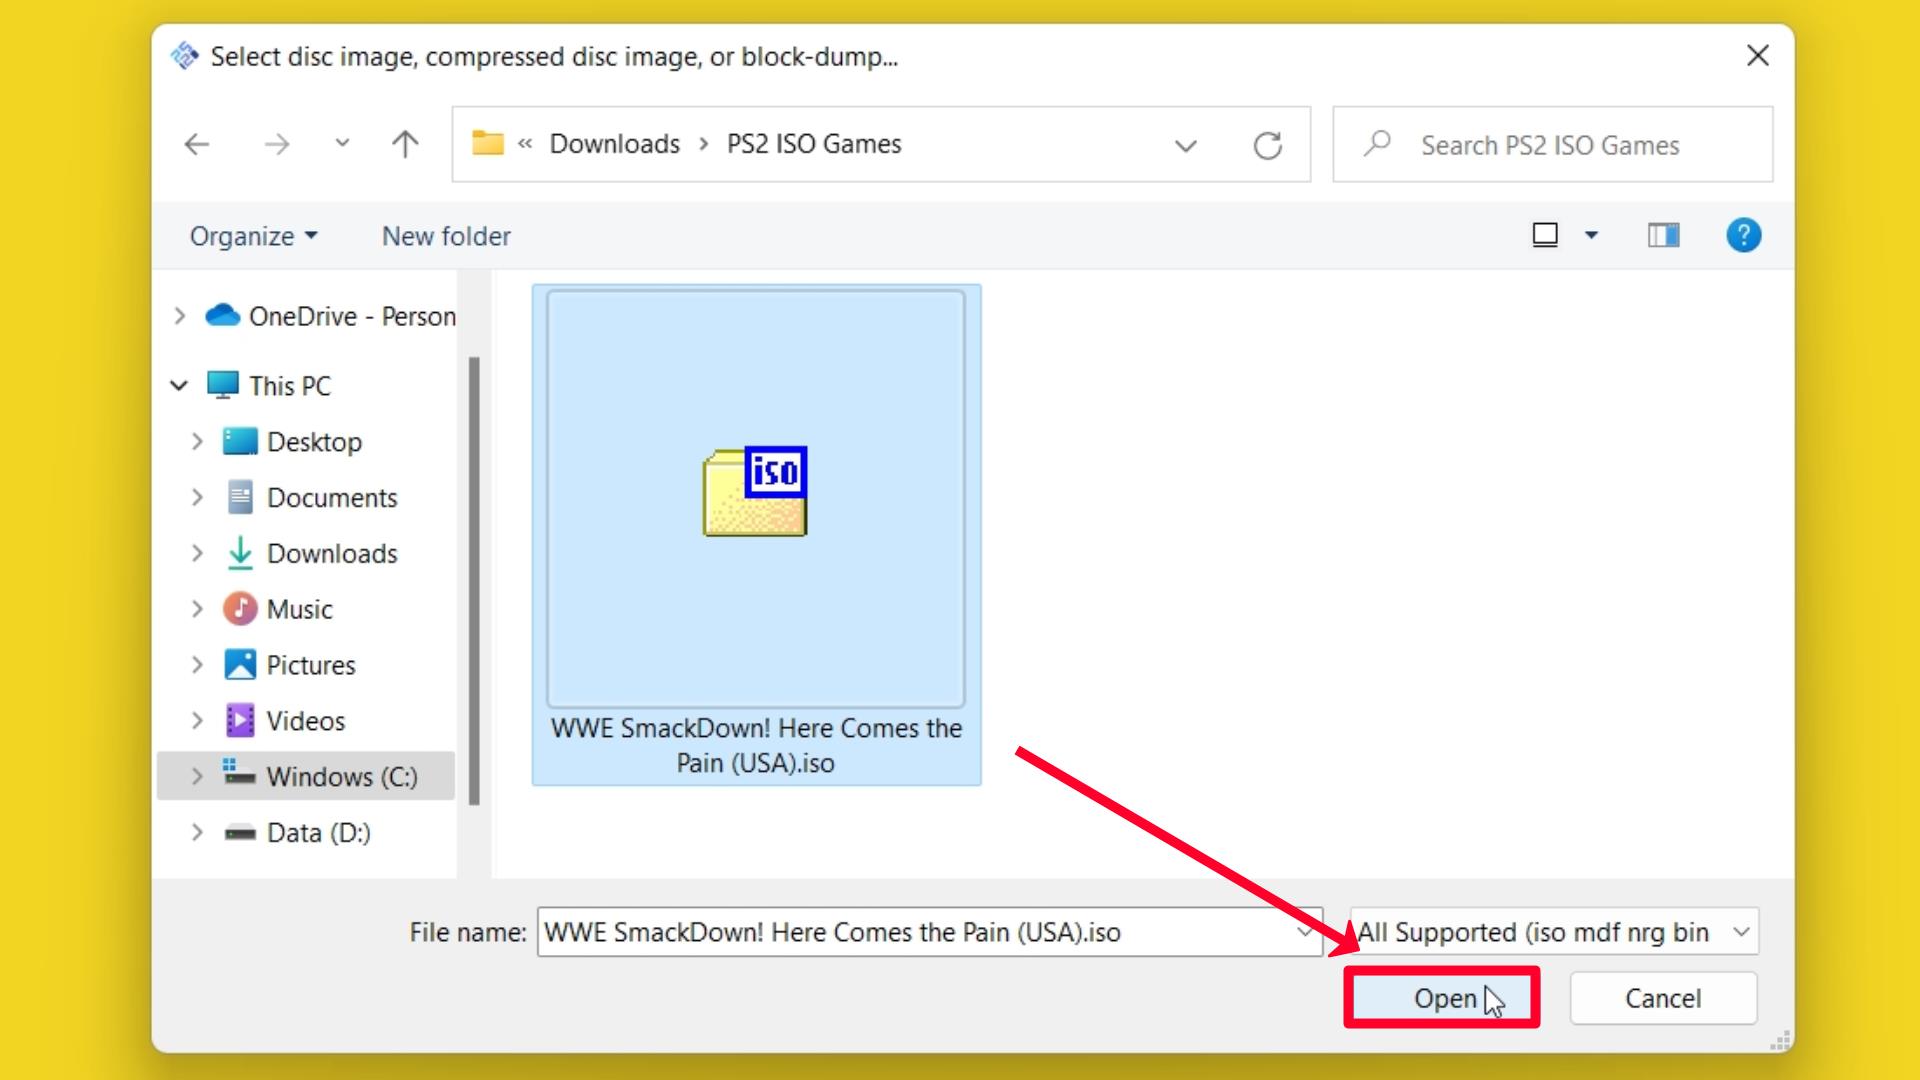
Step 2 – Select your PS2 ISO game and click on the Open button.
Step 3 – PS2 ISO Game is Successfully selected and listed on the PCSX2 emulator.
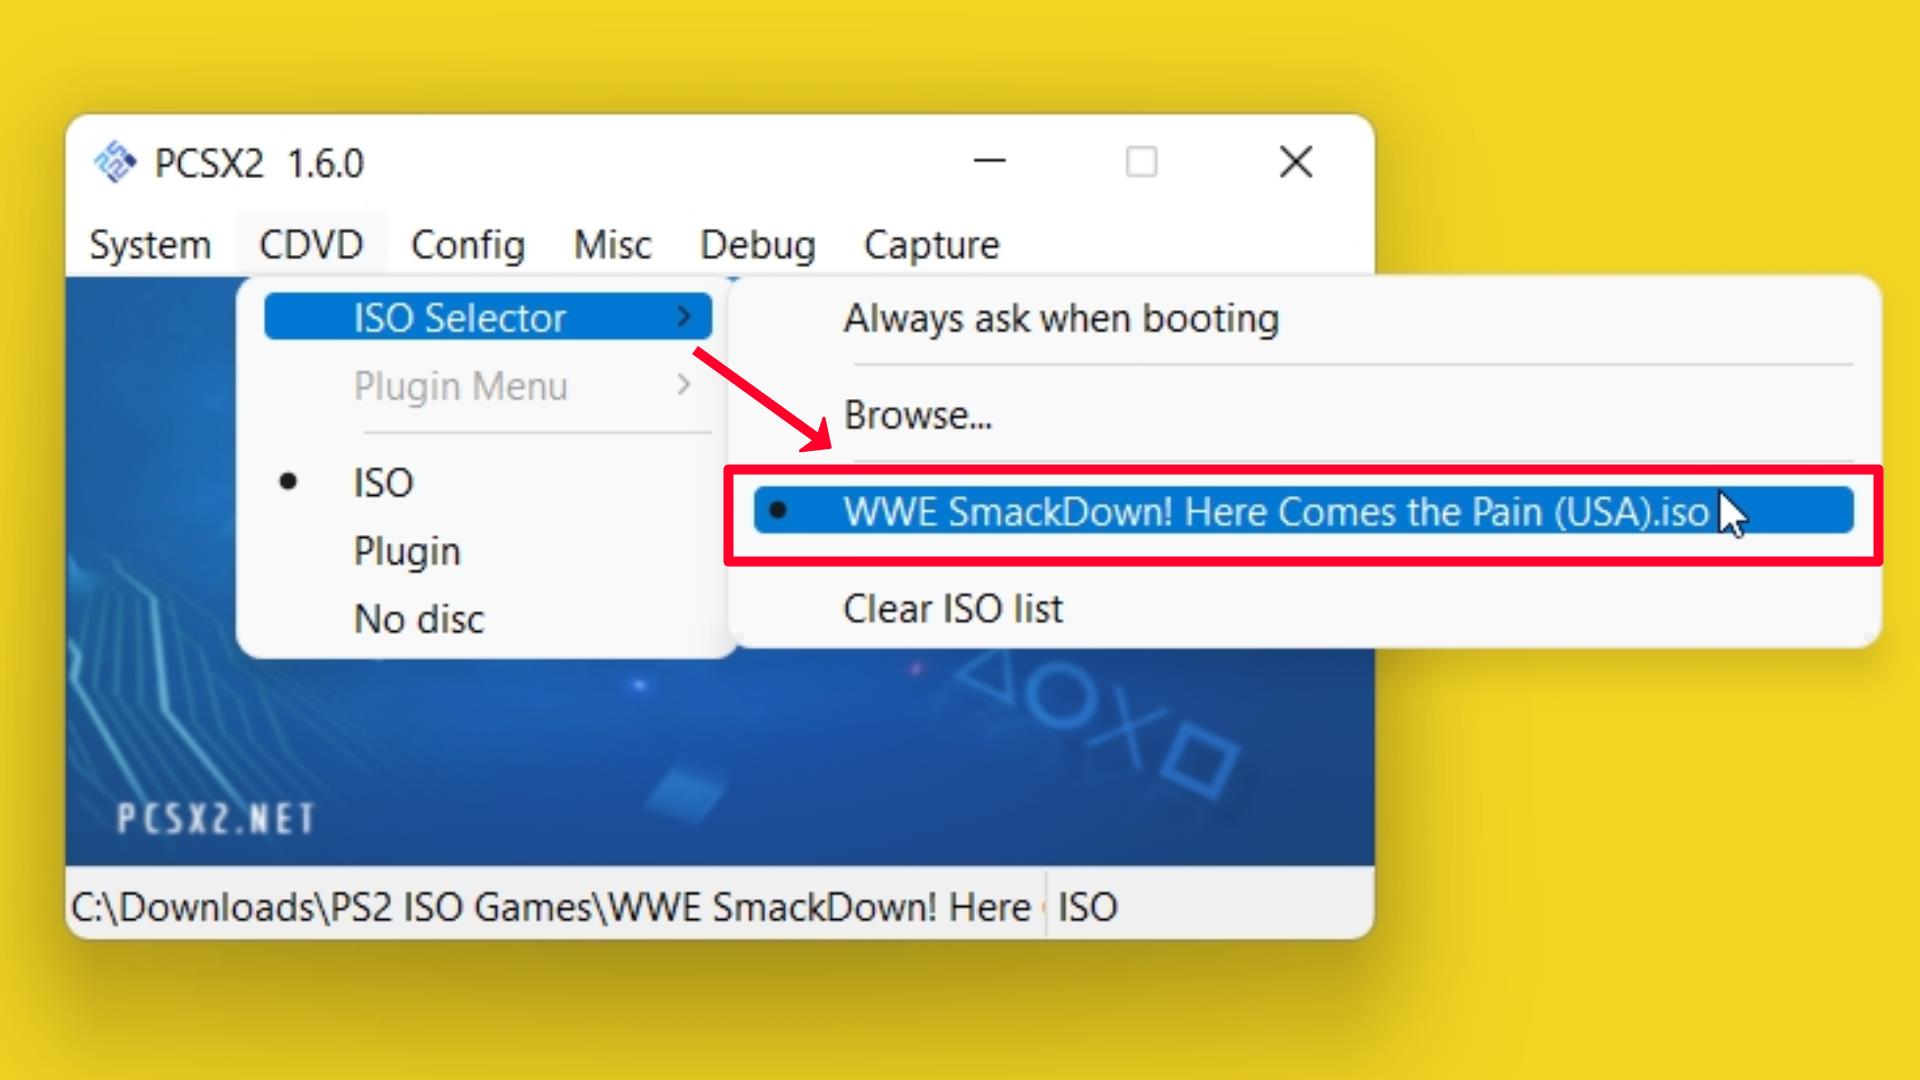
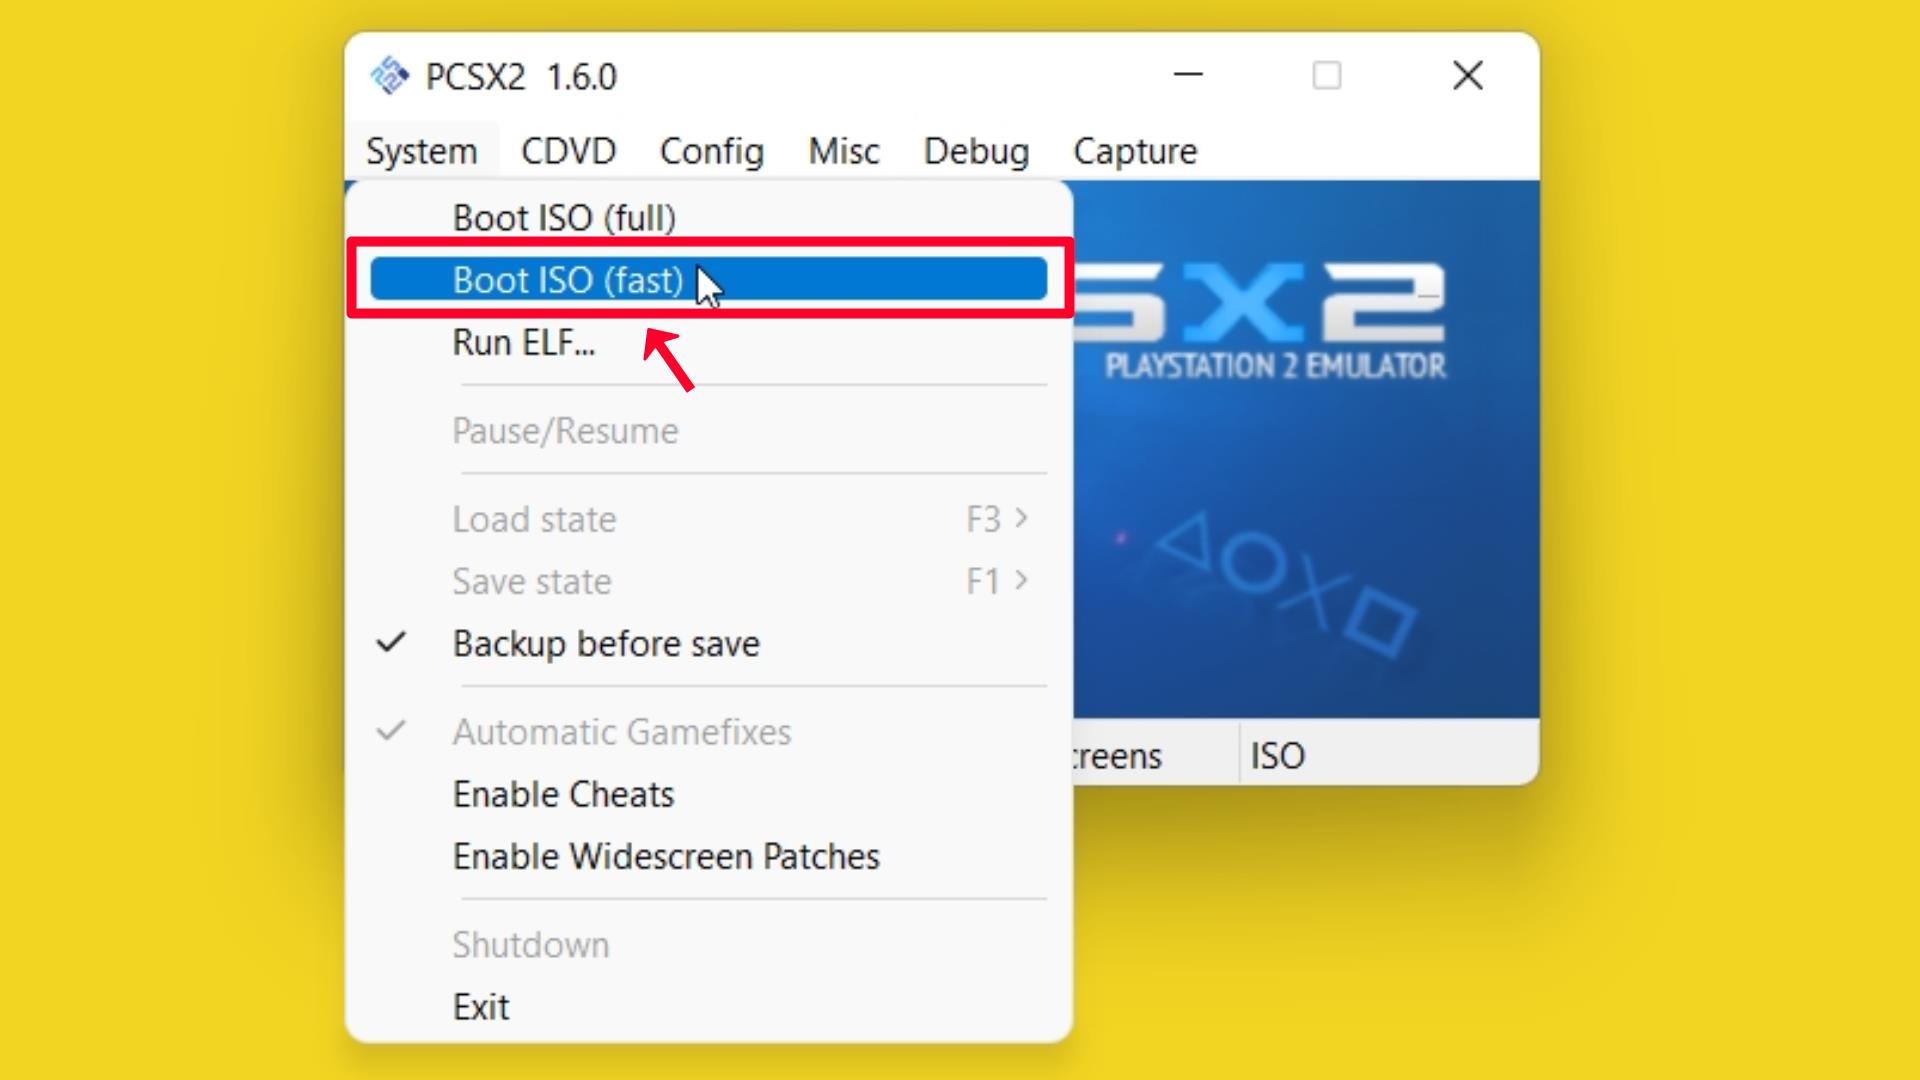
Step 4 – Click on Boot ISO (fast) to start the PS2 game.
Step 5 – Double-click on PCSX2 screen to make PCSX2 fullscreen.
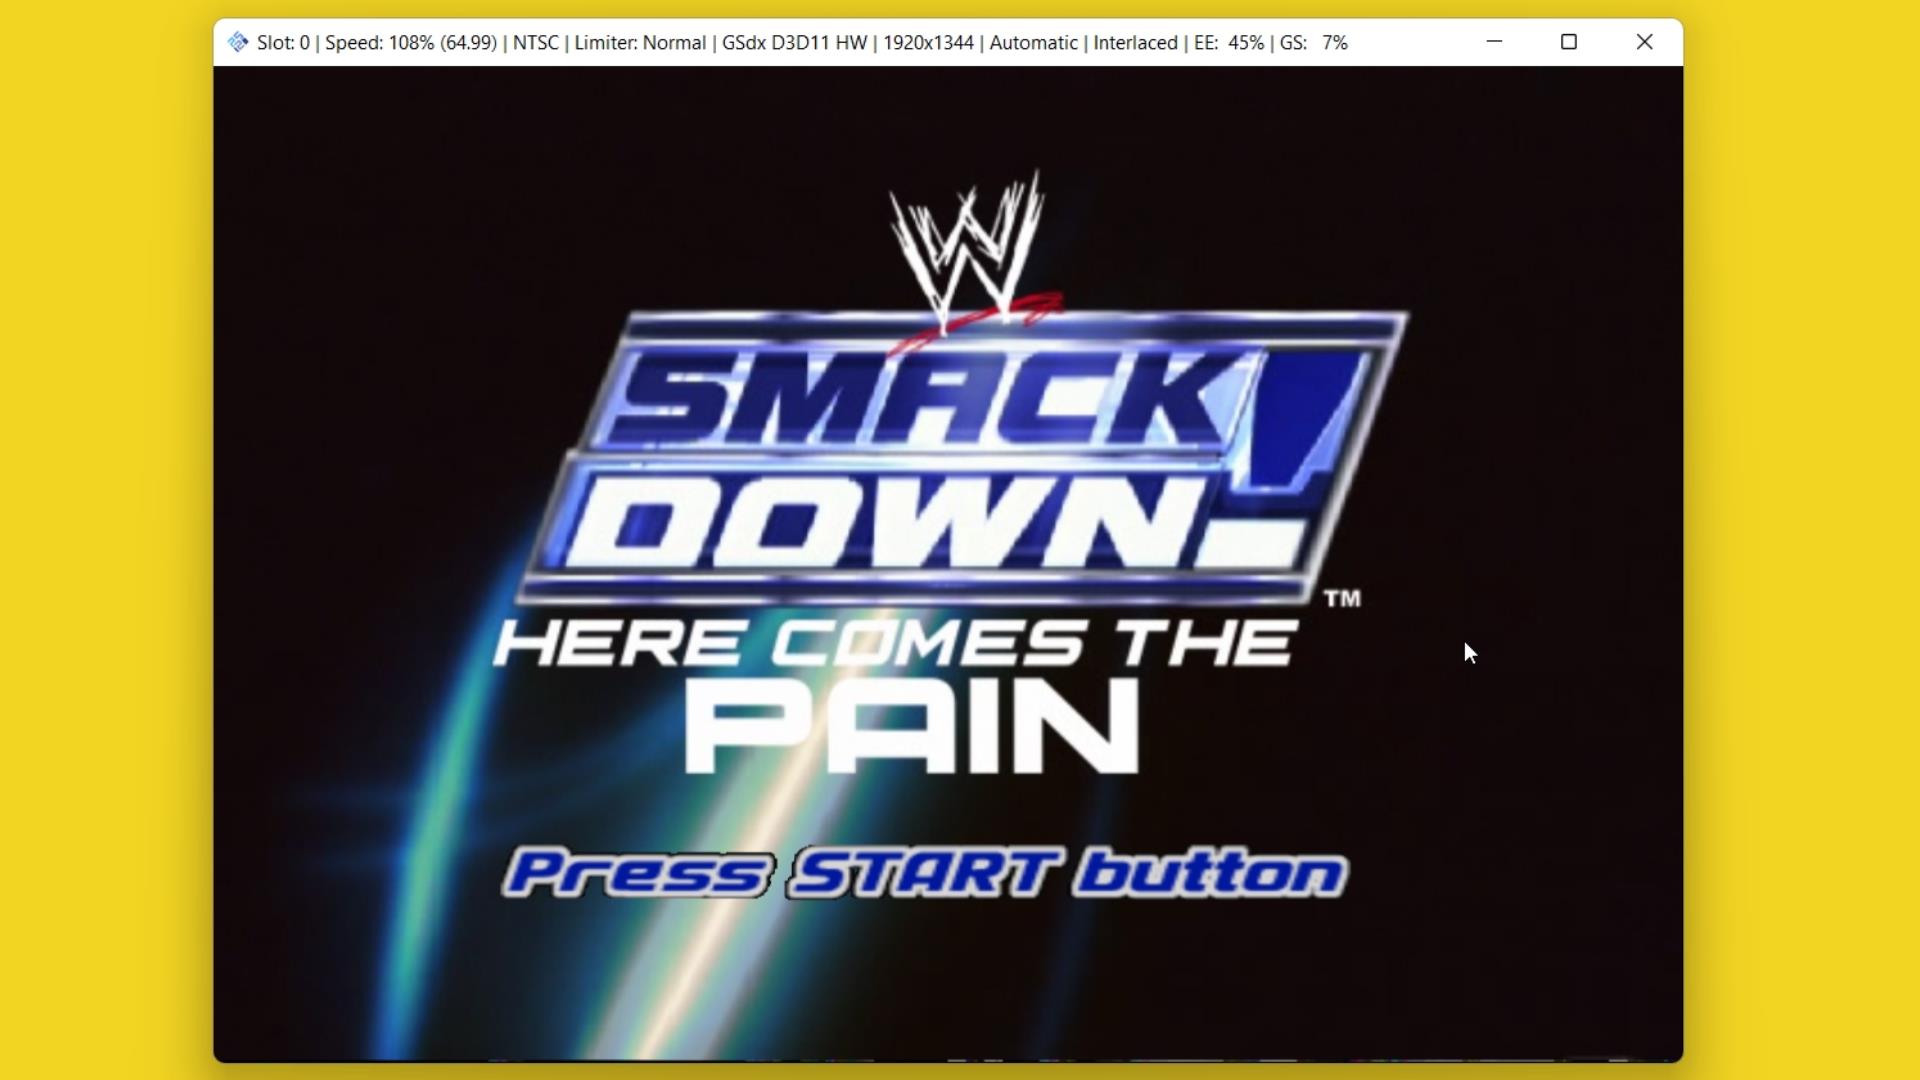
Step 6 – Now you can play any PS2 game on a PC using the PCSX2 emulator, Enjoy.